.png?width=200&height=98&name=Horizontal%20PVFARM%20Logo%20(Small).png)
Note: This is meant to be done after completing the Project Setup process, if you haven't gone through that first please read the article linked below and return here after.
Generating the Layout
Once you're familiar with the Layout Panel, it is time to generate the preliminary layout.
-
You will want to select all boundaries (inclusion and exclusion)
-
have Solar Arrays and Roads toggled on and have Blocking toggled off.
- Under Solar Arrays you will select Model and select your preset solar array object that you have created in the catalog. If you haven't done that yet, see this article.
- You can then select the lengths that you wish to use in your layout.

-
You can select "Maximize Capacity", DC Capacity should not be limited, and you can leave all other settings as default for now.
Run "Update"
-
The Update button is greyed out at first. Once enough information has been entered for the system to run, the button will turn purple.

View the Results
-
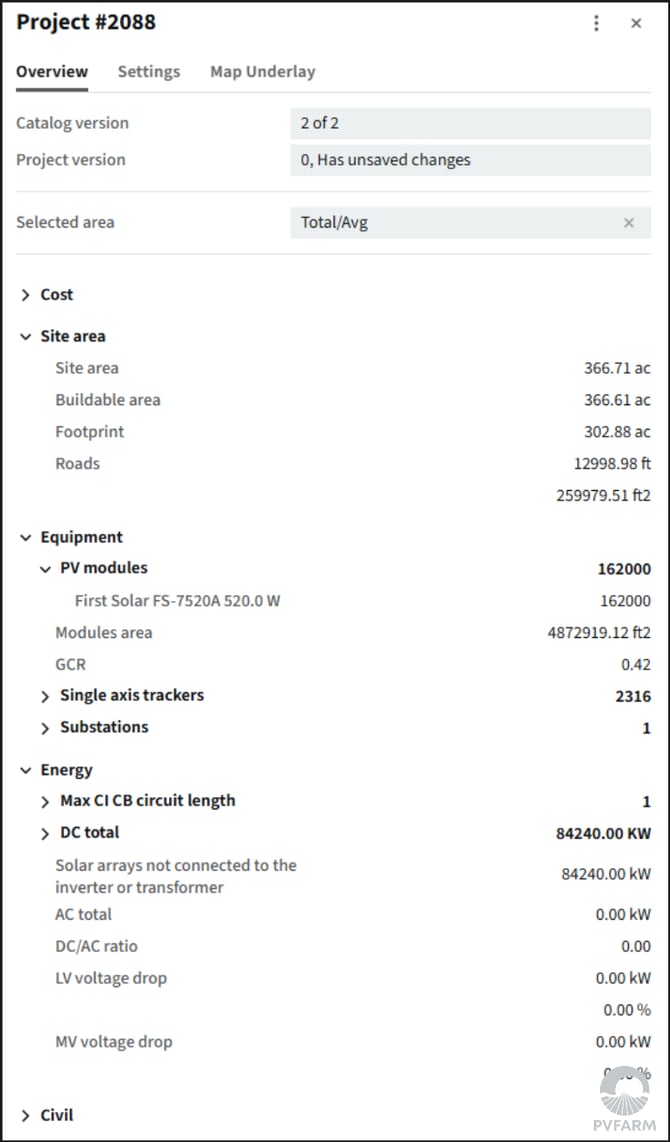
After generating the layout, you will be able to see the DC that was generated immediately at the bottom of the Layout Panel.

-
Since the blocks were toggled off, the system generated is not broken up into segments but simply placed wherever space is available.


-
More detail can be found in the Project Metrics Panel Overview:
Save your project
-
In order to save your layout use Ctrl+S on your keyboard or by pressing the save version icon and creating a new version.
