.png?width=200&height=98&name=Horizontal%20PVFARM%20Logo%20(Small).png)
The Layout Panel is where you generate your arrays, roads, and blocking. To use this panel you simply toggle on or off the assets you want to generate. For example, if you want to generate arrays with blocking but no roads you would leave Solar Arrays and Blocking toggled on but toggle Roads off. Or if you wanted to repower an existing site you would toggle Arrays and Roads off but Blocking would be toggled on. To expand out the different sections simply click the![]() icon.
icon.
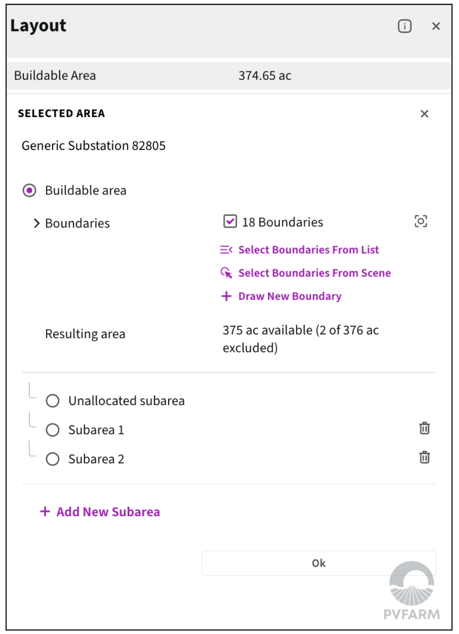
Buildable Area
-
Substation- You will determine which substation you are using, this allows you to have multiple substations in one site.
-
Buildable Area- where you define what to include and exclude.
-
Select boundaries- This will give you the option to select boundaries from list, select from scene, or draw a new boundary.
-
- Add New Subarea- This is where you can create subareas, to learn more about subareas see this article.
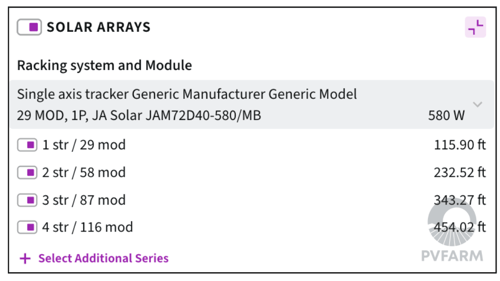
Solar Arrays
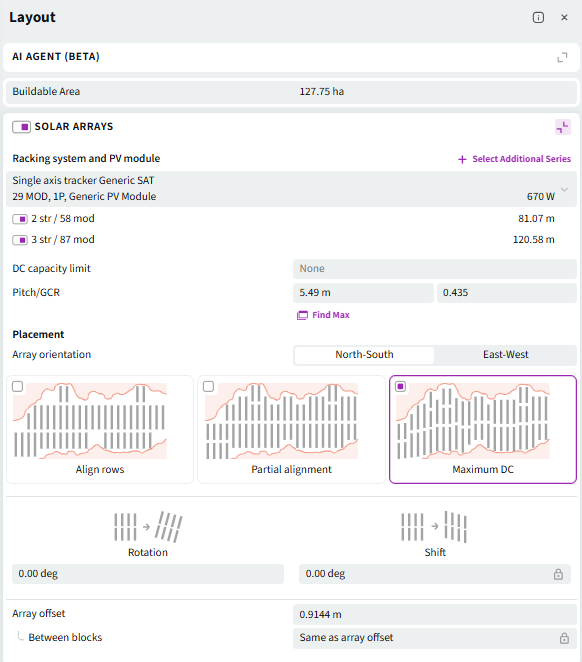
- Model- This is where you determine what model of solar array you want to use when generating a layout.
- You can select multiple lengths of racking by selecting the preset that you have created in the catalog, then you will see all length options available. You will toggle on the lengths that you want to use.
- You can select multiple lengths of racking by selecting the preset that you have created in the catalog, then you will see all length options available. You will toggle on the lengths that you want to use.
- DC Capacity Limit- Where you will determine the system size in kilowatts.
-
None- Will maximize the total DC system power within the buildable areas minus the exclusion zones, using the constraints provided. We will use MAX, this will be used to start the project.
-
Limit Set- set target and after generating percentage of target met will be shown. Will be used in later stages.
-
- Pitch/ GCR- The offset between rows, measured from pile to pile.
- Arrays Direction- This refers to the orientation of the arrays. You can choose between North-South or East-West.
- Alignment- You can define whether you want your arrays aligned or if you would prefer to leave them unaligned in order to maximize capacity.
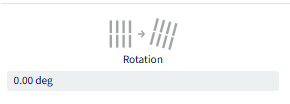
- Rotation- This is where you can define the angle of rotation or azimuth of your arrays.
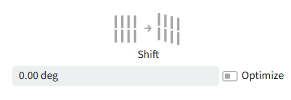
- Shift- This is where you can define the angle of rotation while the arrays remain oriented in the direction you have dictated, while stair stepping to follow the roads.
- Array Offset- This refers to the offset between your solar array objects
- Between Blocks- This refers to the offset between solar array objects when one block ends and another begins, if you toggle on Optimize that input will become a minimum rather than a fixed distance.
- To learn more about the offsets select the “i” icon in the top right corner of the Layout panel to see a full diagram.
Roads
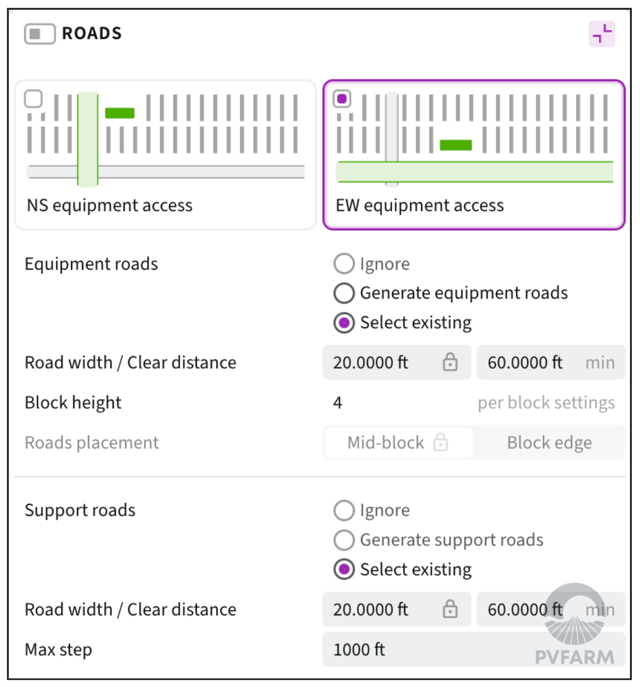
- Equipment Access- This is where you can toggle between your equipment being placed on North/South roads or East/West roads. Some of the options below will only be available depending on which configuration you choose.
- Equipment Roads- You can choose to either generate new or select existing, when you opt to select existing the menu to select your roads will appear at the bottom of your roads section.
- Row Height- This is for reference, to set your row height go to the Blocking section
- Road Placement- This is only available when choosing N/S roads, you have the option to place the roads mid-block or on the block edge
- Support Roads- This is where you can choose to either generate new, select existing, or ignore (not generate) support roads. A support road is a road running parallel to your equipment road.
- Across the Site means support roads will generate evenly across the site.
- Only Linked means that support roads will only generate to link up equipment roads.
Blocking
Block Configuration
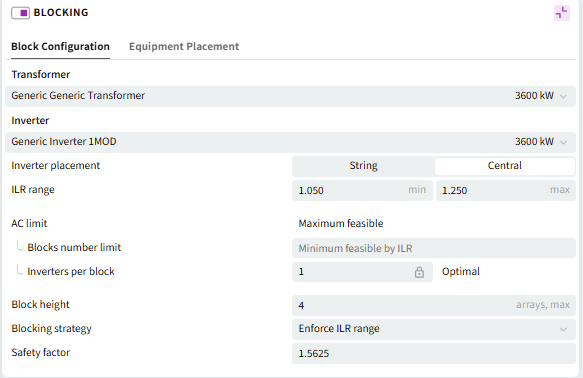
- Inverter Type- This is where you can toggle whether you are using String or Central inverters.
- Safety Factor- This is a multiplier used to ensure electrical components and conductors are not overloaded. The formula is:
Max_Trackers = floor [ (I_combiner / SF) / (I_string * N_strings) ]
• I_combiner: The nominal current rating of the DC Combiner Box (in Amperes).
• SF: The Safety Factor or multiplier (e.g.,1.25or1.56).
• I_string: The Short-circuit current (Isc) or maximum power current (Imp) of a single PV string.
• N_strings: The number of strings per tracker.
• floor[]: This function rounds the result down to the nearest whole integer, as you cannot have a partial tracker on a circuit. - Inverter- This is where you can set which Inverter you want to use.
- ILR Range- ILR (inverter loading ratio)is the allowable DC to AC power ratio allowed across inverters on the site.
- This is closely related to but not the same as site-wide DC/AC ratio.
- You can customize this range as necessary for your equipment/project.
- Transformer- This is where you can set which Transformer you want to use.
- Blocks Number- If you know the specific number of inverters required for your energy target, can you input a specific number here.
- Blocking Strategy- You can choose to tell the software to prioritize precise ILR or rectangular shaped blocks.
- Block Height- This determines how many solar array items the system will place in each block.
Equipment Placement

- Roadside or Nested Skid- this is where you can toggle whether you want your equipment placed on the roadside or nested amongst your solar arrays.
- Note that certain options will turn on or off depending on which configuration you choose
- Skid Notch Size- If you have selected Nested you can determine how many array roads and strings are removed to make room for the skid.
- Skid Placement Relative to Road- You have the option to determine the skid as being North, South, Parallel, or Perpendicular.
- Setbacks for Arrays- Where you can view the setback of the inverter (relative to the road) and change the setback for the combiner boxes (relative to the end of the array).
- To view how PVFARM defines certain measurements, click on the
 icon.
icon.
- To view how PVFARM defines certain measurements, click on the
Resulting Capacity
- After generating this will give you the resulting DC, AC, and block numbers.