.png?width=200&height=98&name=Horizontal%20PVFARM%20Logo%20(Small).png)
Plugin Process
Civil3D can be temperamental, and sometimes your information will not show up as you expect in PVFARM. Here are some tips to make this process smoother. While there is a small chance that the issue is with PVFARM, 99% of the issues we see are due to incorrectly formatted information coming from Civil3D.
We wish we could fix Civil3D and make this easier for everyone, but alas, we are all stuck using software created in 2003. The good news is that there is 15+ years of content on YouTube of people troubleshooting Civil3D problems which can be another great resource.
If you're still stuck after troubleshooting, please contact our support team, and we'll be happy to help you chase down the issue.
The Desired End Result
Our goal is a healthy import. This is what a healthy import looks like:

In Civil3D
-
Make sure the DWG file contains a surface

-
Toolspace → Prospector Tab → Surface
Confirm that the surface has contours and boundaries

-
-
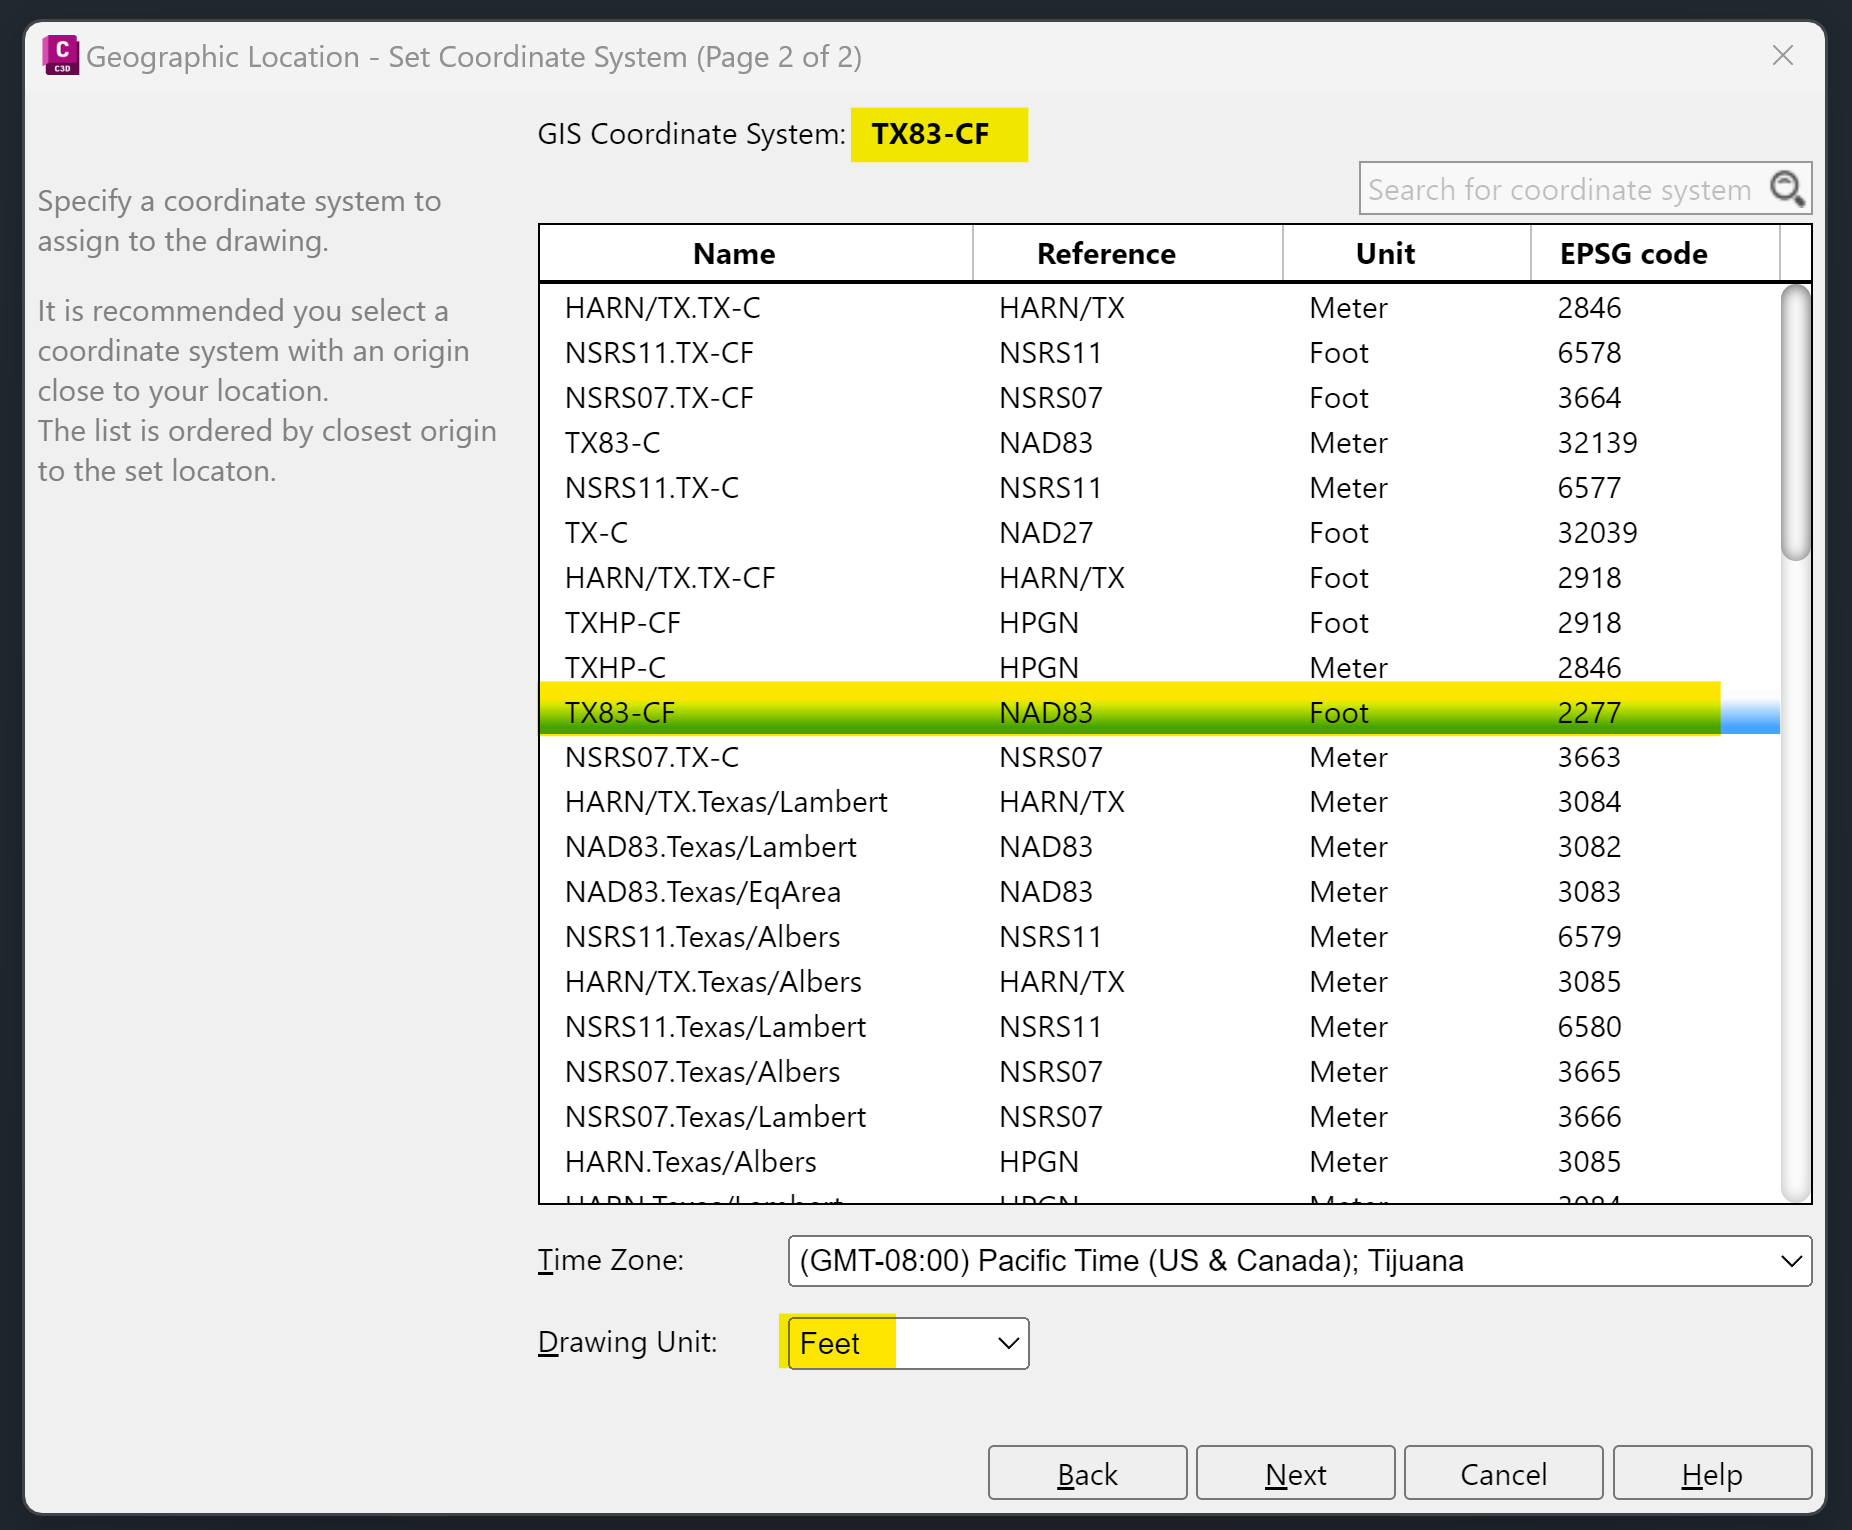
Check the units
-
for drawing C3D → Drawing Utilities → Units


-
for geolocation Toolspace → Settings → File name right-click → Edit Drawing Settings


-
-
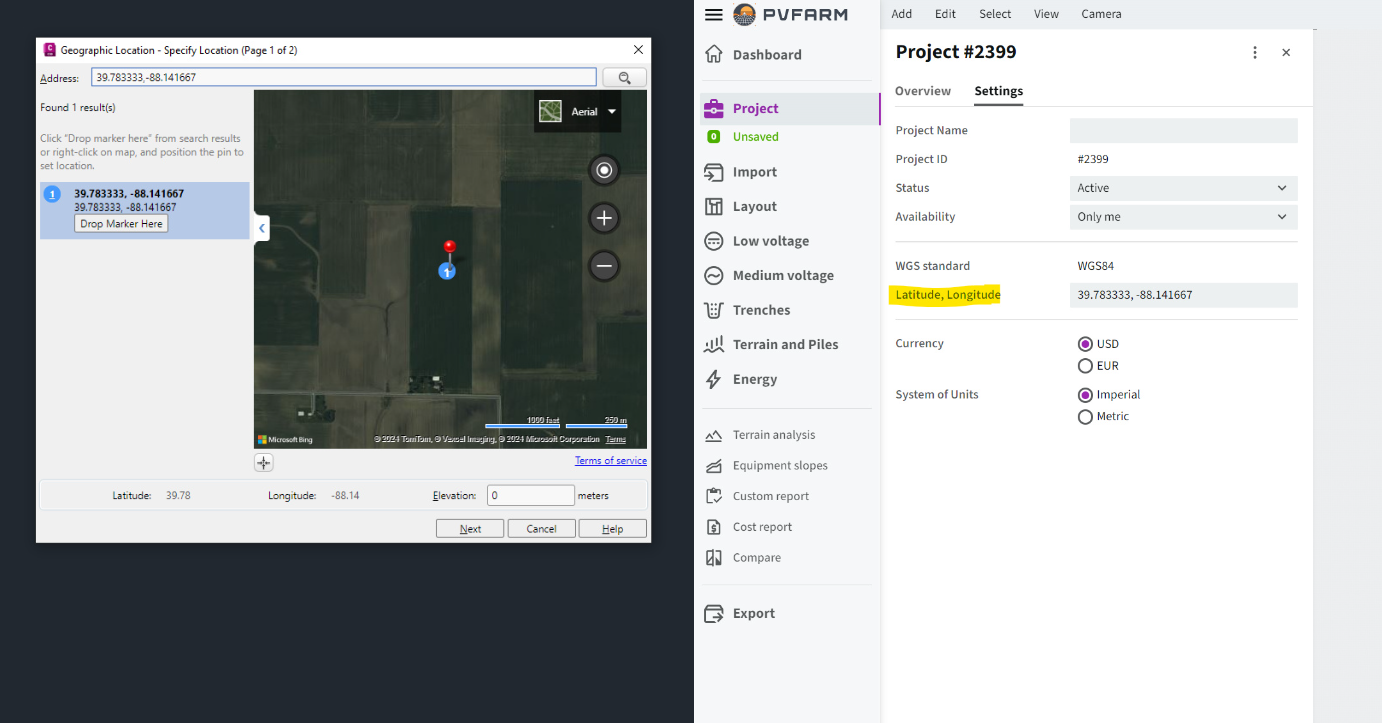
Check the geolocation
-
Drawing Settings Toolspace → Settings → File name right-click → Edit Drawing Settings

-
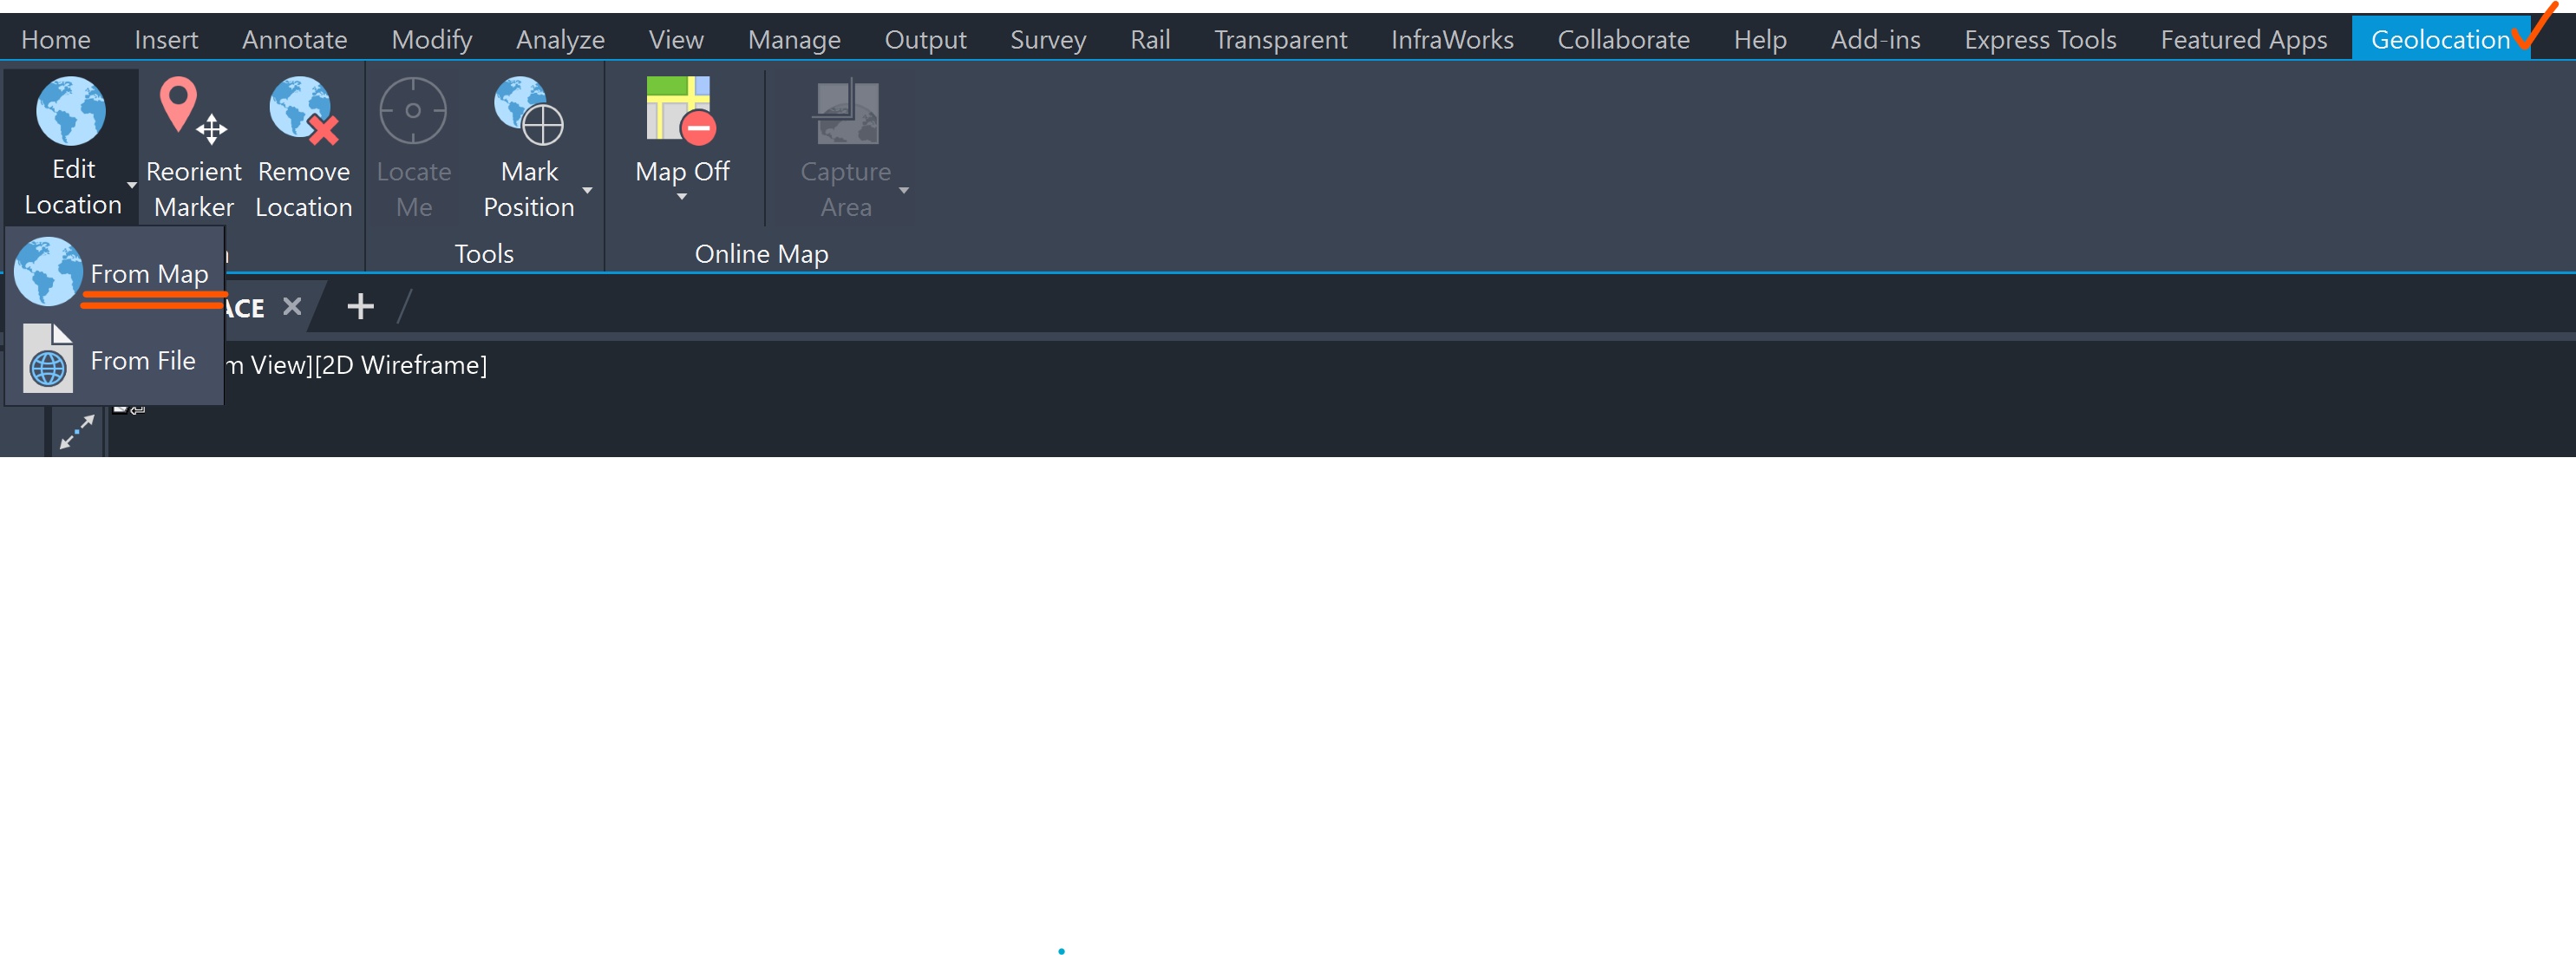
Geographic Location Geolocation Tab → Edit Location → From Map

-
-
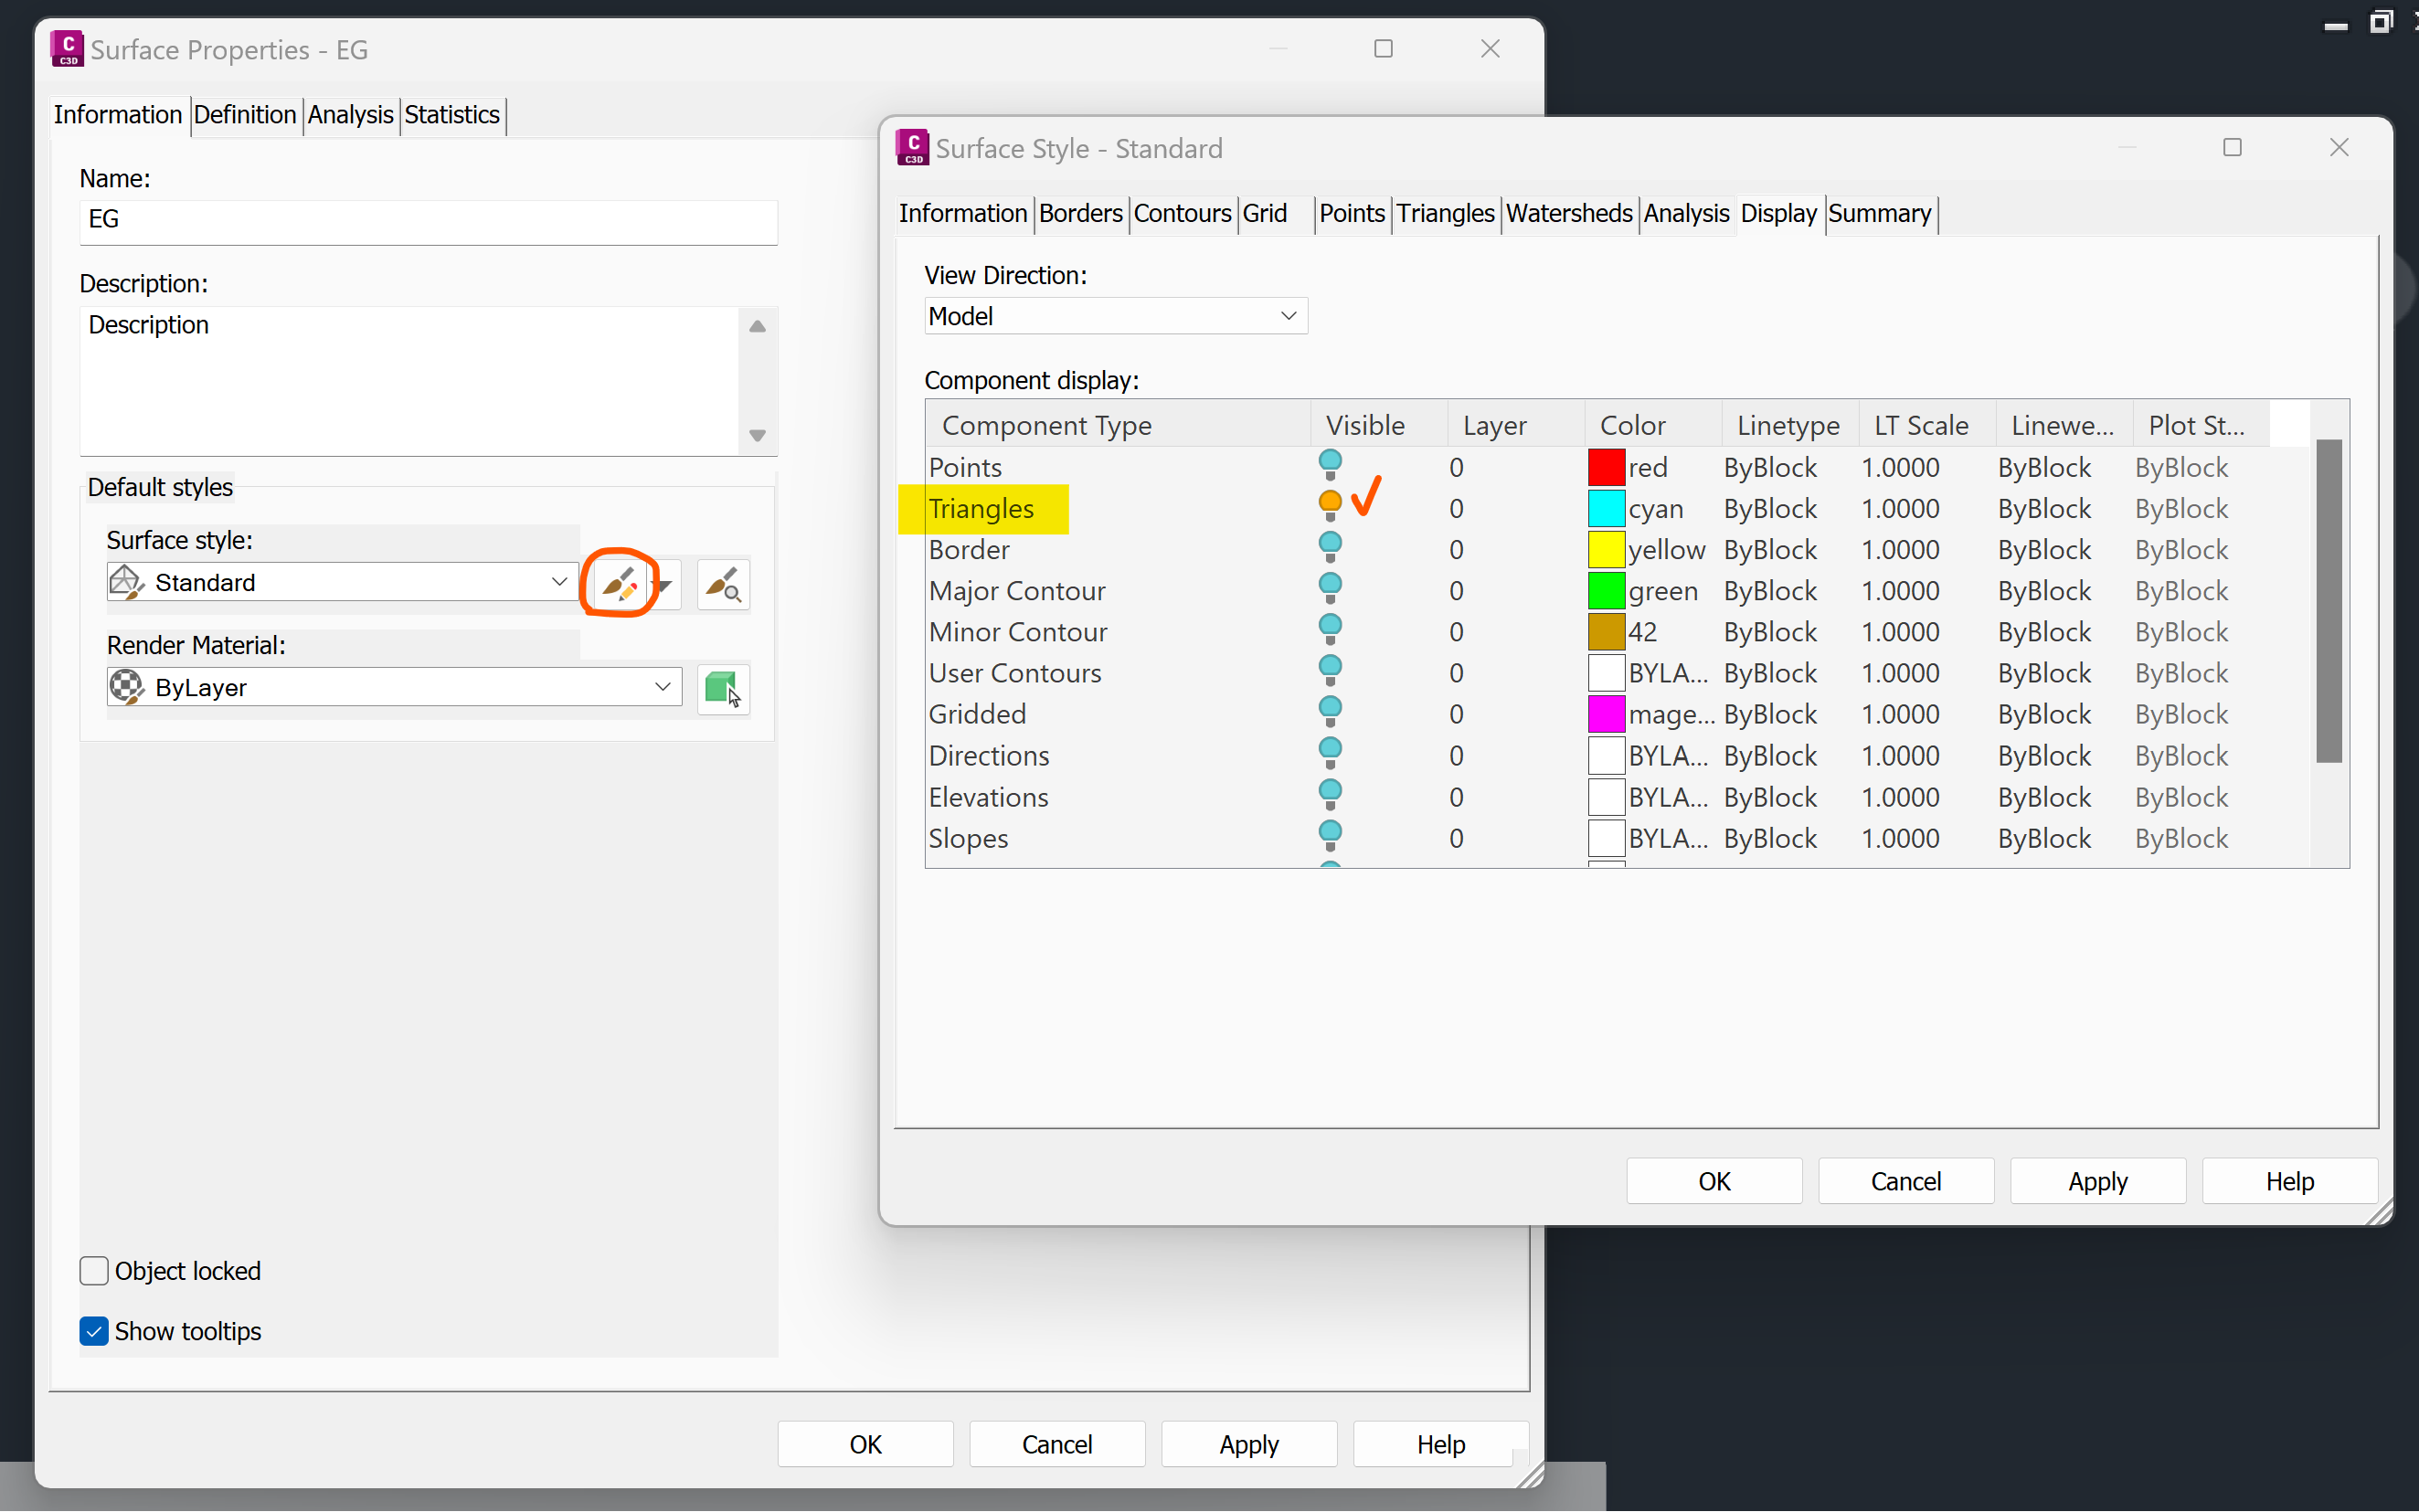
Visualize triangles
-
Toolspace → Prospector Tab → Surface name right-click menu → Surface Properties

Information Tab → Display Tab → Model → Triangles (turn on) → OK
-
-
3D view
-
Make sure the surface doesn’t have artifacts

-
artifacts examples:
-
inaccurate surface borders

-
extra points at the very bottom of the surface

-
-
-
Check the surface parameters
-
Min / Max elevations
-
Toolspace → Prospector Tab → Surface name right-click menu → Surface Properties
Analysis Tab → ‘Run Analysis’ button

-
-
Area Toolspace → Prospector Tab → Surface name right-click menu → Surface Properties
Statistics Tab →Expand ‘General’ and ‘Extended’

-
-
Run GETSURFACES
In PVFARM
-
Create a new project
-
Import surface

-
View → Terrain Analysis

-
Terrain Analysis → Elevations → Auto-Fill Ranges
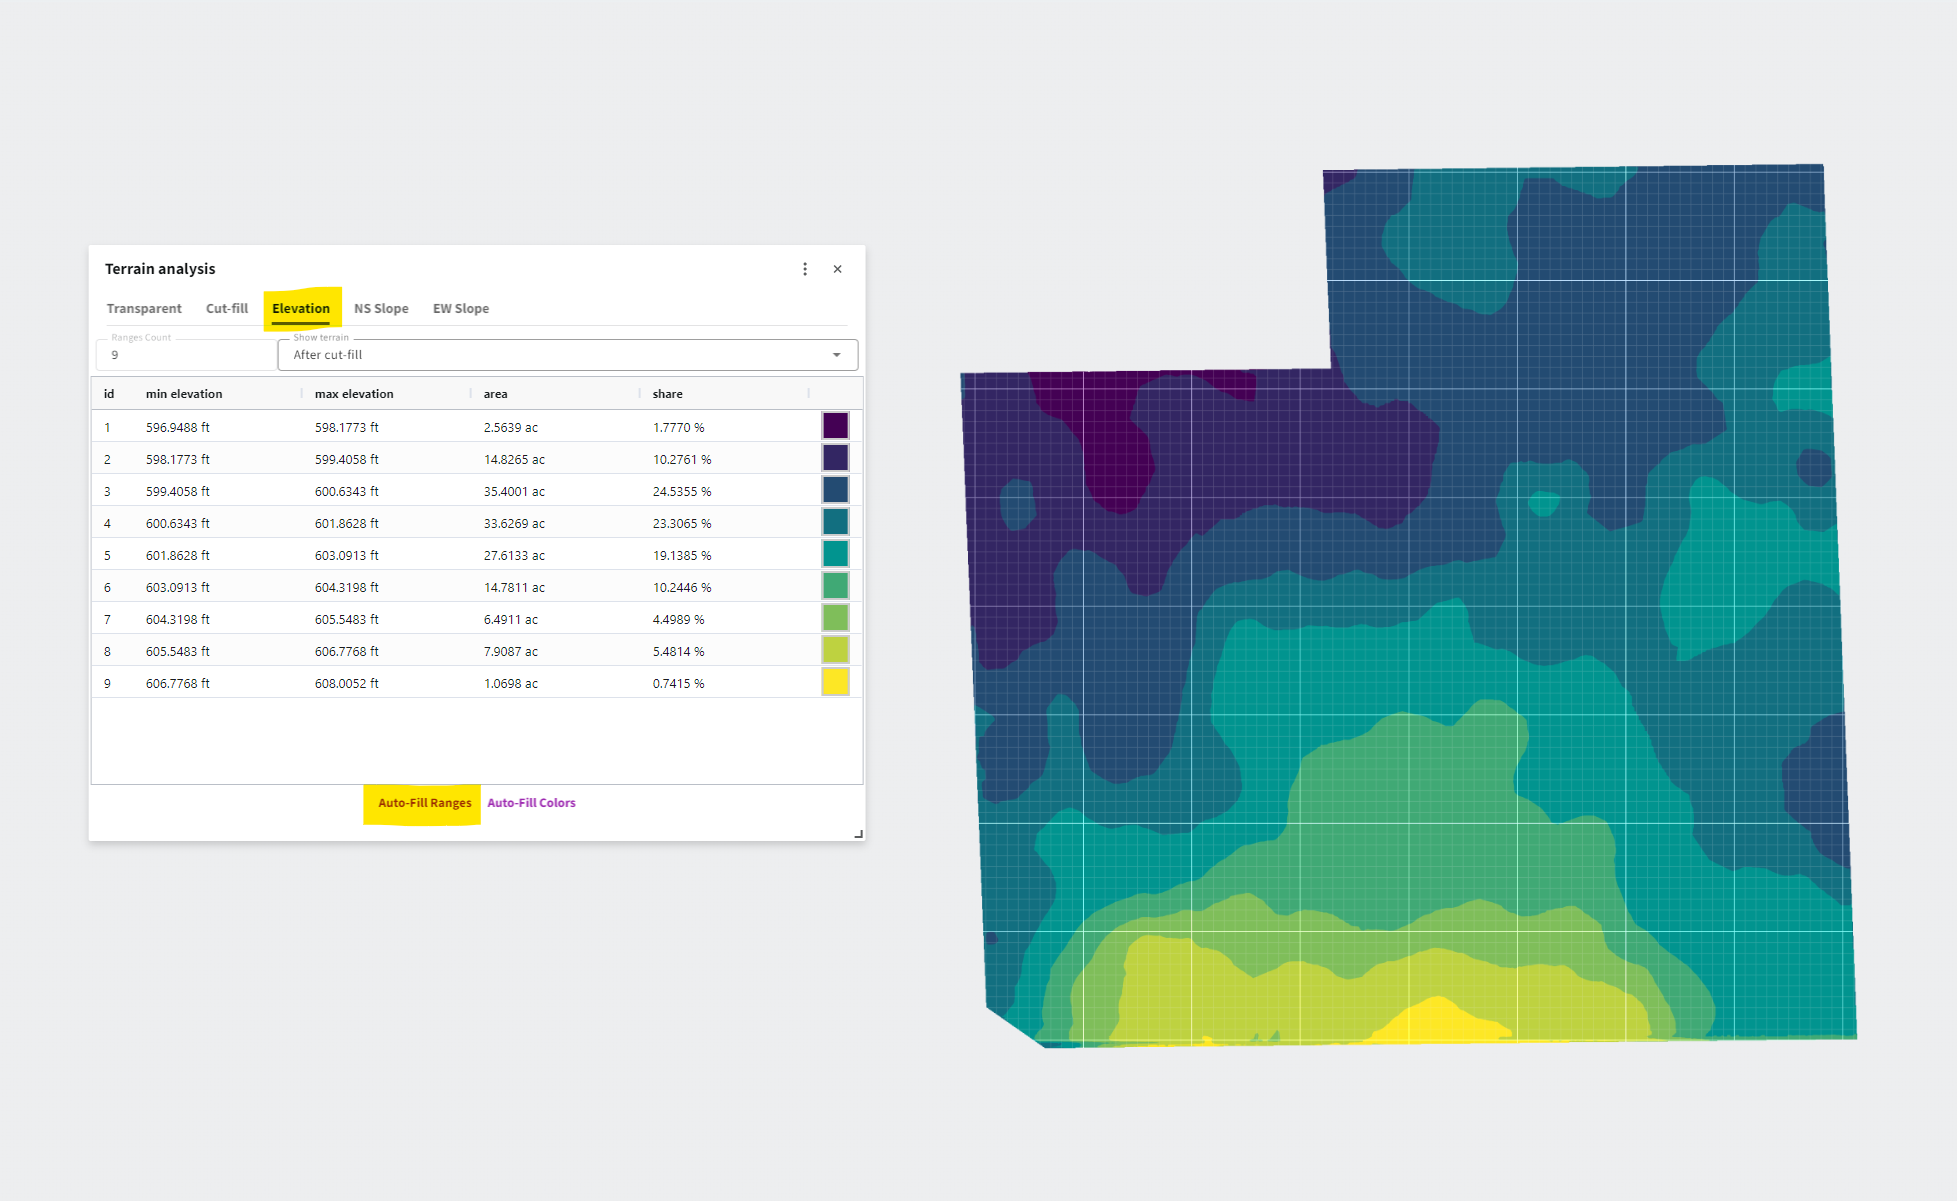
-
Select Surface on the scene in Model Explorer → Object Details
Confirm that the total area and the min and max elevations are accurate.

-
Project → Settings → Check the latitude and longitude
