.png?width=200&height=98&name=Horizontal%20PVFARM%20Logo%20(Small).png)
Work Flow Overview
The basic steps for importing your layout
Note: Please see the example file at the bottom of this article called "Convention_Drawing.dxf" to use for practice.
-
Trackers/Fixed-Tilt - Align CAD Block references to PVFARM conventions (or create new ones)
-
Skid- Align CAD Block references to PVFARM conventions (or create new ones)
-
Blocks - Group Trackers and a skid into electrical blocks
-
Align Layer Naming Conventions for PVFARM Conventions:
-
Roads
-
Boundaries
-
-
Substation - Align CAD Block references to PVFARM conventions (or create new ones). This step is entirely optional. If skipped, the system will automatically install the substation in its default location based on the layout parameters.
-
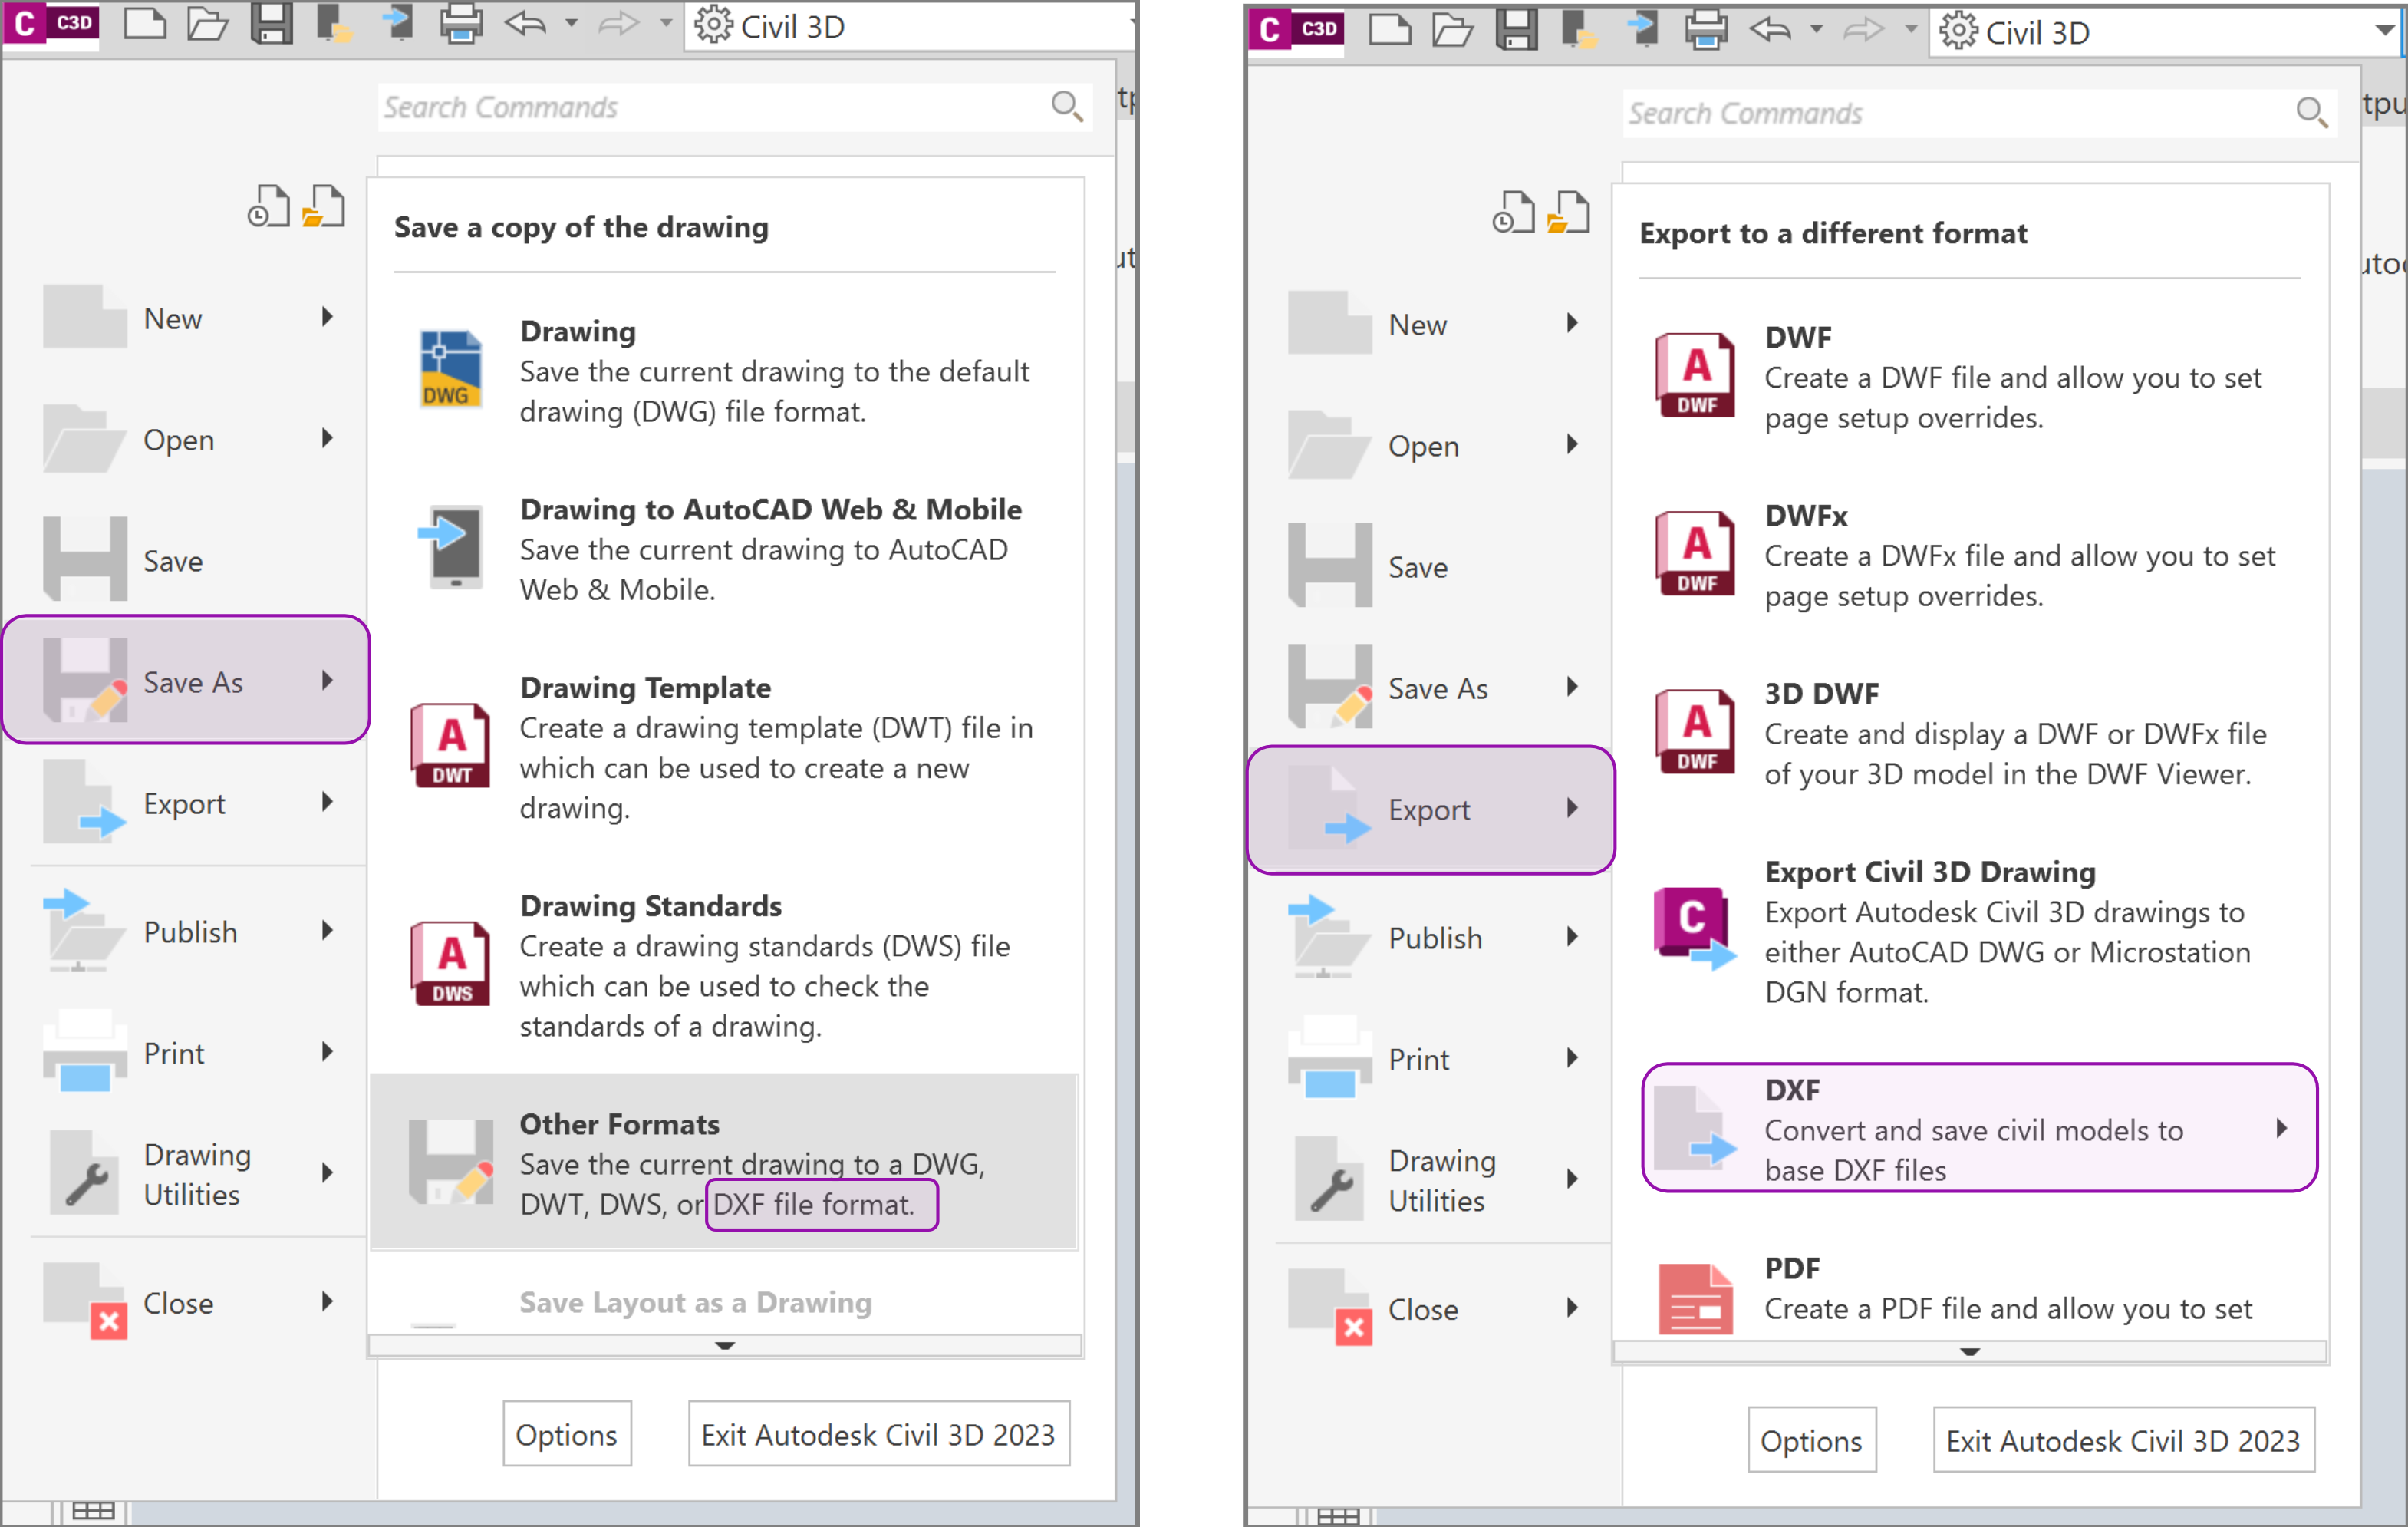
Save or Export the converted layout as a DXF file (2018)
-
Import the layout into the PVFARM
-
Match the trackers and transformers to the appropriate catalog item
-
NOTE: Please create any new equipment your import requires on the PVFARM side before importing the layout, see this article on how to do this.
-
-
AutoCAD / Civil3D Commands
Scenario 1: Blocked Layout (Trackers, Skids, and Blocks)
Trackers-
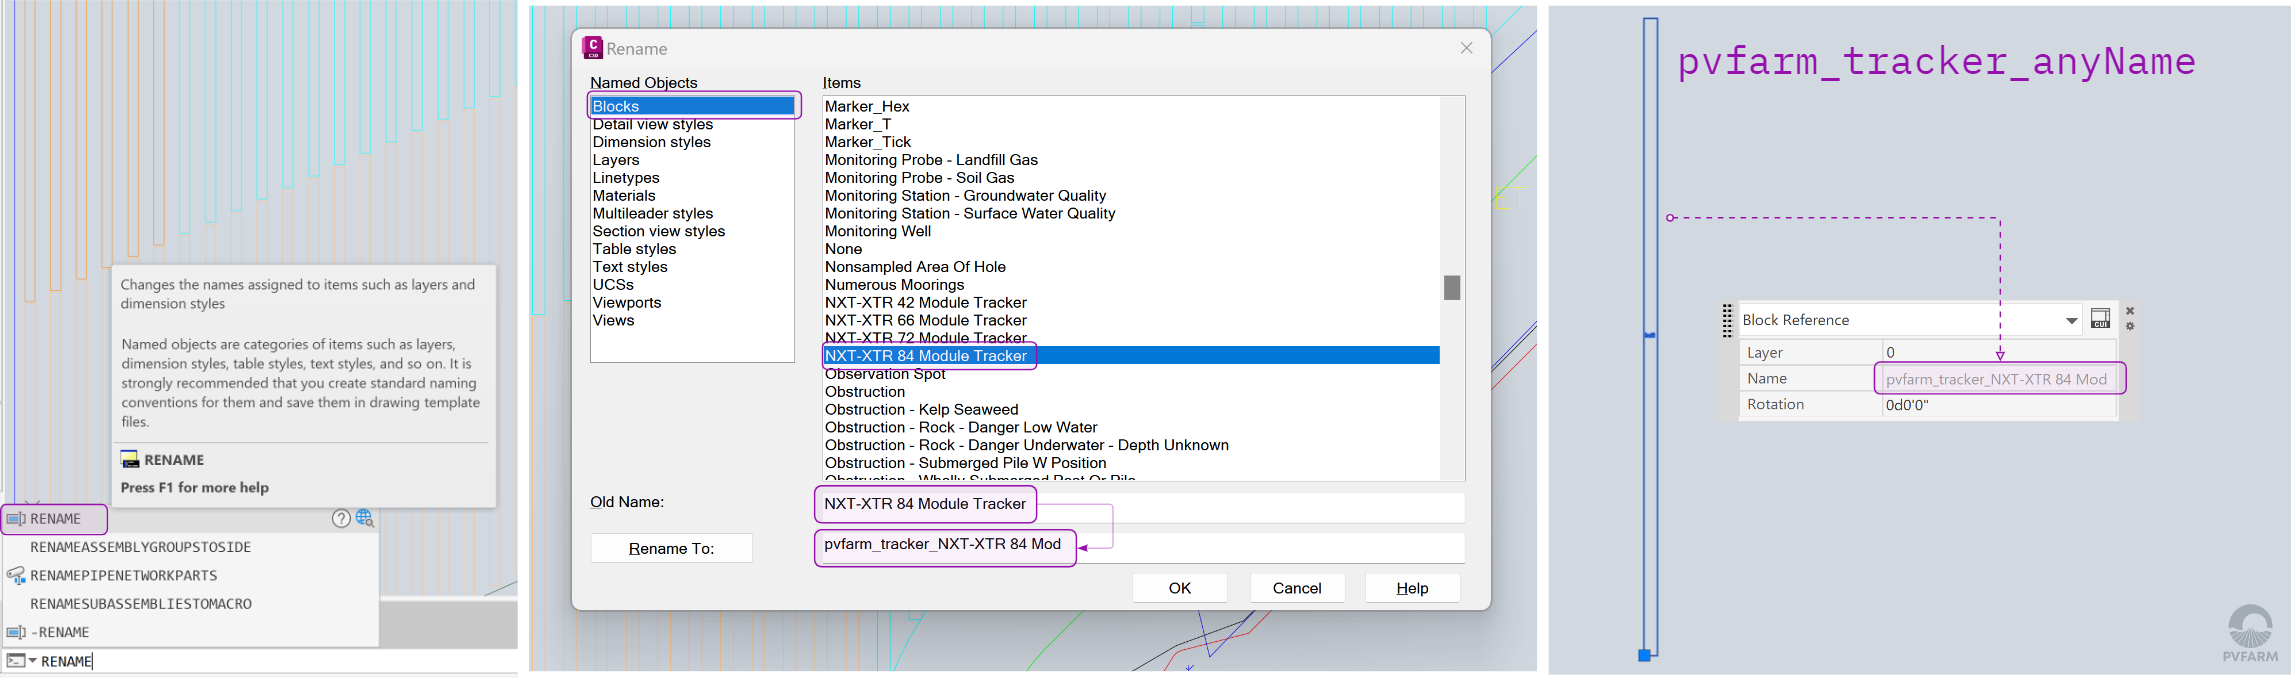
Trackers need to be created as a block reference with the name 'pvfarm_tracker_anyName'
-
Make sure the tracker shape is rectangular and a closed polyline
-
Rename existing tracker block reference via the Rename menu
-
RENAME command
-
Blocks section
-
Find a tracker block
-
Rename it with the name 'pvfarm_tracker_anyName'
-
Make sure the new name is applied for trackers in the Model space
-
-
Fixed-Tilt Objects
-
Fixed-Tilt objects need to be created as a block reference with the name 'pvfarm_fixed-tilt_anyName'
-
Make sure the fixed-tilt shape is rectangular and a closed polyline
-
Rename existing fixed-tilt block reference via the Rename menu
-
RENAME command
-
Blocks section
-
Find a fixed-tilt block
-
Rename it with the name 'pvfarm_fixed-tilt_anyName'
-
Make sure the new name is applied for fixed-tilt objects in the Model space.
-
-
Skid
-
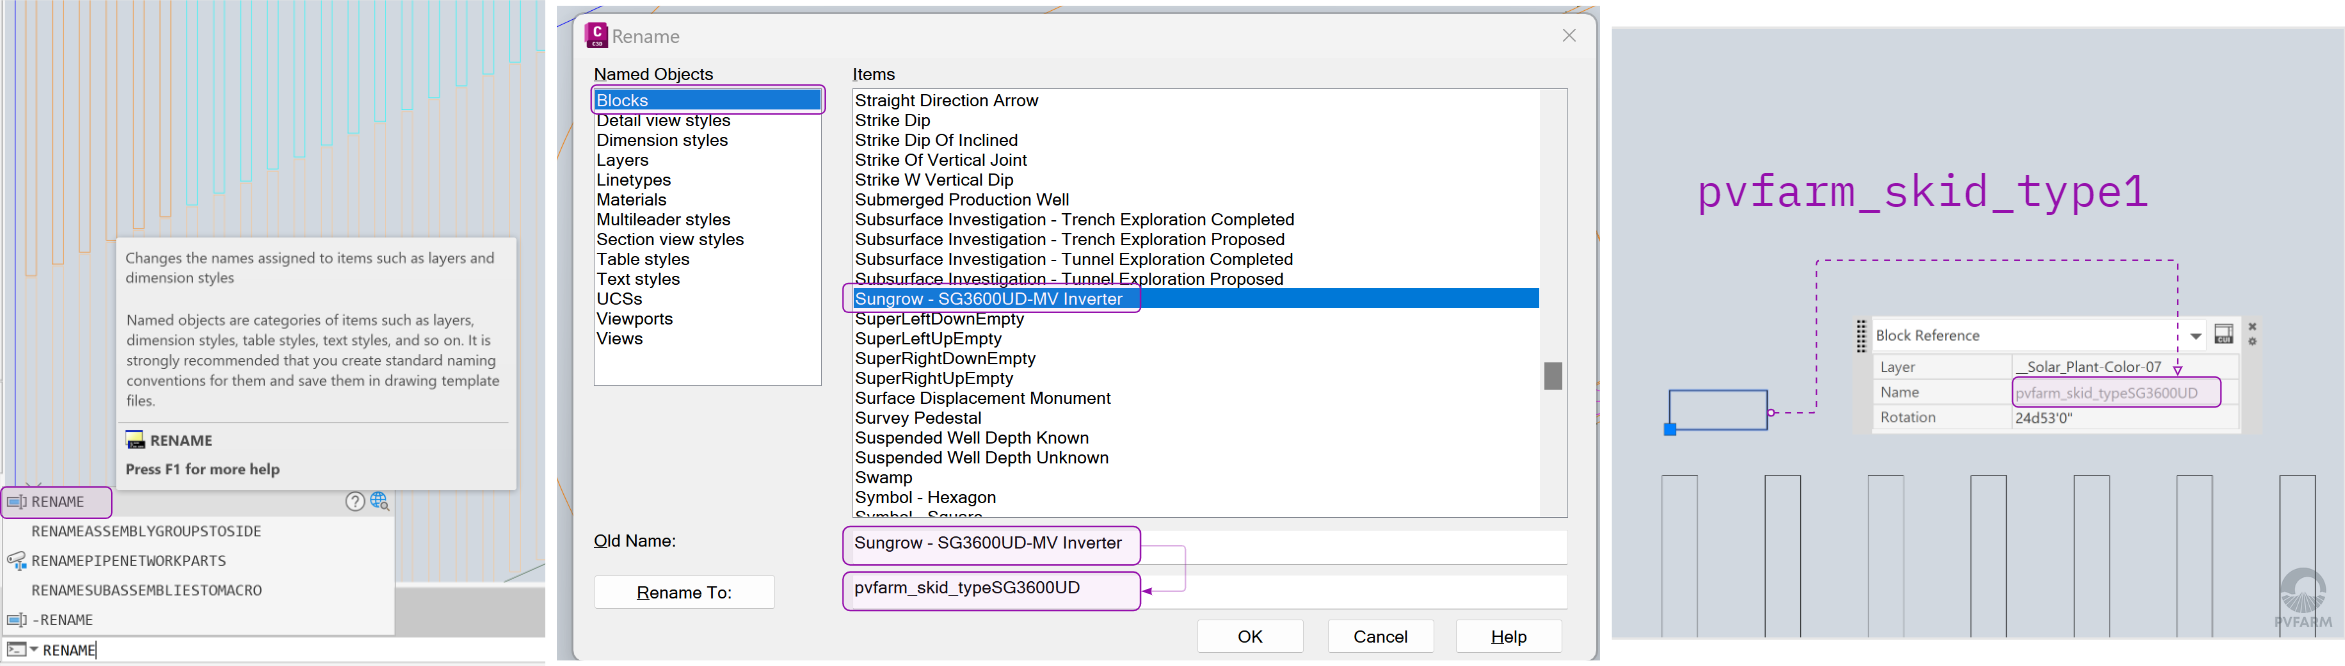
Skids need to be created as a block reference with the name 'pvfarm_skid_typeX'
-
Make sure the skid shape is rectangular and a closed polyline
-
Rename existing skid block reference via the Rename menu
-
RENAME command
-
Blocks section
-
Find a skid block
-
Rename it with the name 'pvfarm_skid_typeX'
-
Make sure the new name is applied for skids in the Model space
-
-
Blocks
Electrical blocks can be created two ways
Our prefered method:- Draw a polyline around your trackers and all other equipment assoiated with each block. (if using a method that already creates polylines around your blocks skip this step)
- Rename the layer that these closed polylines are on to pvfarm_block_area
-
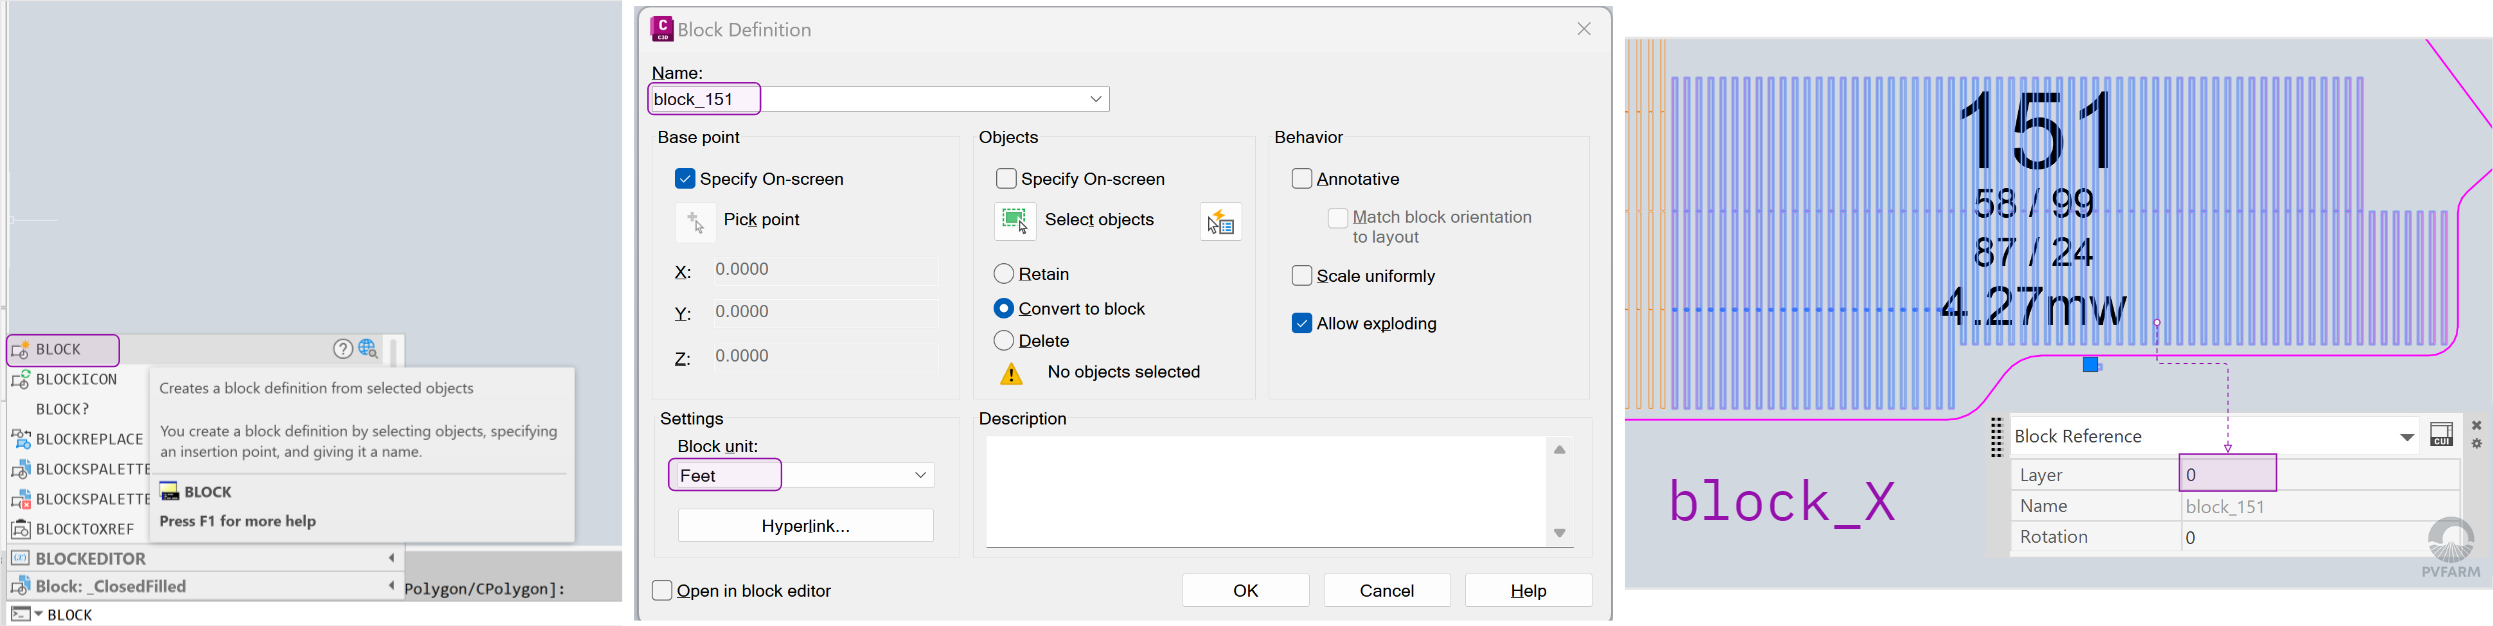
Electrical blocks need to be created as a block reference with the name 'block_X'
-
Make sure your drawing contains Skids and Trackers
-
Create a block reference for an Electrical block via the Block definition menu
-
BLOCK command
-
Select a skid and a bunch of trackers that belong to an electrical block
-
run the BLOCK command
-
Give it the name 'pvfarm_block_X'
-
Select 'Feet' as the Block unit
-
Make sure the block reference is applied in the Model space
-
-
Scenario 2: Non-Blocked Layout (Trackers/Fixed-Tilt Only)
Trackers-
Trackers need to be created as closed polylines with the layer name 'pvfarm_tracker_anyName'
-
Make sure the tracker shape is rectangular and a closed polyline
-
Rename existing tracker layer via the Rename menu
-
RENAME command
-
Layers section
-
Find a tracker layer
-
Rename it with the name 'pvfarm_tracker_anyName'
-
Make sure the new name is applied for trackers in the Model space
-
-
-
Trackers need to be created as closed polylines with the layer name
'pvfarm_fixed-tilt_anyName' -
Make sure the fixed-tilt shape is rectangular and a closed polyline
-
Rename existing tracker layer via the Rename menu
-
RENAME command
-
Layers section
-
Find a tracker layer
-
Rename it with the name 'pvfarm_fixed-tilt_anyName'
-
Make sure the new name is applied for trackers in the Model space
-
-
Universal Layout Components
Boundaries-
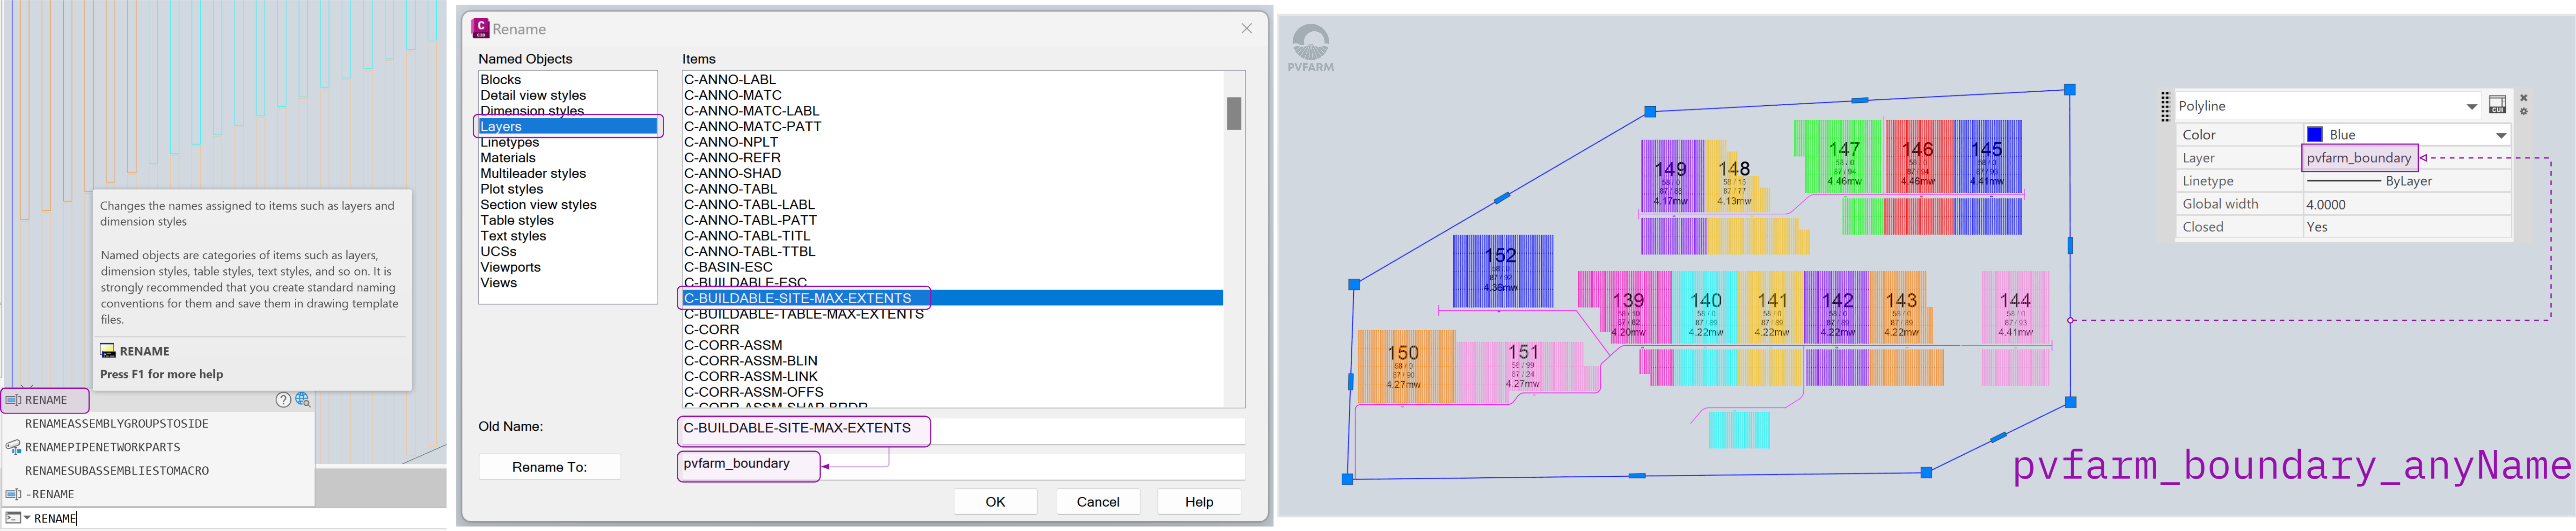
Boundaries need to be created with the layer 'pvfarm_boundary_anyName'
-
Make sure boundaries are closed polylines
-
use the JOIN command to make closed polylines and join different parts of a boundary
-
-
Rename existing boundaries layer via the Rename menu
-
RENAME command
-
Layer section
-
Find a boundary layer
-
Rename it with the name 'pvfarm_boundary_anyName_include'
- anyName will be any name that you would like to assign to this particular group of boundaries.
- include/exclude will determine if the boundaries in this layer will come in as inclusion or exclusion zones. This input must come last in the sequence.
-
Make sure the new name is applied for boundaries in the Model space
-
-
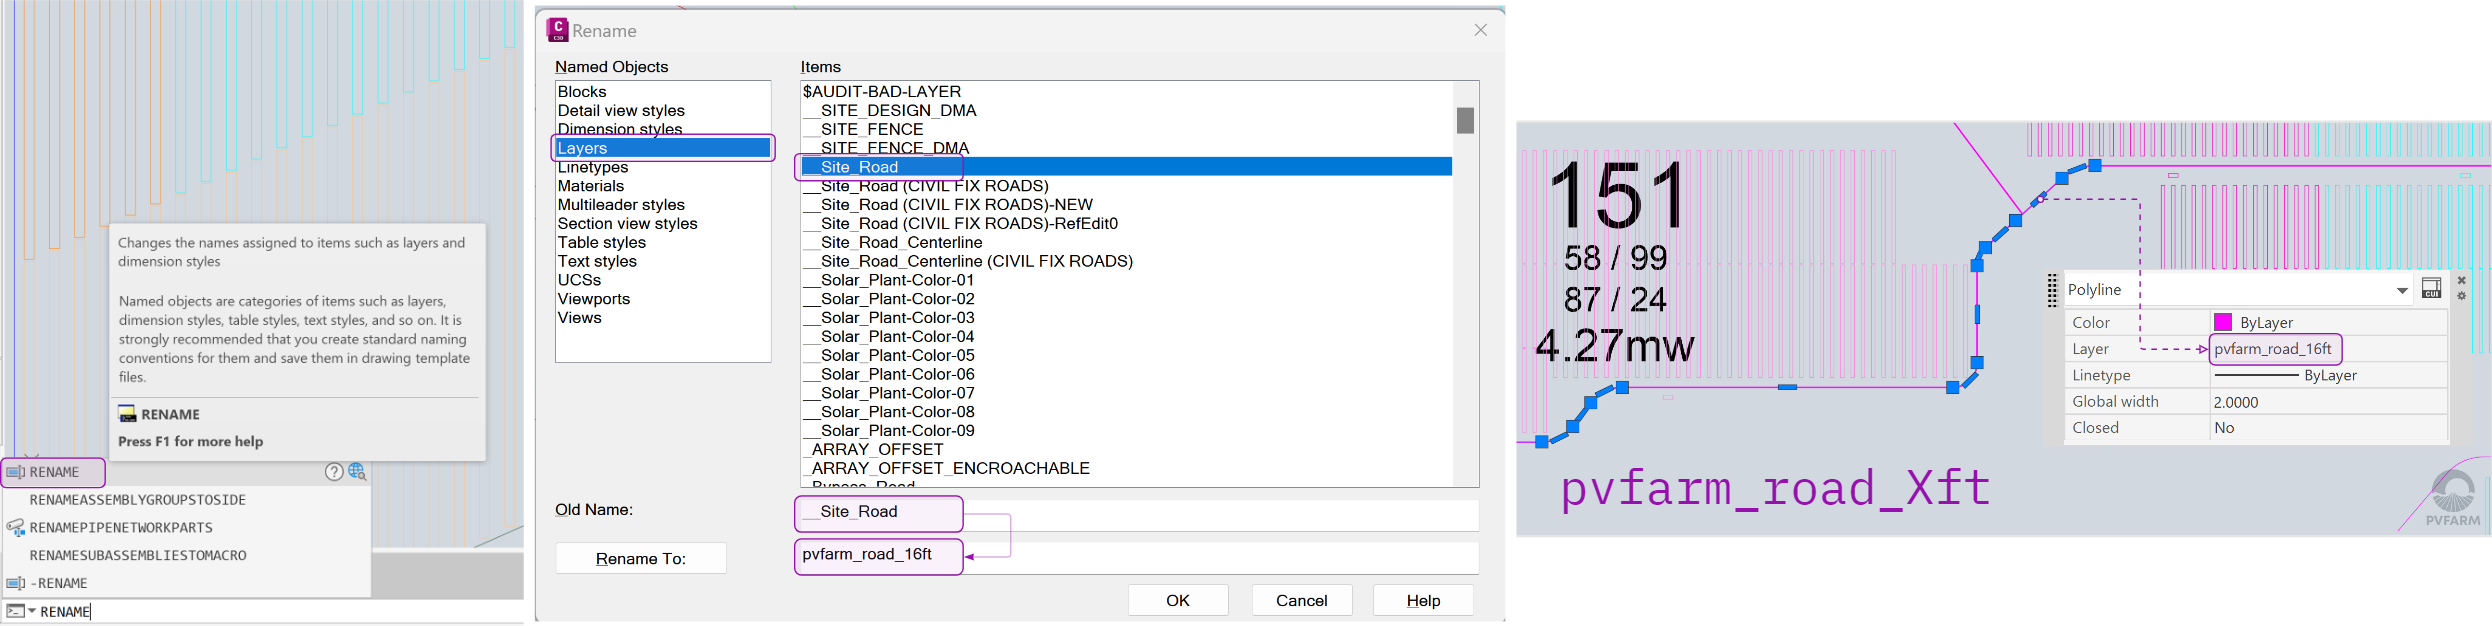
Roads
-
Roads need to be created as lines, arcs, and polylines with the name 'pvfarm_road_Xft'
-
Rename existing roads layer via the Rename menu
-
RENAME command
-
Layer section
-
Find a road layer
-
Rename it with the name 'pvfarm_road_Xft'
-
Make sure the new name is applied for roads in the Model space
-
-
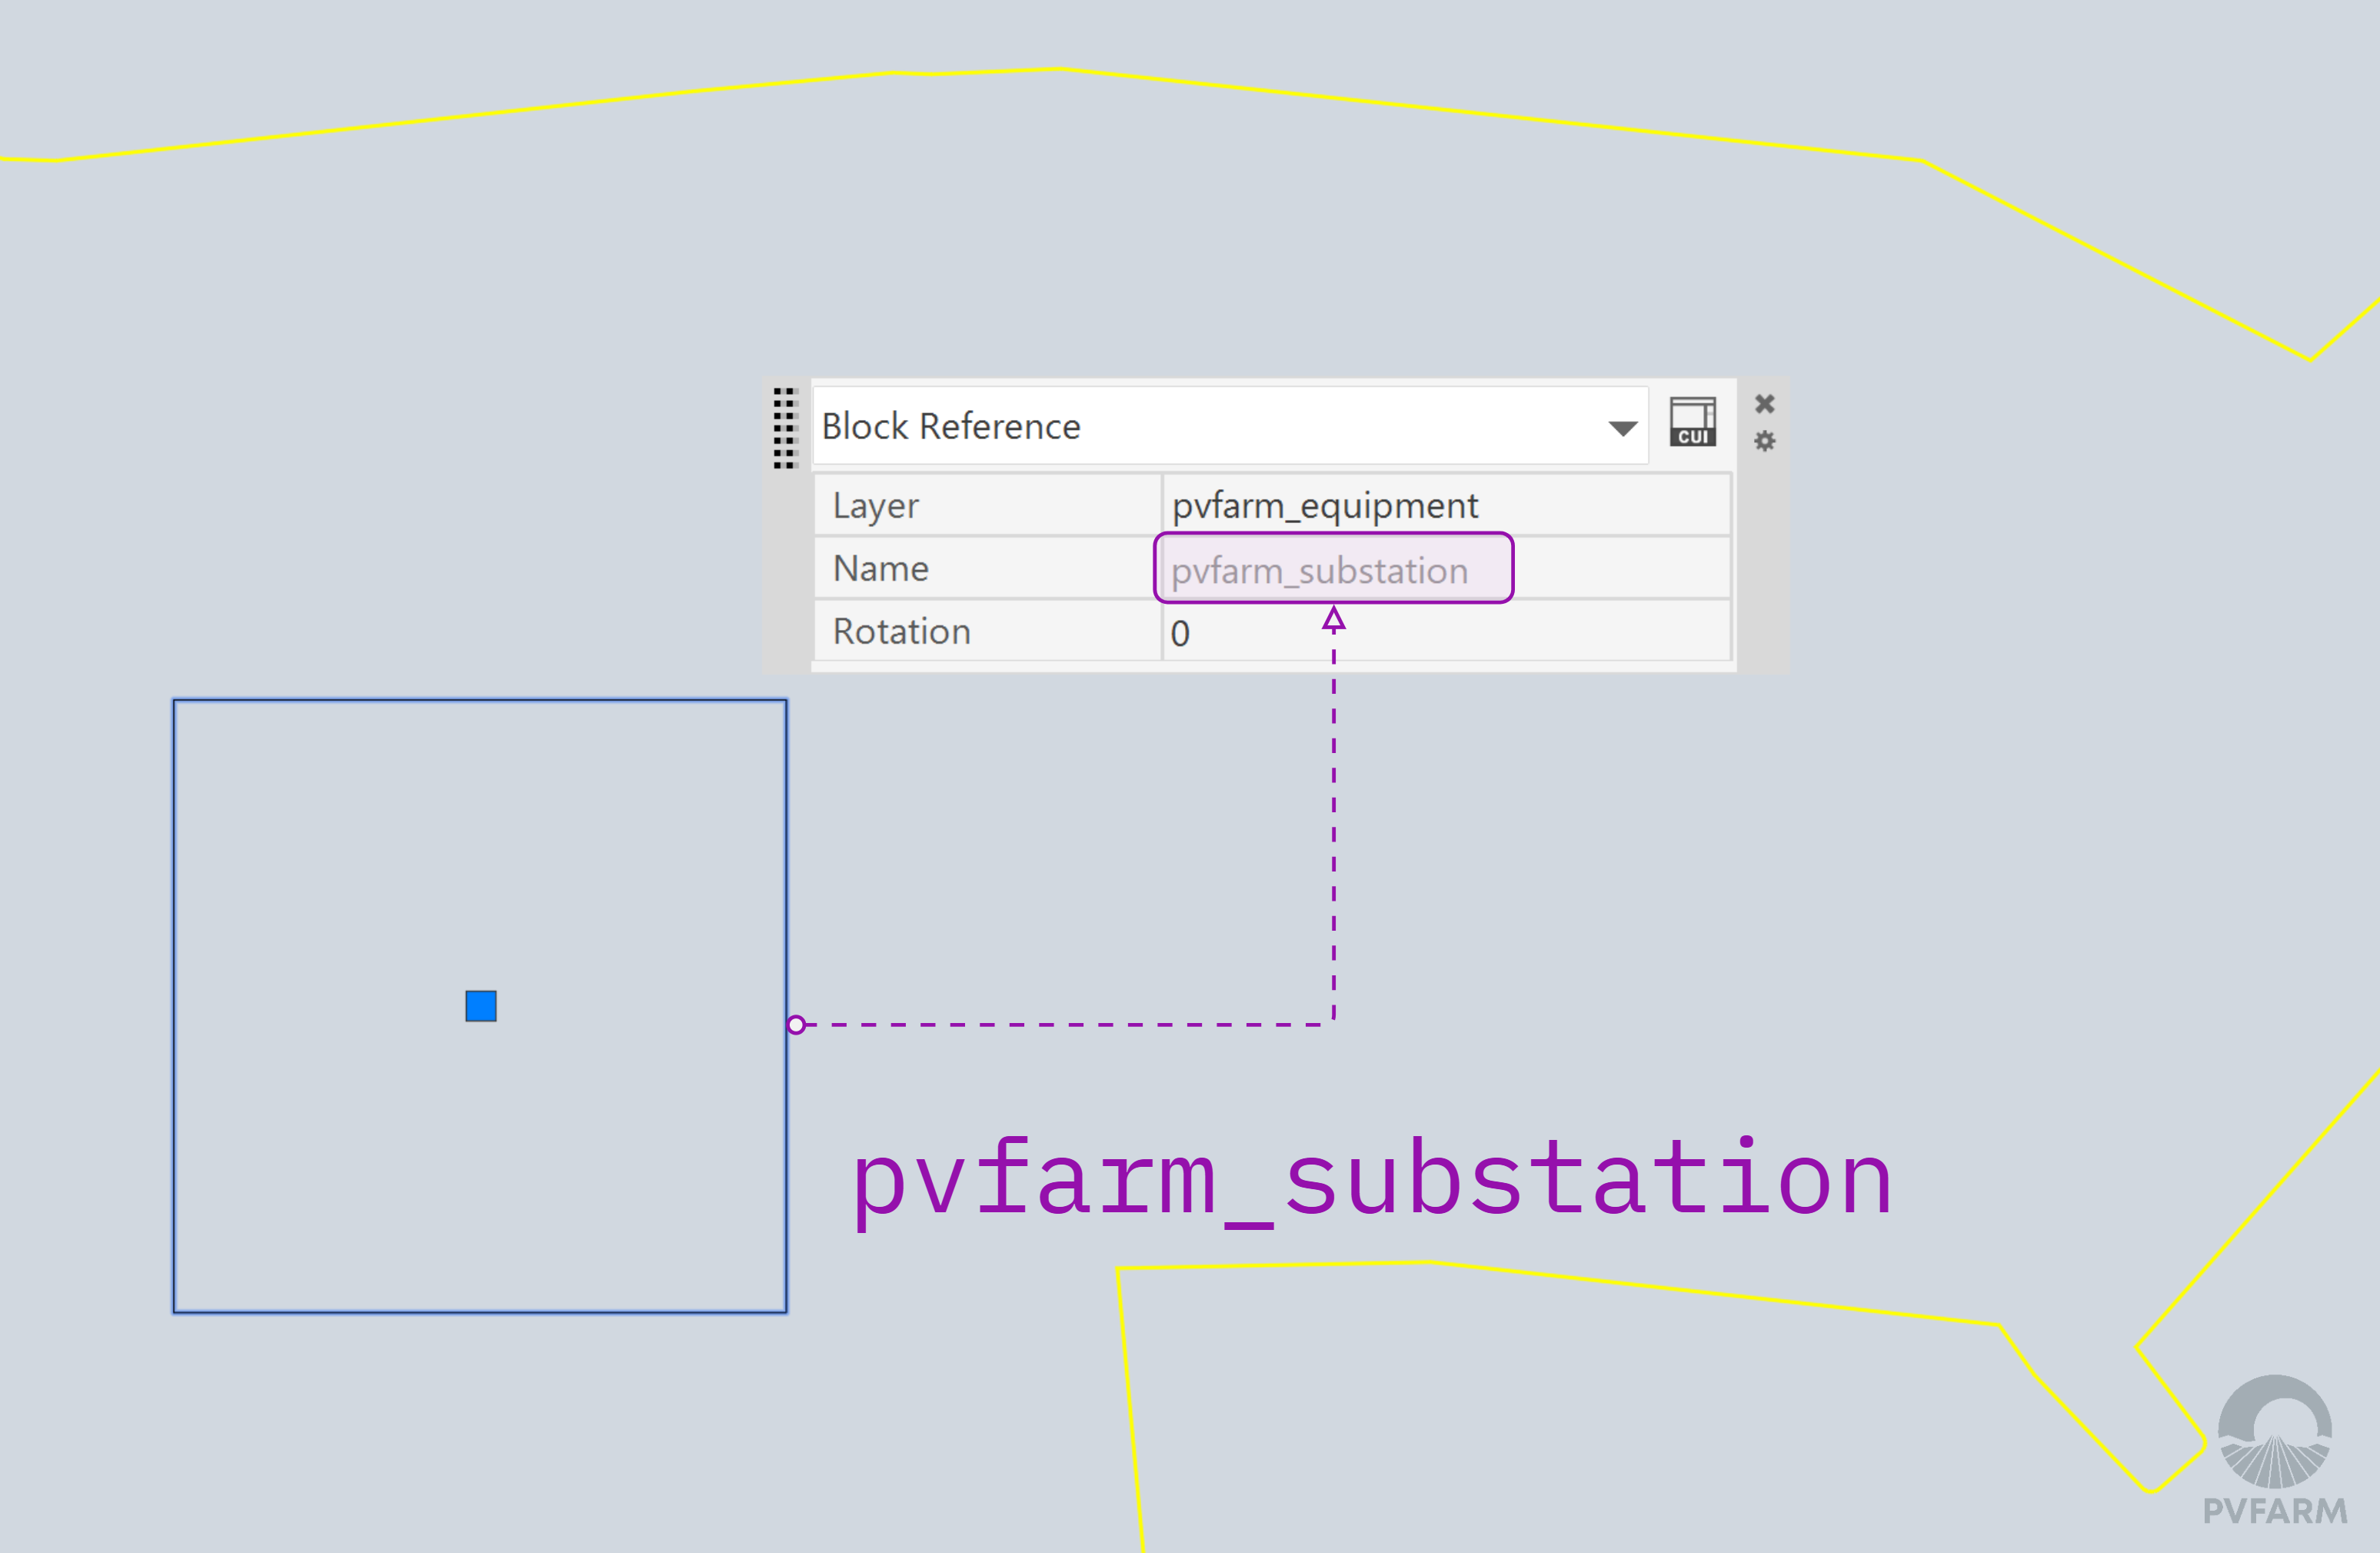
Substation
-
Substation needs to be created as a block reference with the name 'pvfarm_substation'
-
Make sure the block shape is rectangular and a closed polyline
-
Rename existing substation block reference via the Rename menu
-
RENAME command
-
Blocks section
-
Find a substation block
-
Rename it with the name 'pvfarm_substation'
-
Make sure the new name is applied for a substation in the Model space
-
Make sure you have only one substation in the Model Space
-
-
Save or Export from AutoCAD/Civil3D
Save or Export the existing layout as a DXF file (2018 version)
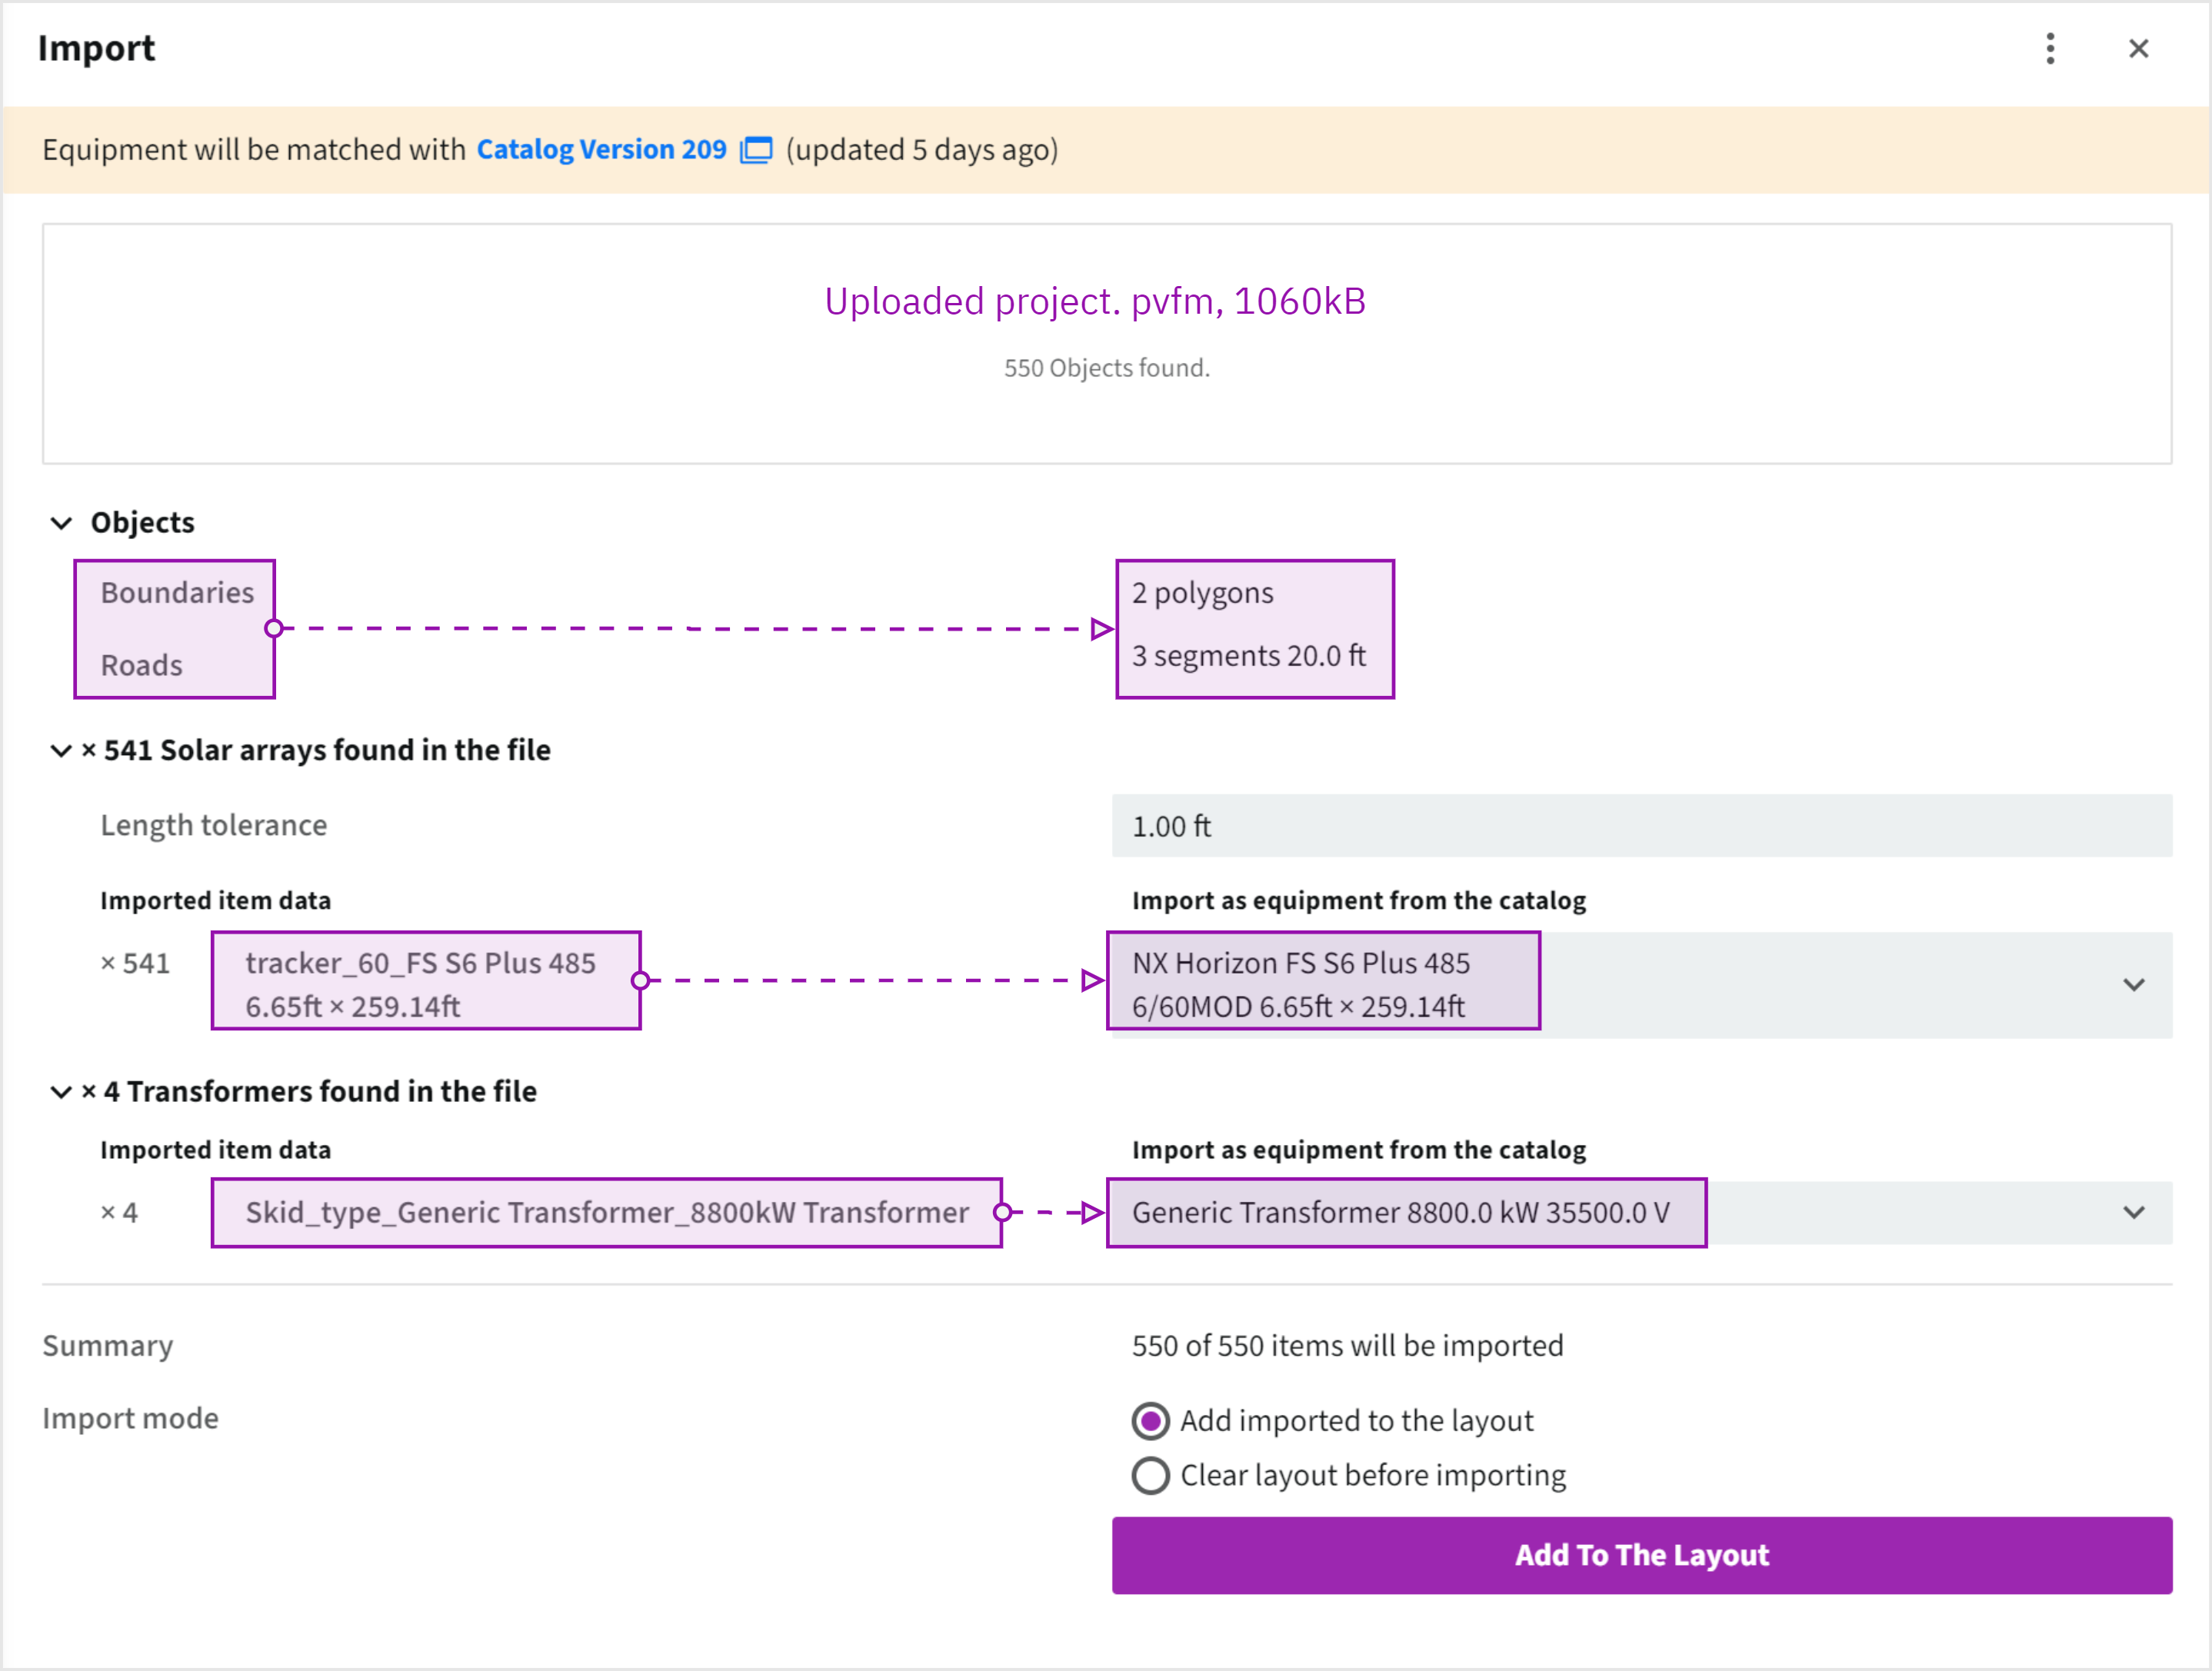
Import DXF to PVFARM
-
Import the DXF file into the PVFARM
-
Find a perfect match for trackers and transformers in the Catalog
-
Create new catalog equipment first if your Catalog version doesn’t contain some trackers or transformers you need
-
-
Observe the DXF has roads and boundaries
-
Add to the Layout
-
Enjoy your 3D layout in PVFARM 🧡
Please take a look at the example file to use for practice.