.png?width=200&height=98&name=Horizontal%20PVFARM%20Logo%20(Small).png)
In PVFARM equipment is added to the scene via Boundaries, you will have boundaries that represent buildable area, called "inclusion zones" and boundaries that represent non buildable area or "exclusion zones." You can get those boundaries using one of the following methods:
DXF by Civil3D/AutoCAD
-
Open the file you need boundaries from
-
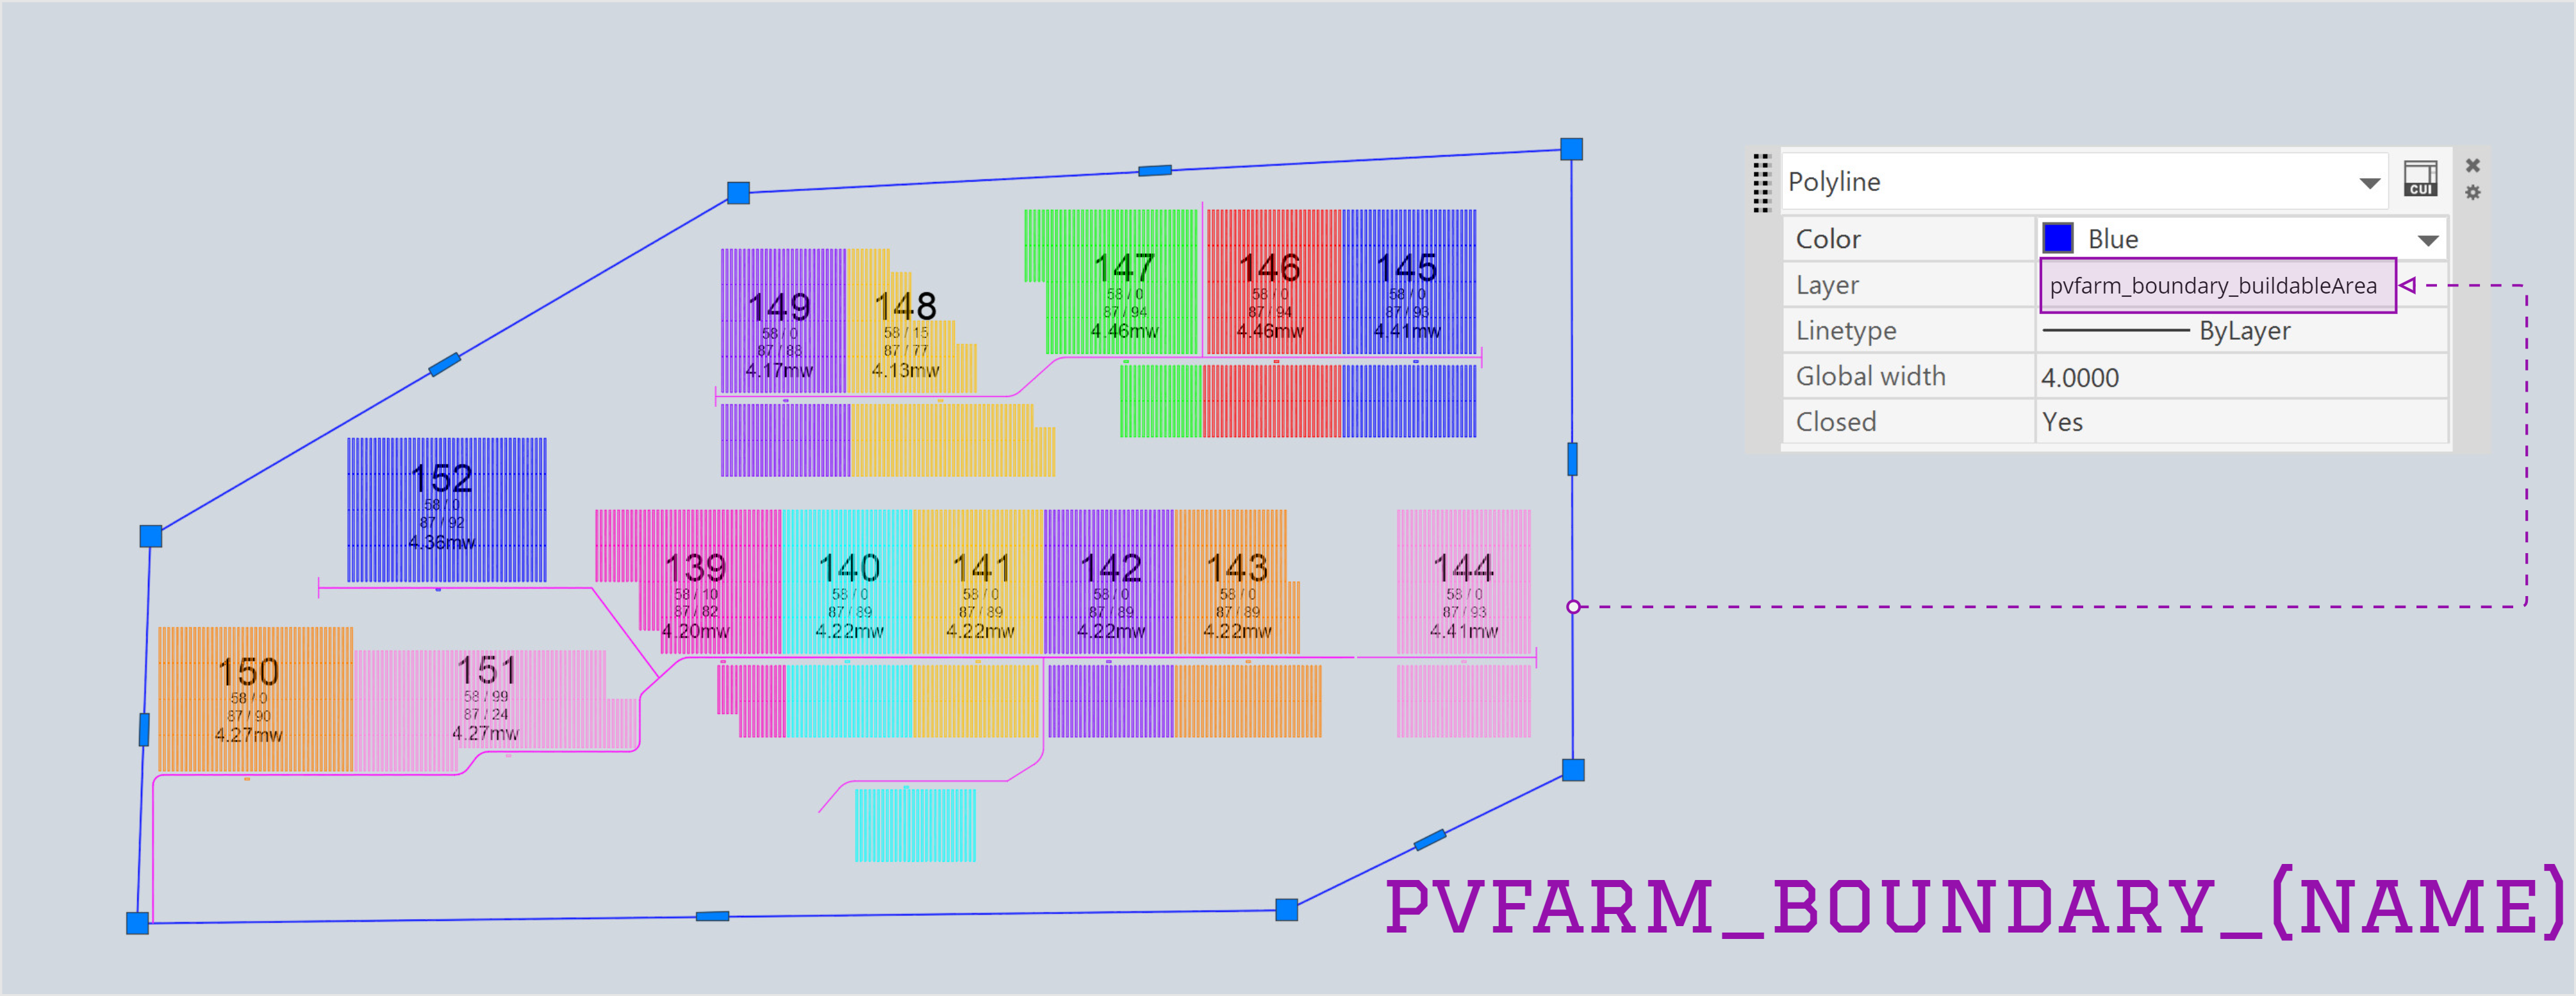
Boundaries need to be created with the layer 'pvfarm_boundary_(Name)'
-
Make sure boundaries are closed polylines
-
use the JOIN command to make closed polylines and join different parts of a boundary
-
-
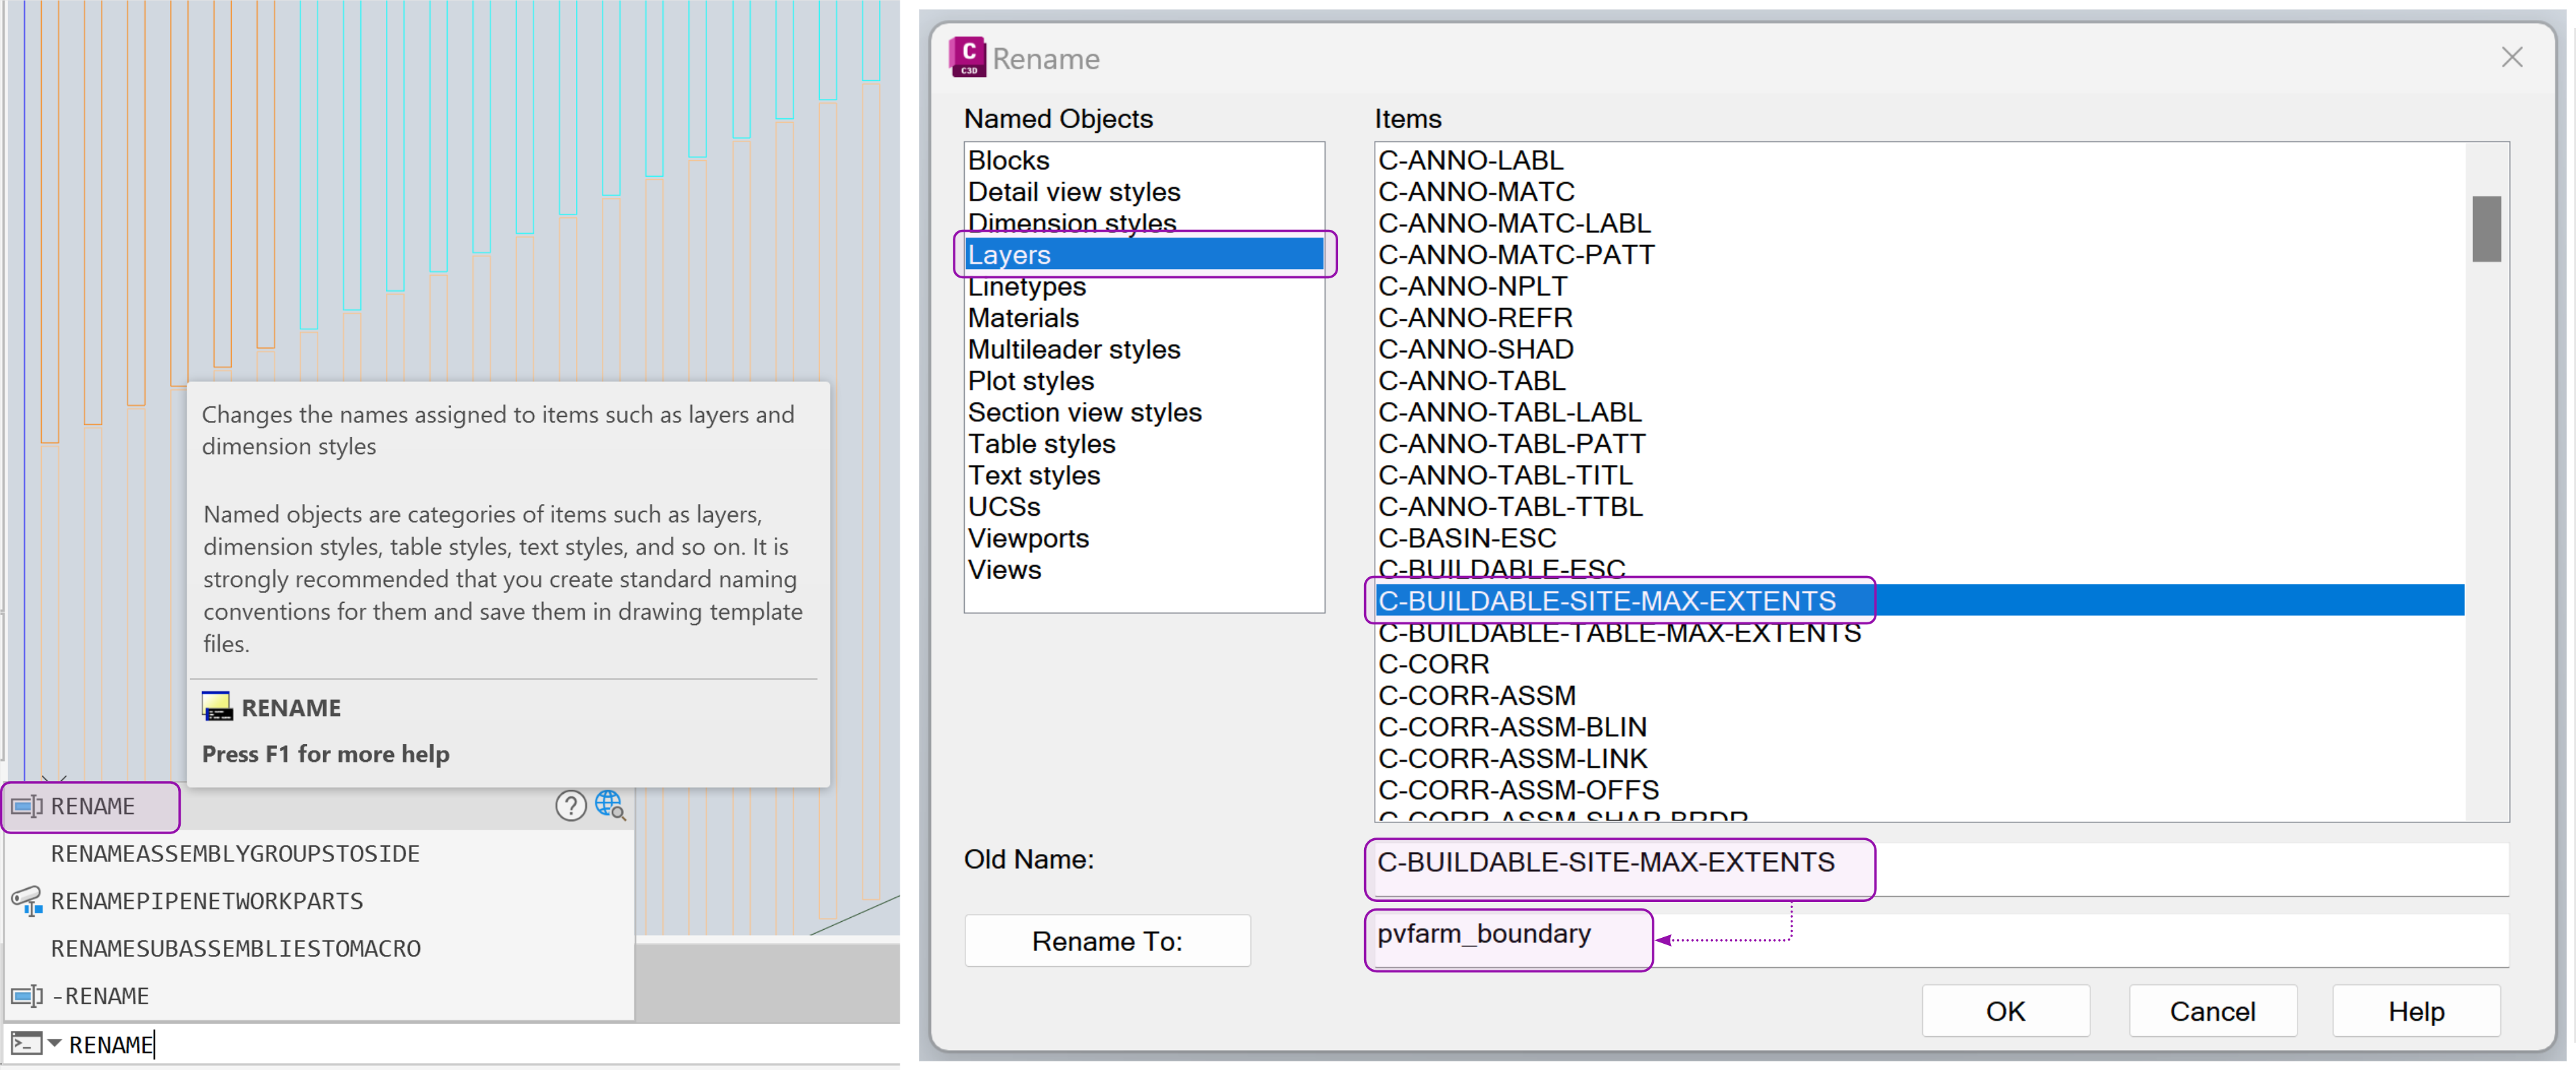
Rename existing boundaries layer via the Rename menu
-
RENAME command
-
Layer section
-
Find a boundary layer
-
Rename it with the name 'pvfarm_boundary_(Name)'
-
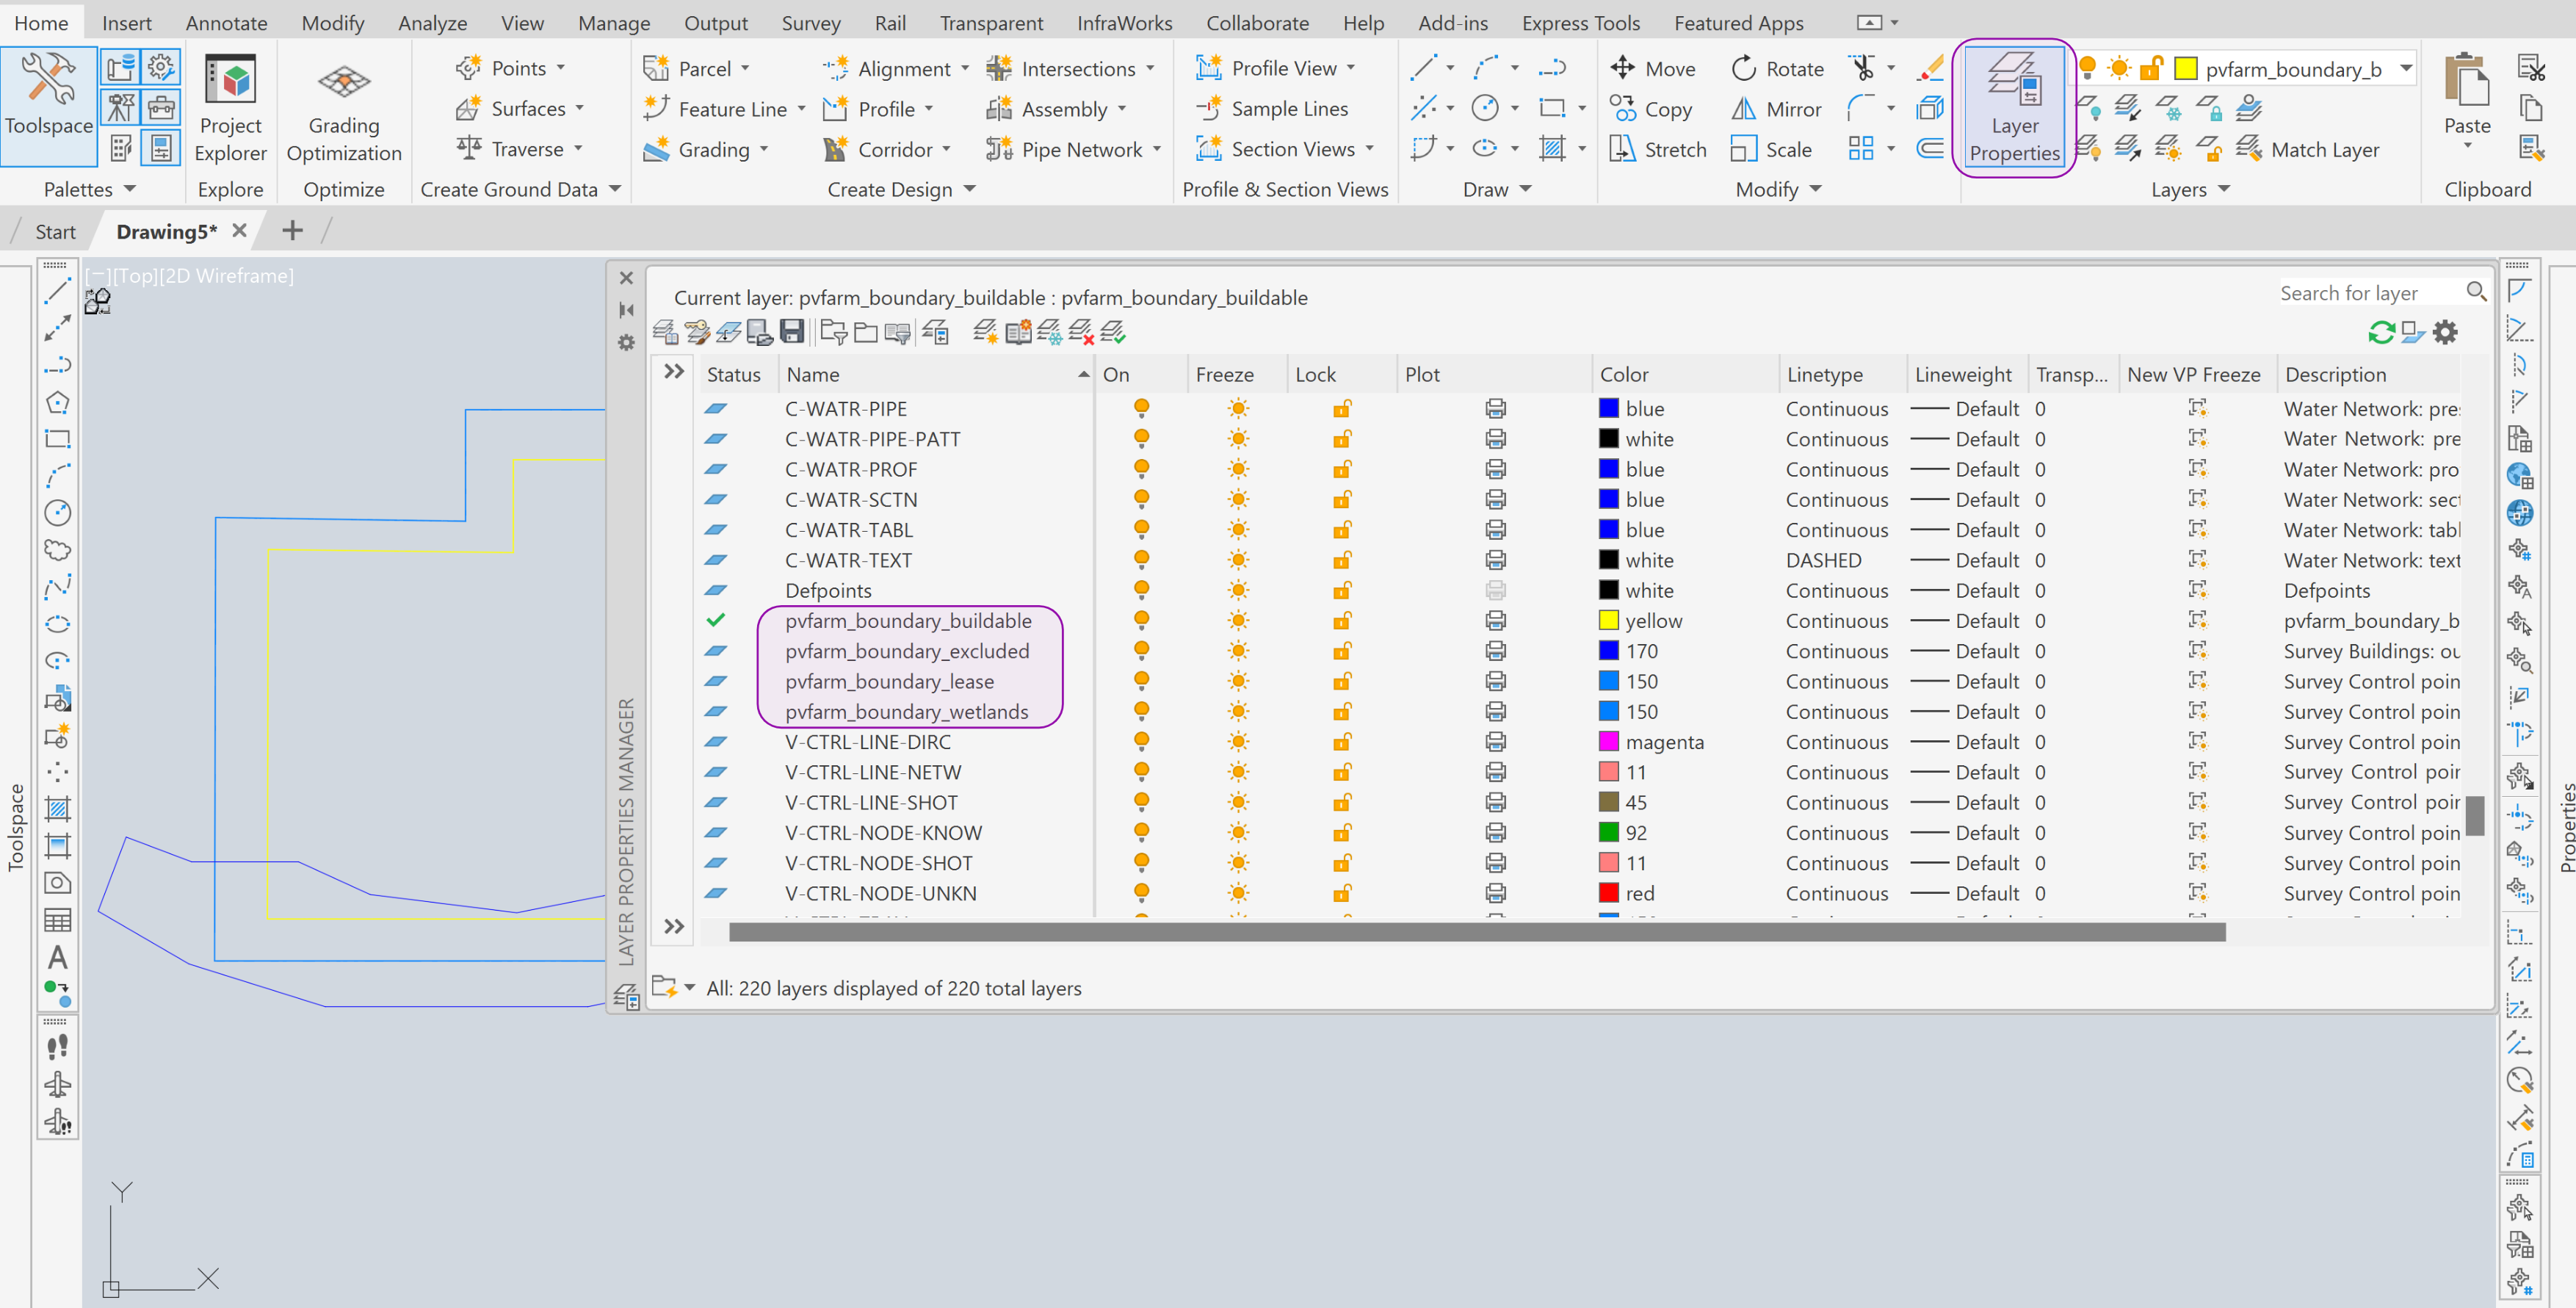
Make sure the new name is applied for boundaries in the Model space
-
-
-
Or rename existing boundaries layer via the Home -> Layer Properties menu
-
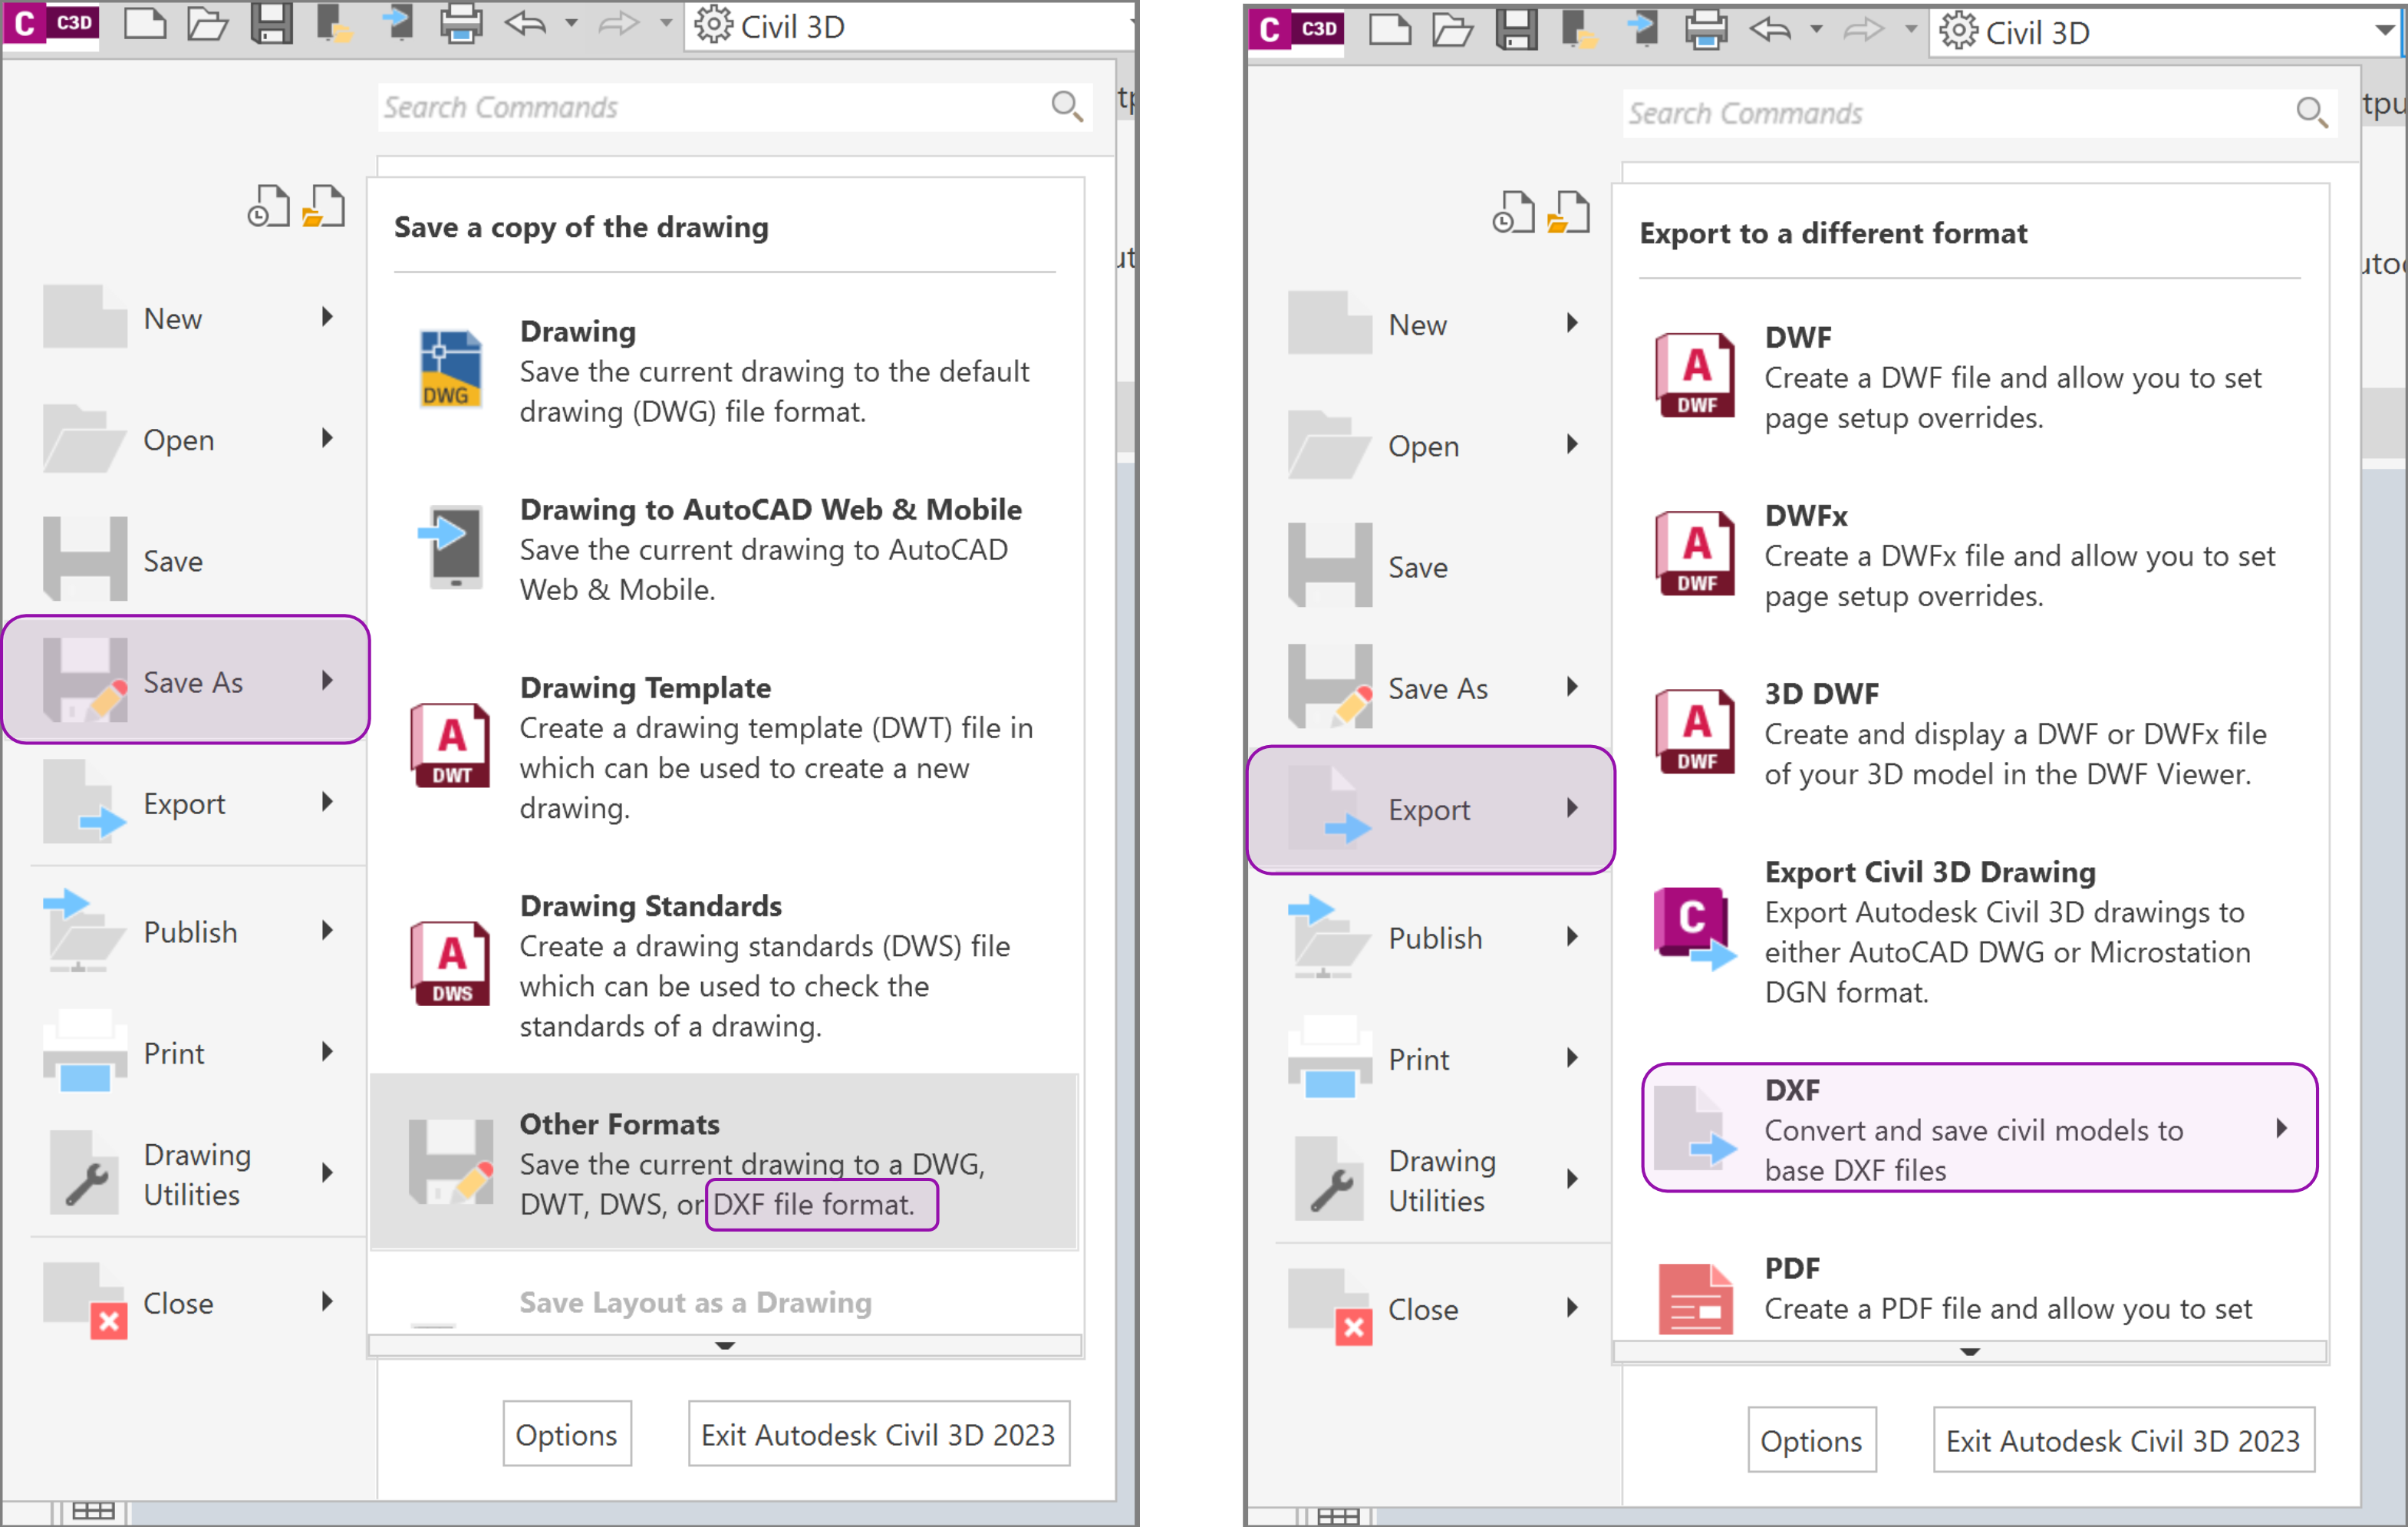
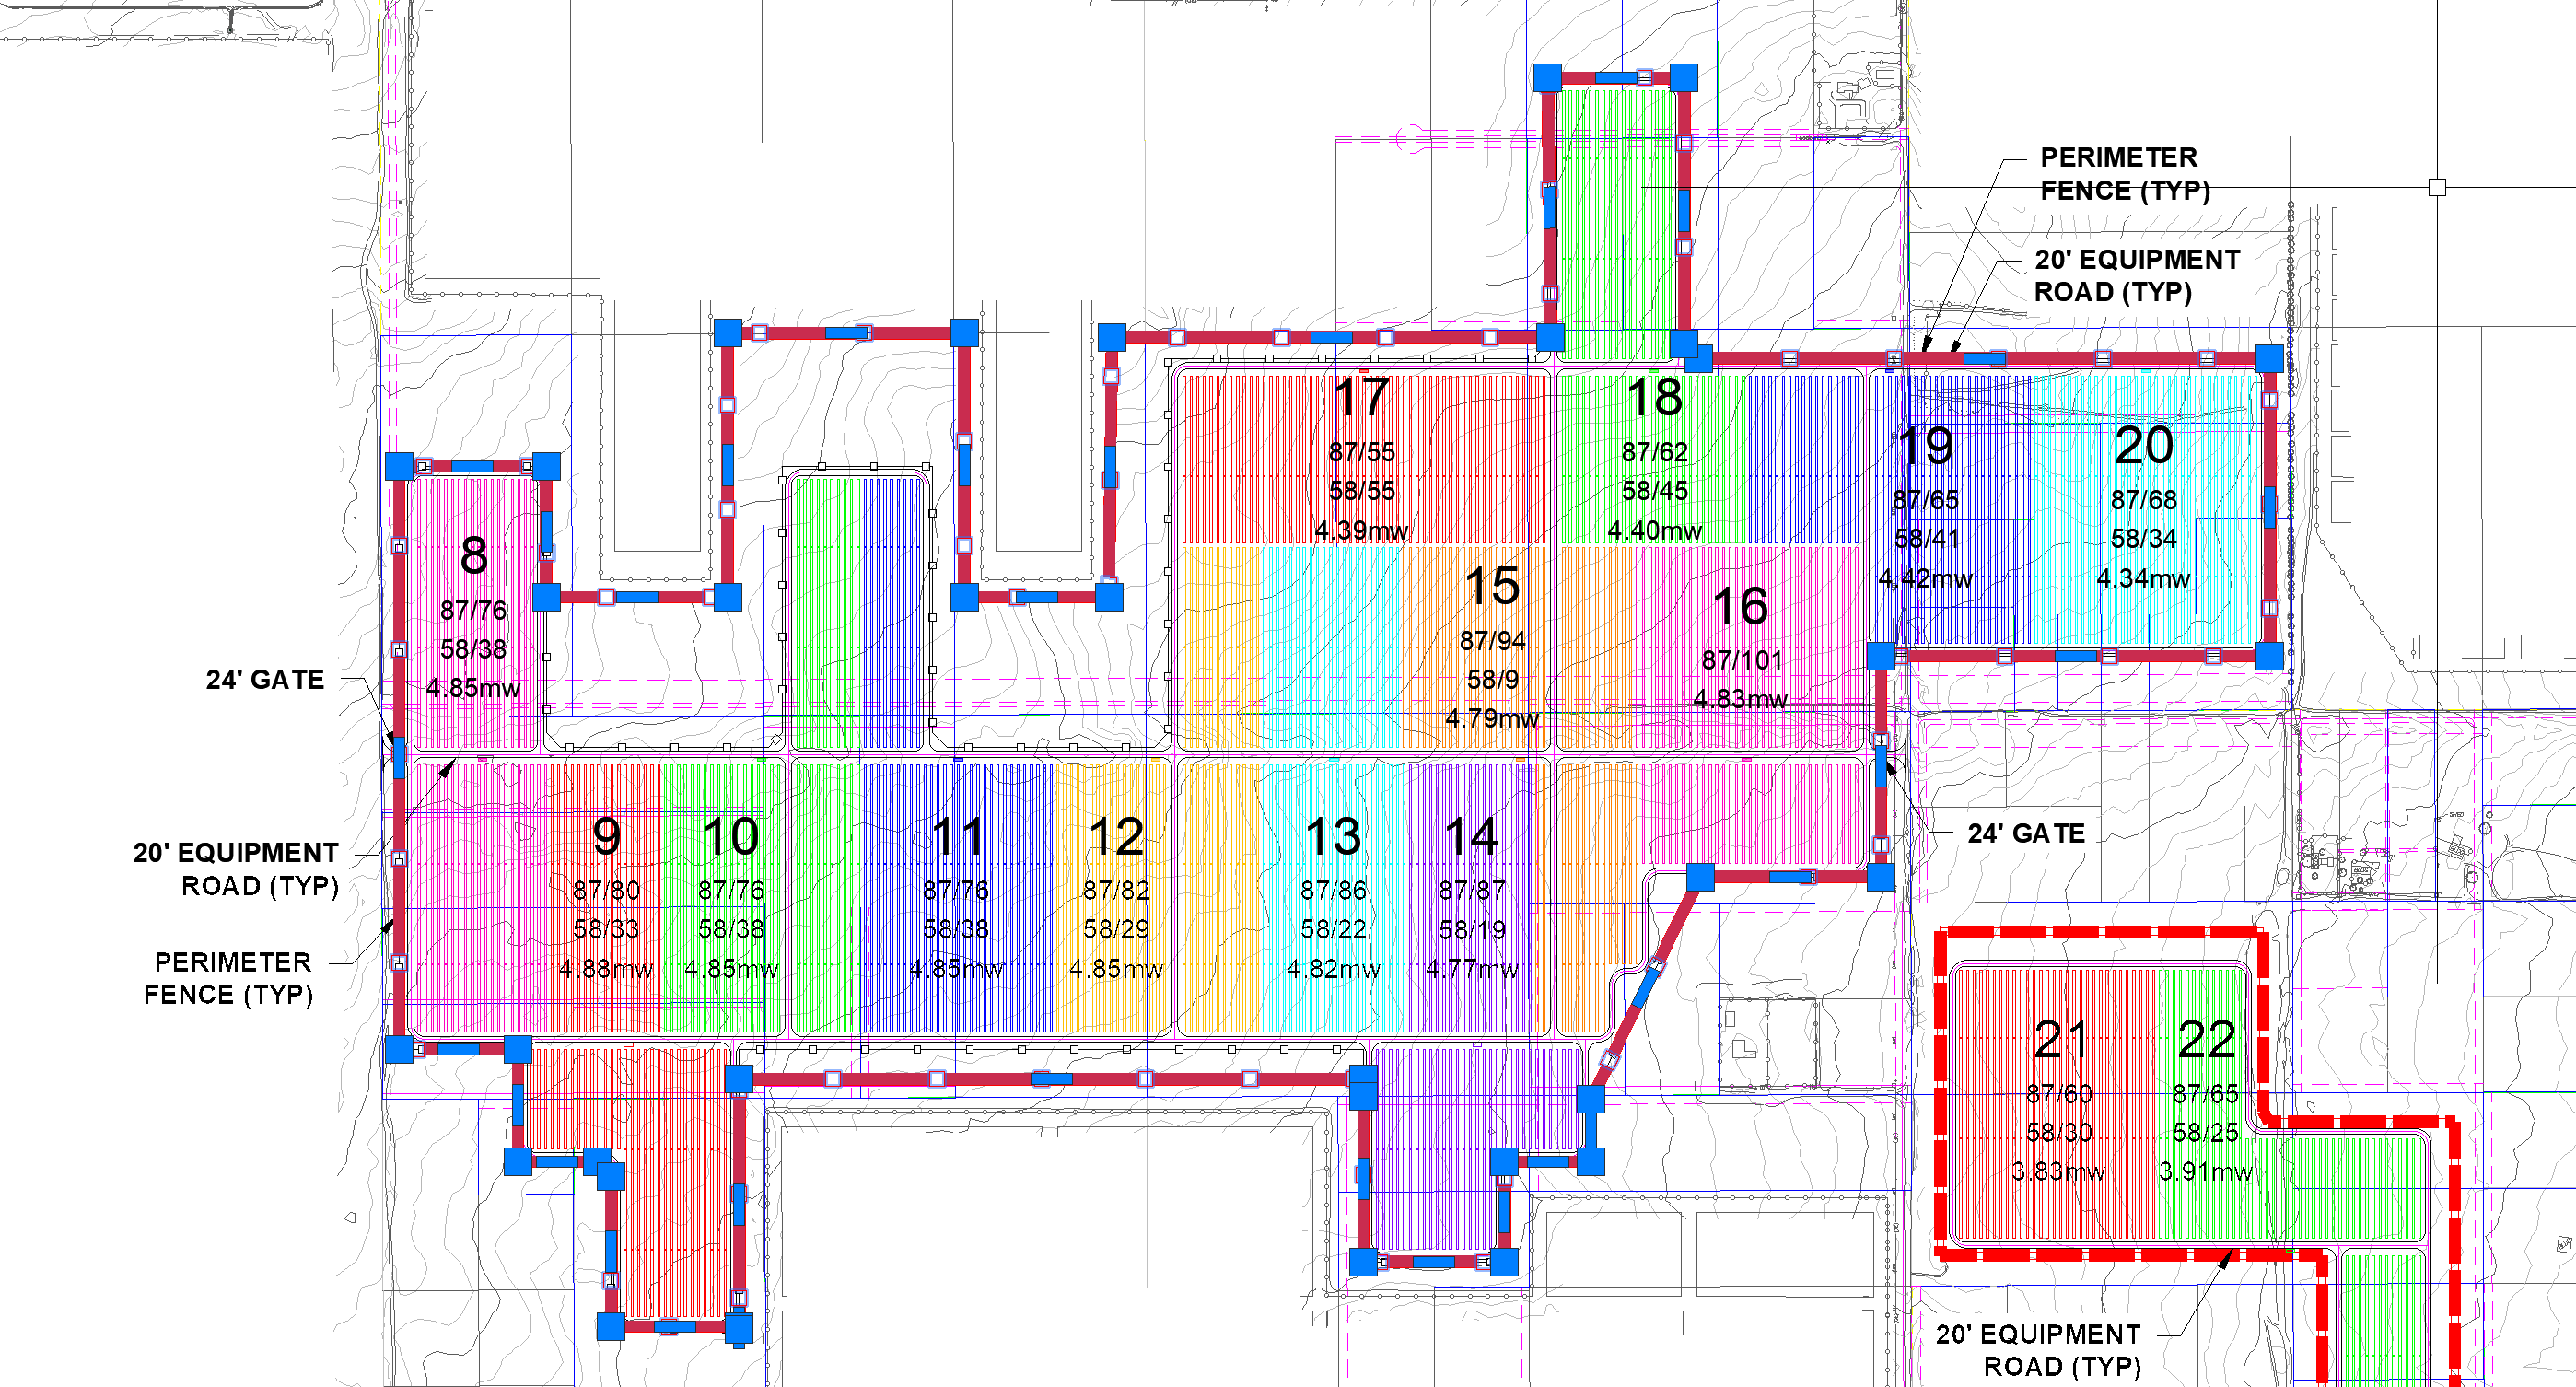
Save or Export the existing layout as a DXF file (2018 version)
-
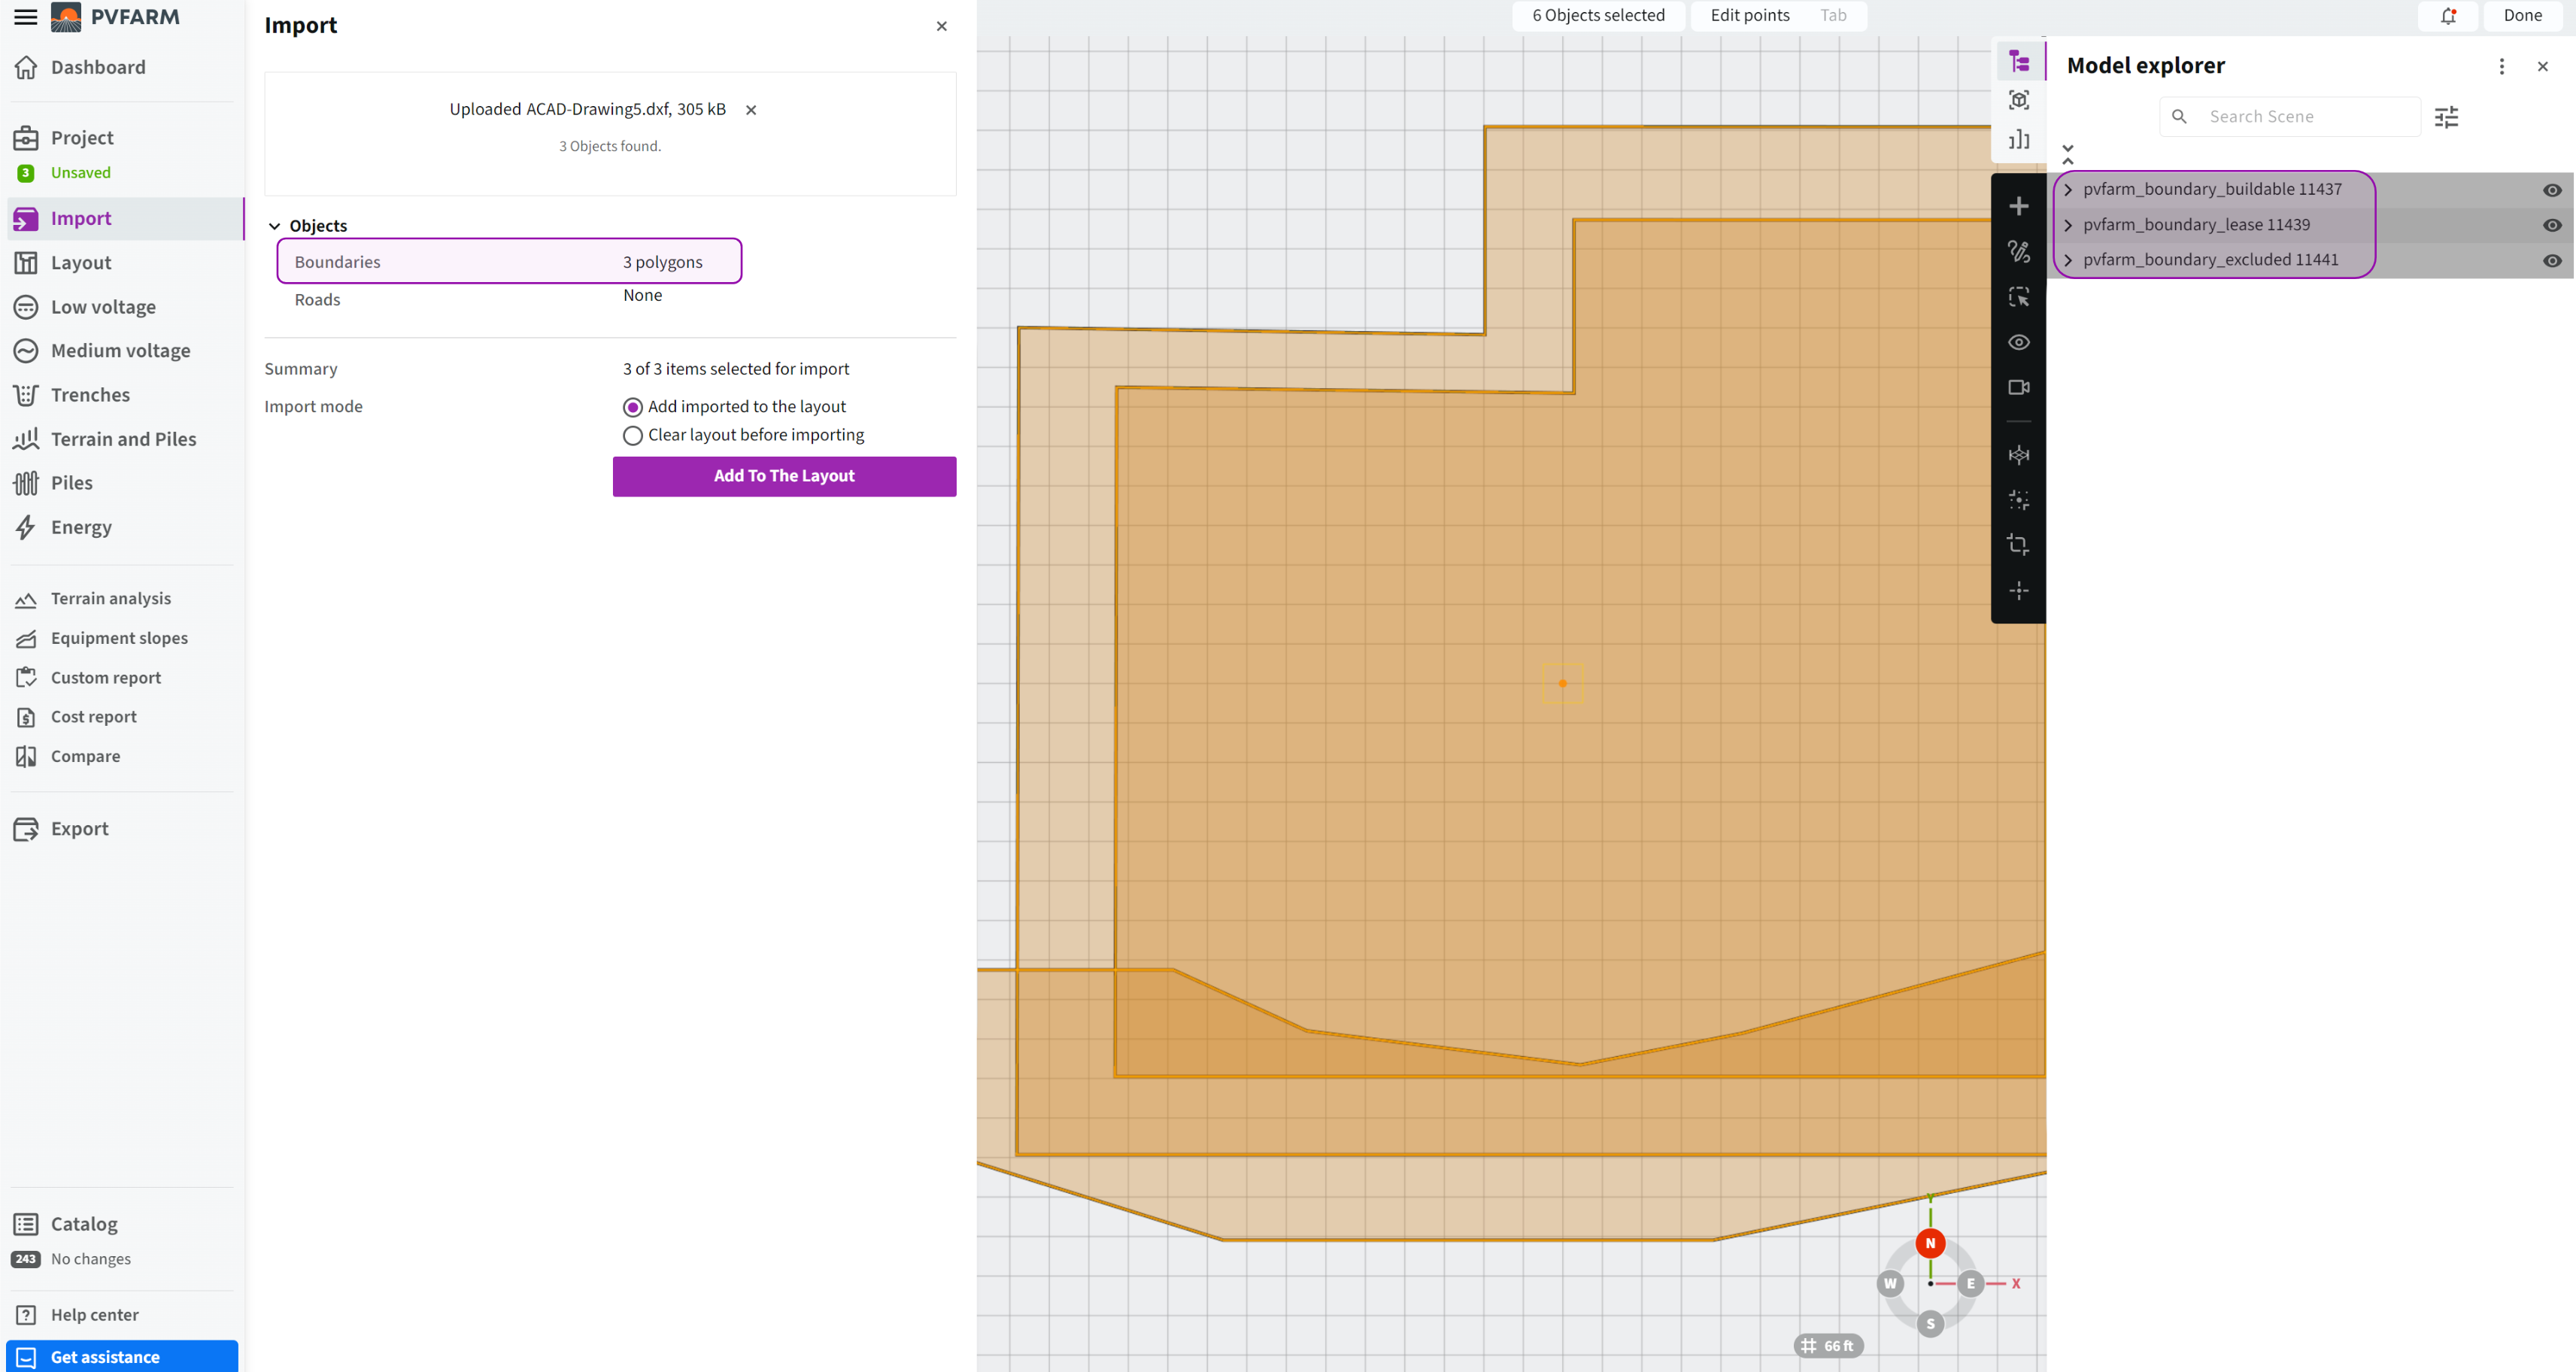
Import the DXF file into the PVFARM
-
Observe the DXF has boundaries -> Add to the Layout
KMZ/KML by Civil3D/AutoCAD
-
Open the file you need boundaries from
-
Toolspace → Toolbox→ Miscellaneous Utilities→ Export KML
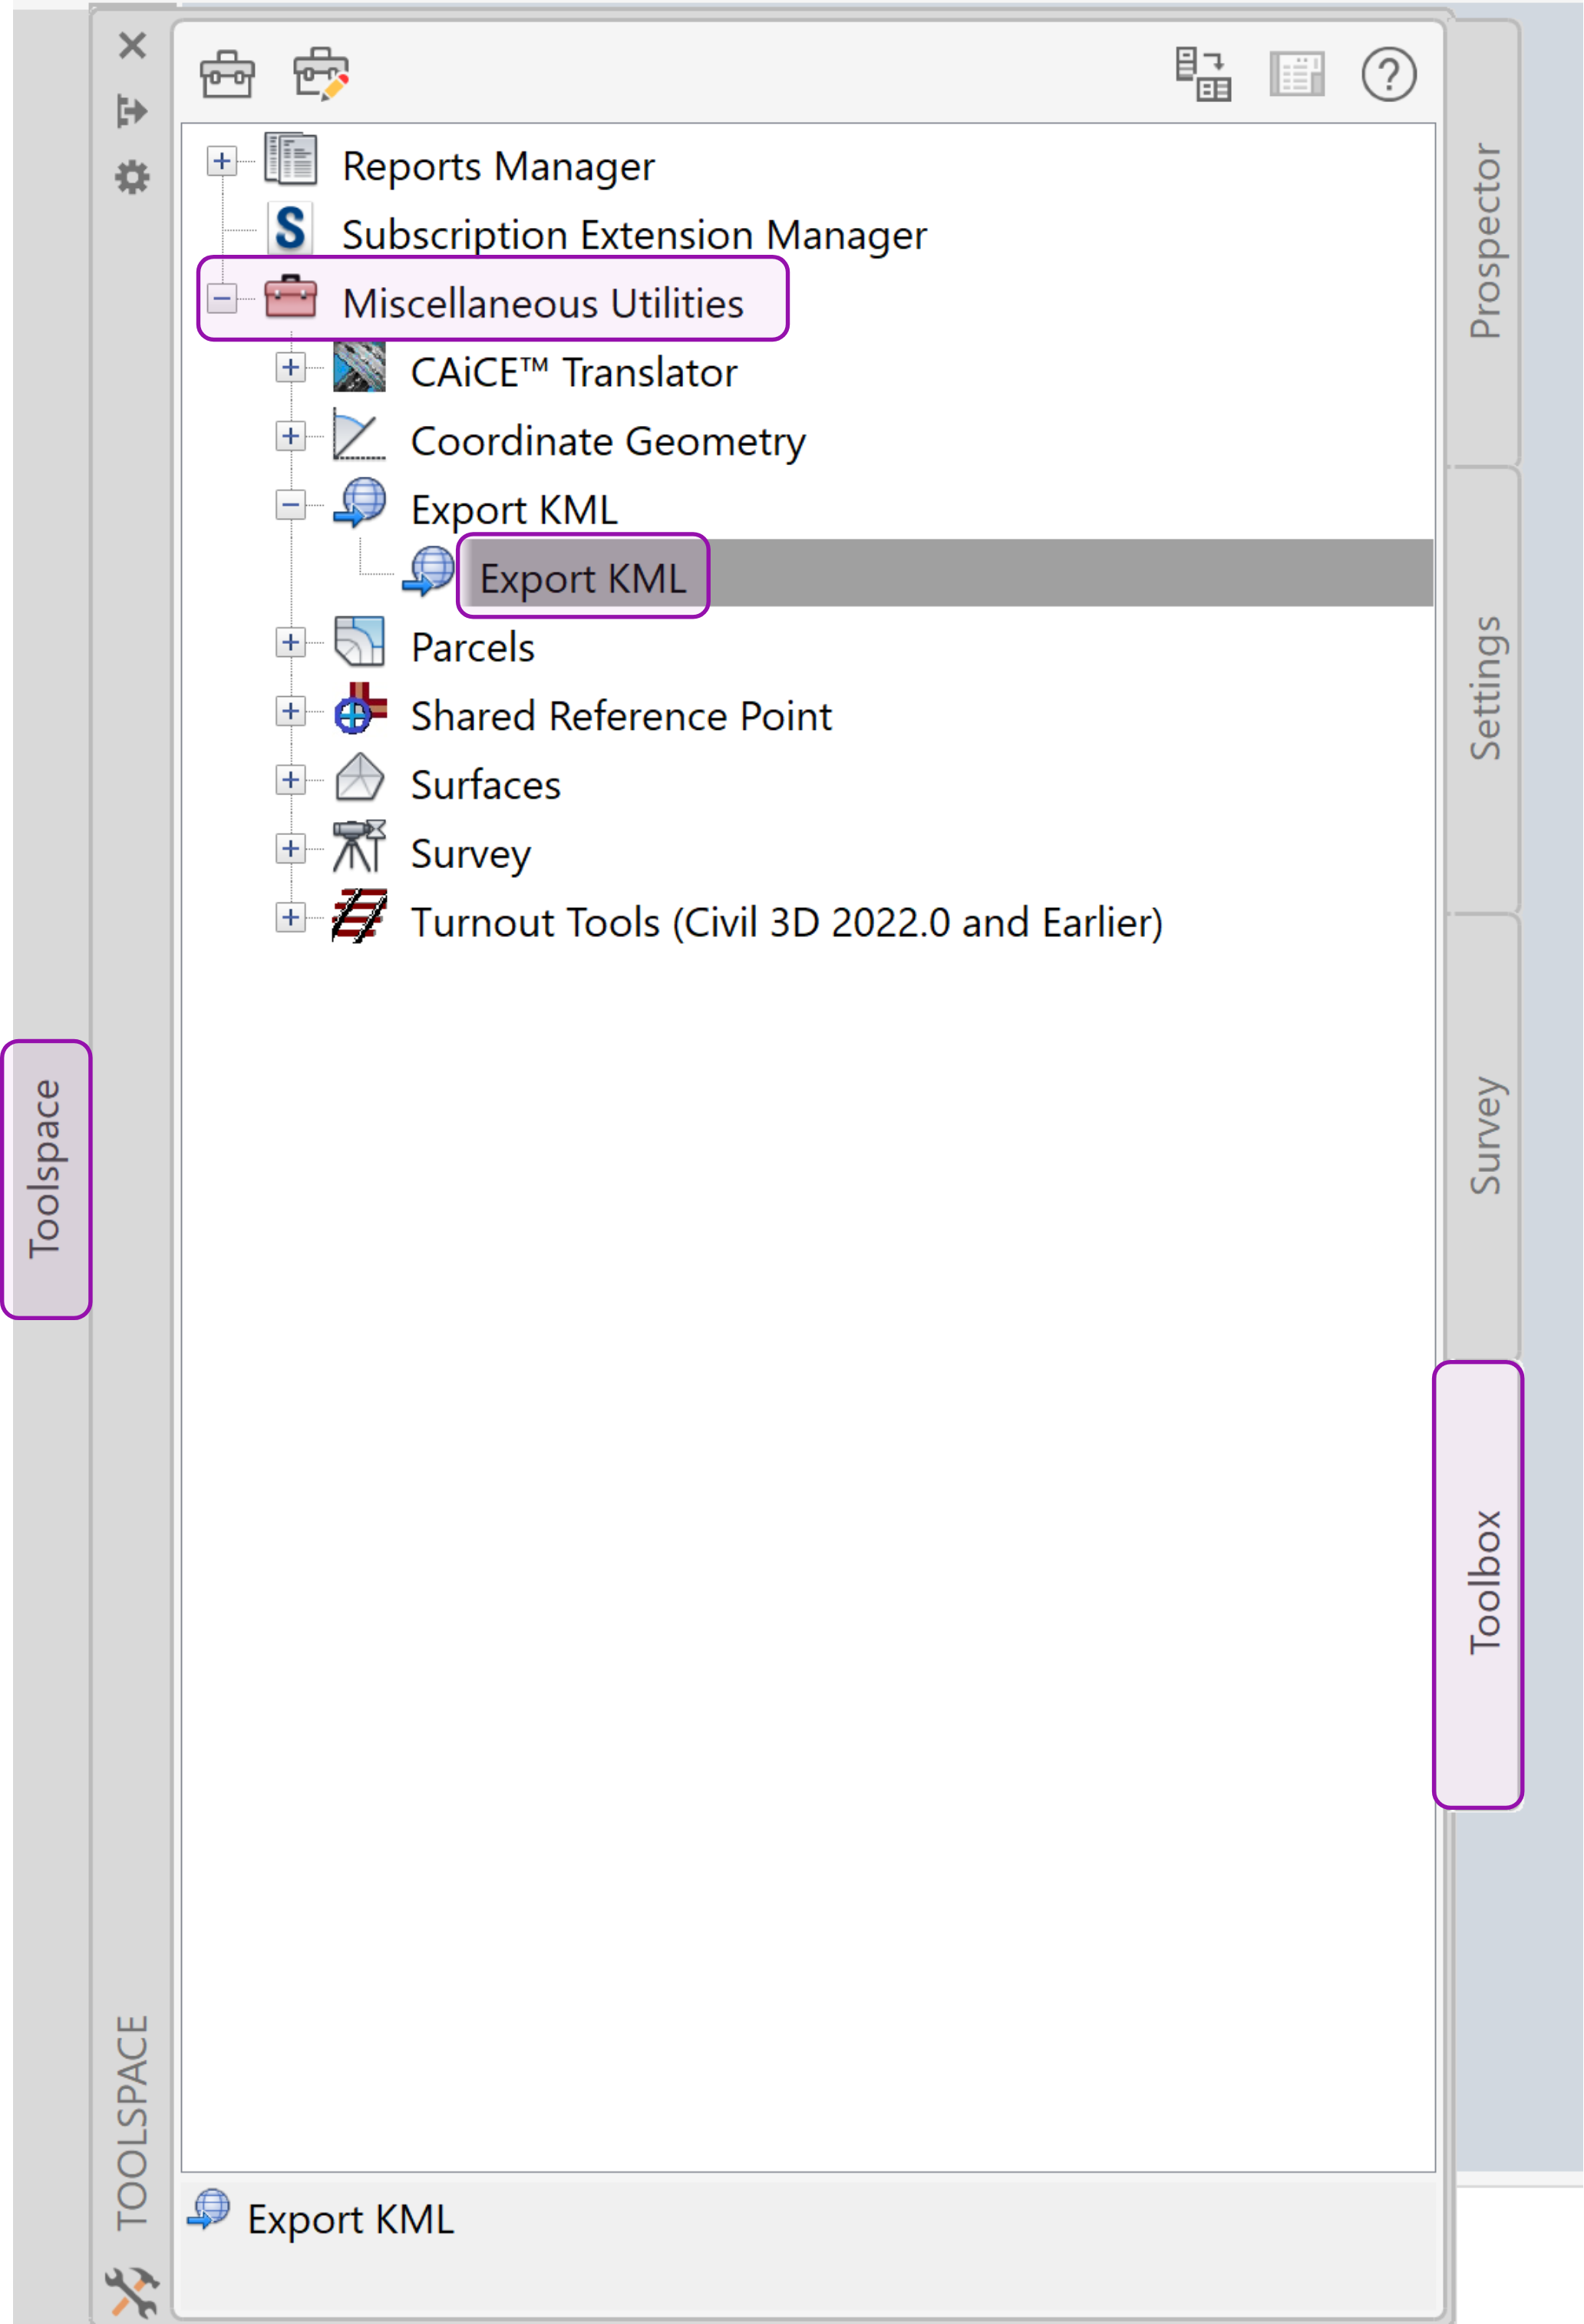
-
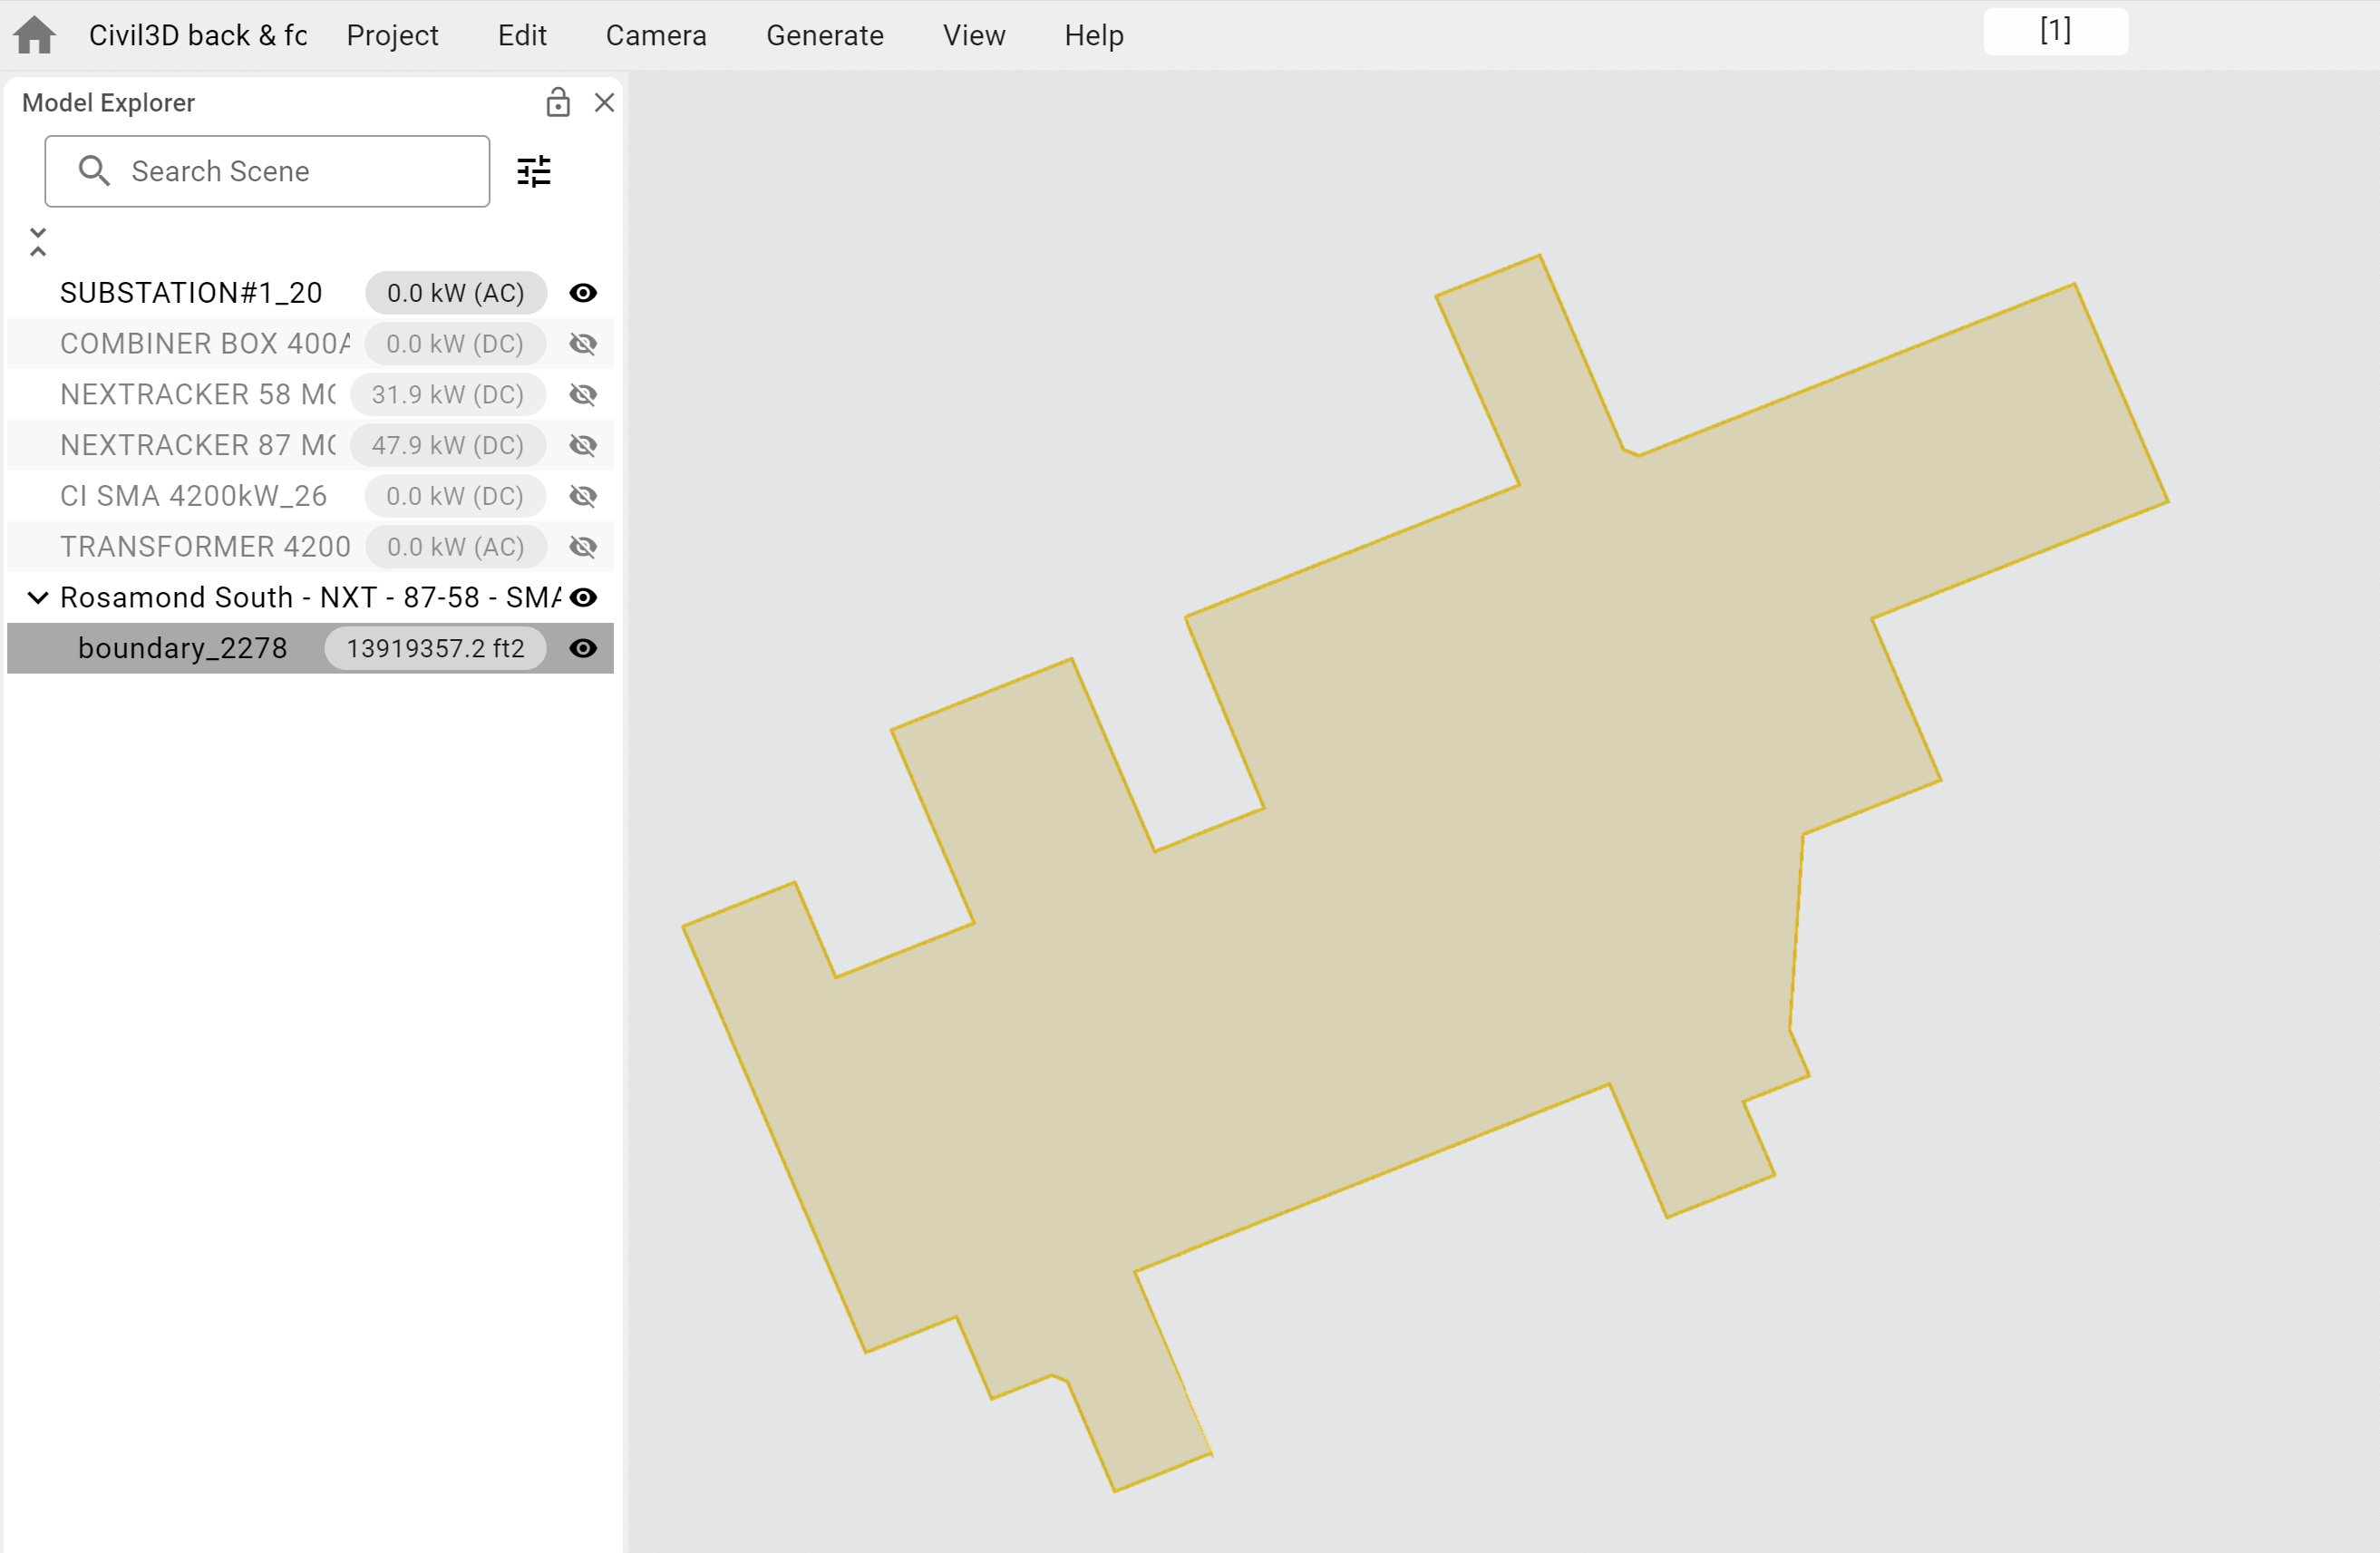
Drag & drop KML/KMZ file in the PVFARM 3D model space or use the Import menu

-
Make sure the boundaries are added to your project
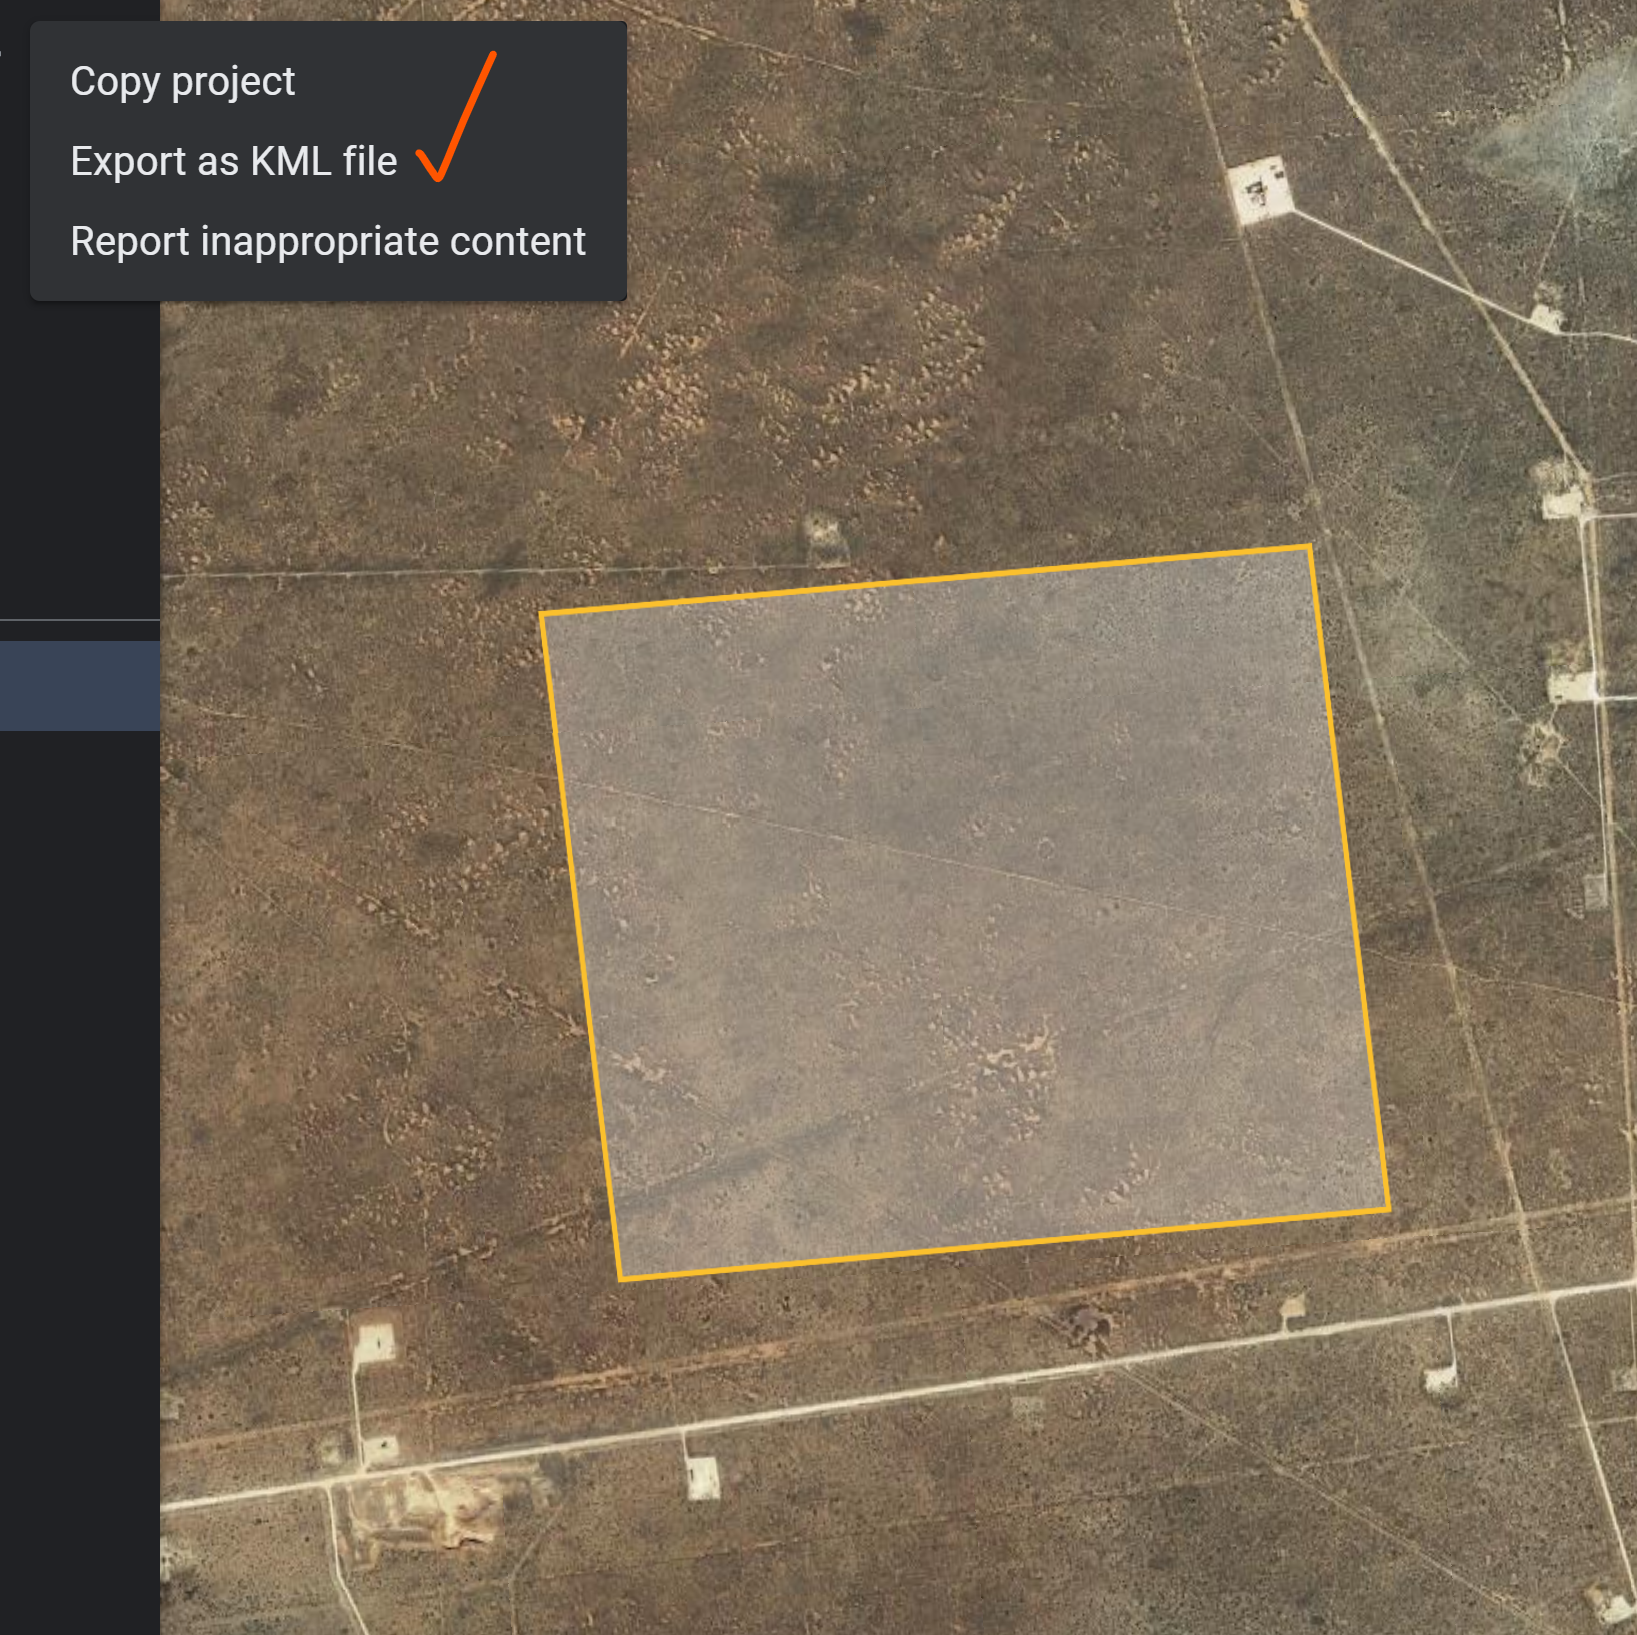
KMZ/KML by Google Earth
-
Draw boundaries in Google Earth according to the real view of the site
-
Export to KMZ/KML file
-
Drag & drop KML/KMZ file in the PVFARM 3D model space or use the Project -> Import menu

-
Make sure the boundaries are added to your project
