.png?width=200&height=98&name=Horizontal%20PVFARM%20Logo%20(Small).png)
Select any option to get surfaces ready to be imported into PVFARM.
GeoTiff by Map Underlay
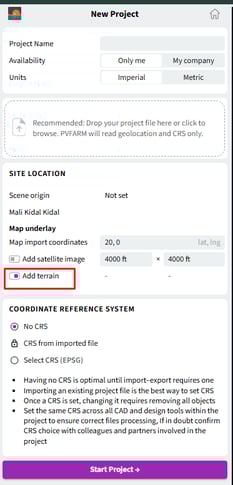
- In the PVFARM app, go to the Project Panel and navigate to the Map Underlay tab.
- If your project is properly geolocated you will see an aerial map image of your site.
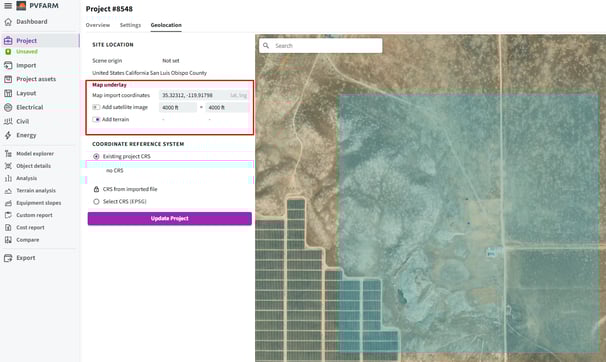
- Check the box that says "Import Terrain" then click "Import Map Underlay
- This will add a terrain file as well as a PNG image the size of the blue box.
- This terrain file is a product of Mapbox and the average resolution is 30m.
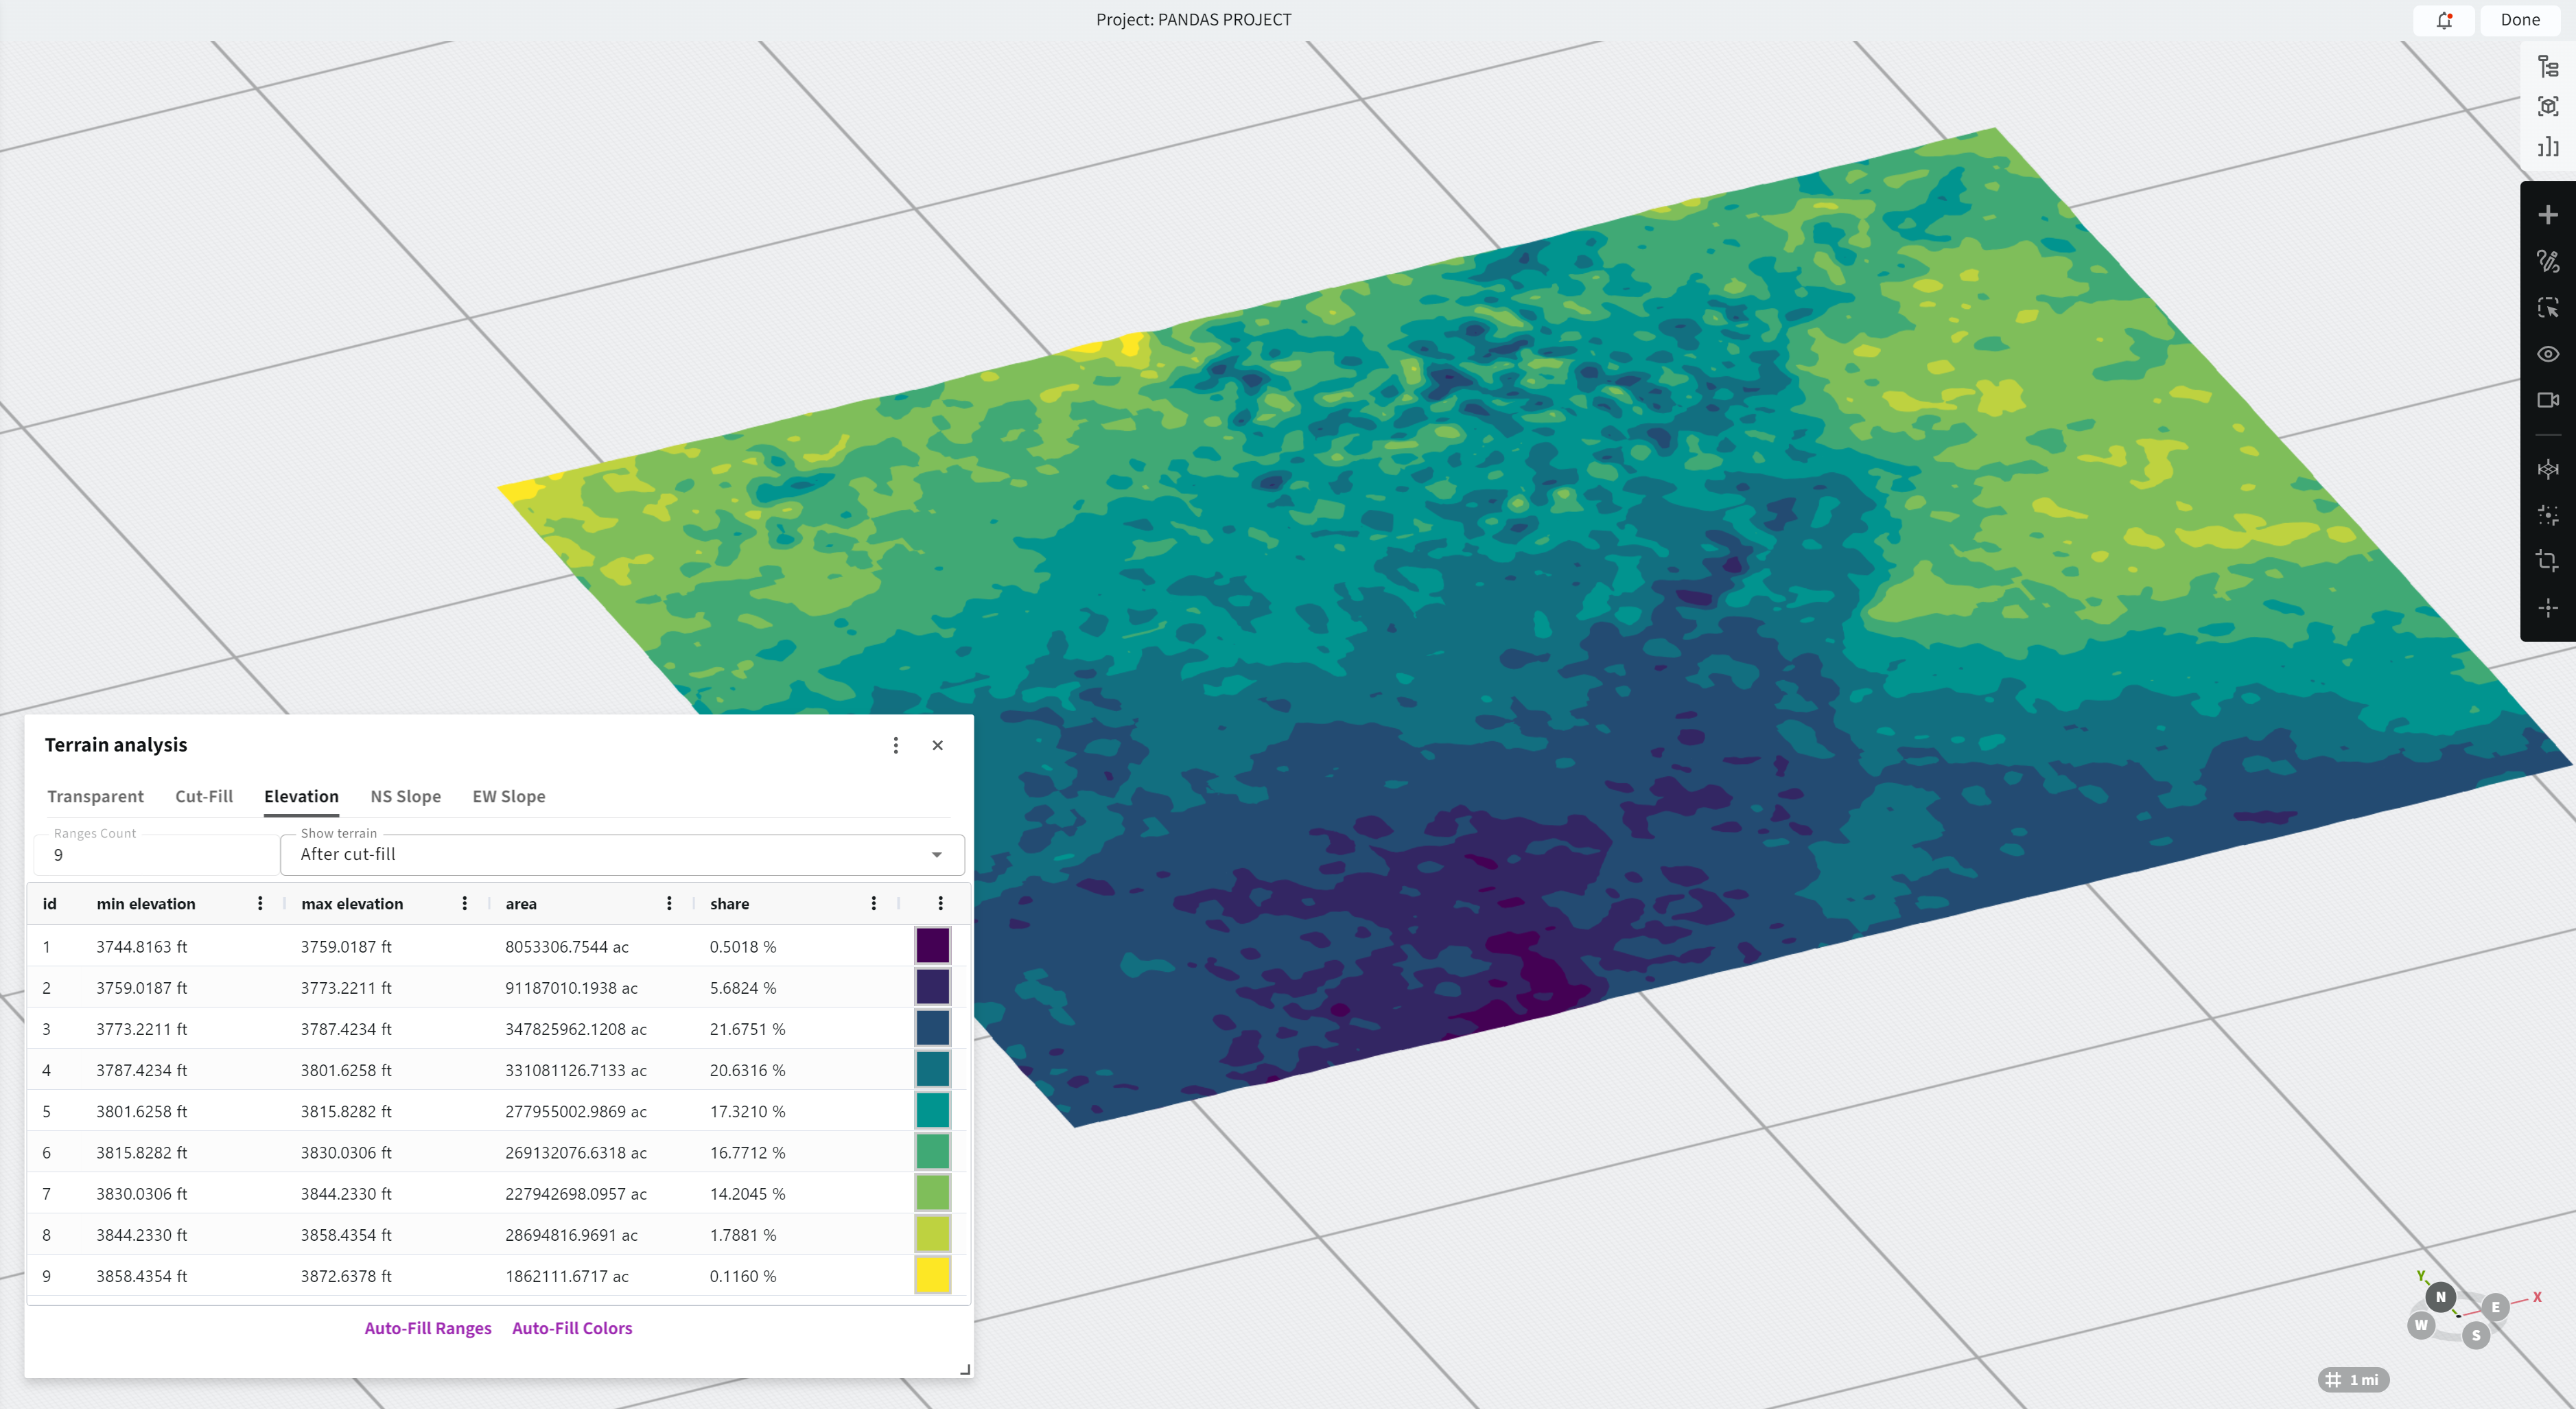
- Double Check your terrain in the Terrain Analysis panel
- If at first you see a checkerboard pattern, you may have to press "Auto-Fill Ranges"

- If at first you see a checkerboard pattern, you may have to press "Auto-Fill Ranges"
GeoTiff by Civil3D
-
Build a surface with boundaries in Civil3D
-
Export as DEM/GeoTiff file
-
Toolspace → Prospector → Surfaces → Export to DEM
-

-
Import to PVFARM
-
Drag & drop GeoTiff file in the PVFARM 3D model space or use Project -> Import menu

-
Make sure the surface is added to your project
-
3D Contours in CAD
To make it work smoothly:
- Make sure your contour lines are on a CAD layer named:

- The system will detect and process that layer during import
This gives you more control over terrain modeling, which is especially useful when working with survey data or custom grading plans.

LandXML Import
We're expanding support for industry-standard formats — you can now import terrain data from LandXML files.How it works:
- The system will automatically detect surface definitions within the LandXML file
- Elevation data is then brought into your project as a terrain object
This is especially useful when working with civil design software like Civil 3D or other survey tools that export in LandXML format.
