.png?width=200&height=98&name=Horizontal%20PVFARM%20Logo%20(Small).png)
Drawing Settings Requirements
General
- Platform: AutoCAD.
- Supports AutoCAD version 2020 and higher
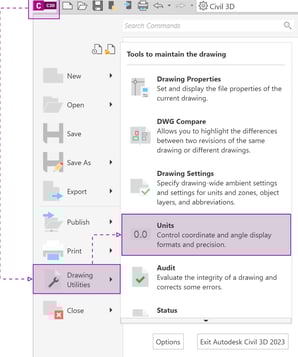
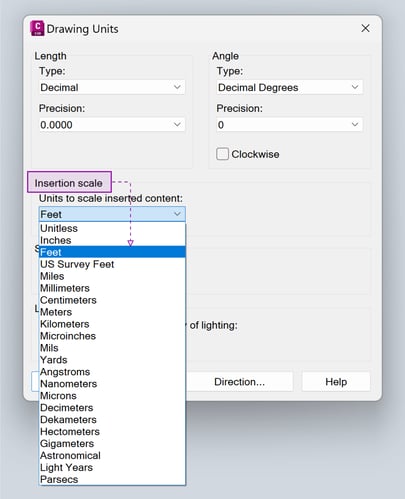
- Drawing units could be either imperial or metric
- Go to Drawing Units and select the Unit you prefer
3. The layout should be created in the Model view
Layers
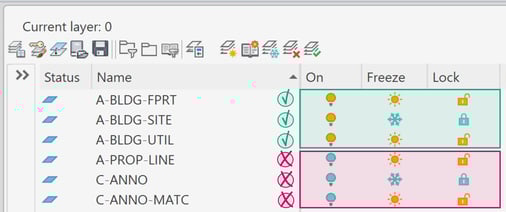
- Layers should be visible on the Model View:
- Turn on💡a Layer
- ‘Freeze’ and ‘Lock’ states are insignificant
Plugin Commands
Commands for Layout import:
-
CreateTracker - Creates a new tracker item with attributes and a block name ’pvfarm_tracker_’
-
CreateSkid - Creates a new Skid item with a block name ‘pvfarm_skid_type1’
-
CreateRoad - Converts layers into the layer with the conventional name ‘pvfarm_road_Xft’
-
CreateBorder - Converts layers into the layer with the conventional name ‘pvfarm_include_boundary’
-
CreateBlock - Creates a block reference by selected Skids and Trackers with the conventional block name ‘block_1’
-
ConvertCurrentTracker - Convert an existing tracker’s block reference into the conventional one with the block name ‘pvfarm_tracker_NXT_6/60_FS7_300W’
-
ConvertCurrentSkid - Convert an existing tracker’s block reference into the conventional one with the block name ‘pvfarm_skid_type1’
Other Plugin Commands
-
GetsSurfaces – Exports all surfaces in the Civil3D/AutoCAD project as PVFM file
-
TrackersToPvsyst – Exports layout from Civil3d to PVsyst
- AutoBlockingAroundSelected - select a specific tracker or fixed-tilt objects + one skid to create a boundary around the electrical block. The boundary belongs to the ' pvfarm_block_area" layer and automatically interprets equipment as a block due to import to PVFARM we'd recommend to use this command instead of the CreateBlock to speed up the process
Commands to verify that the plugin has been installed correctly
-
Pvf_import -a known plugin command used to verify installation
-
Pvf_export -a known plugin command used to verify installation
How to Use Commands
GetSurfaces
-
Run the command ‘GetSurfaces’
-
Select surfaces in the Export Surfaces menu
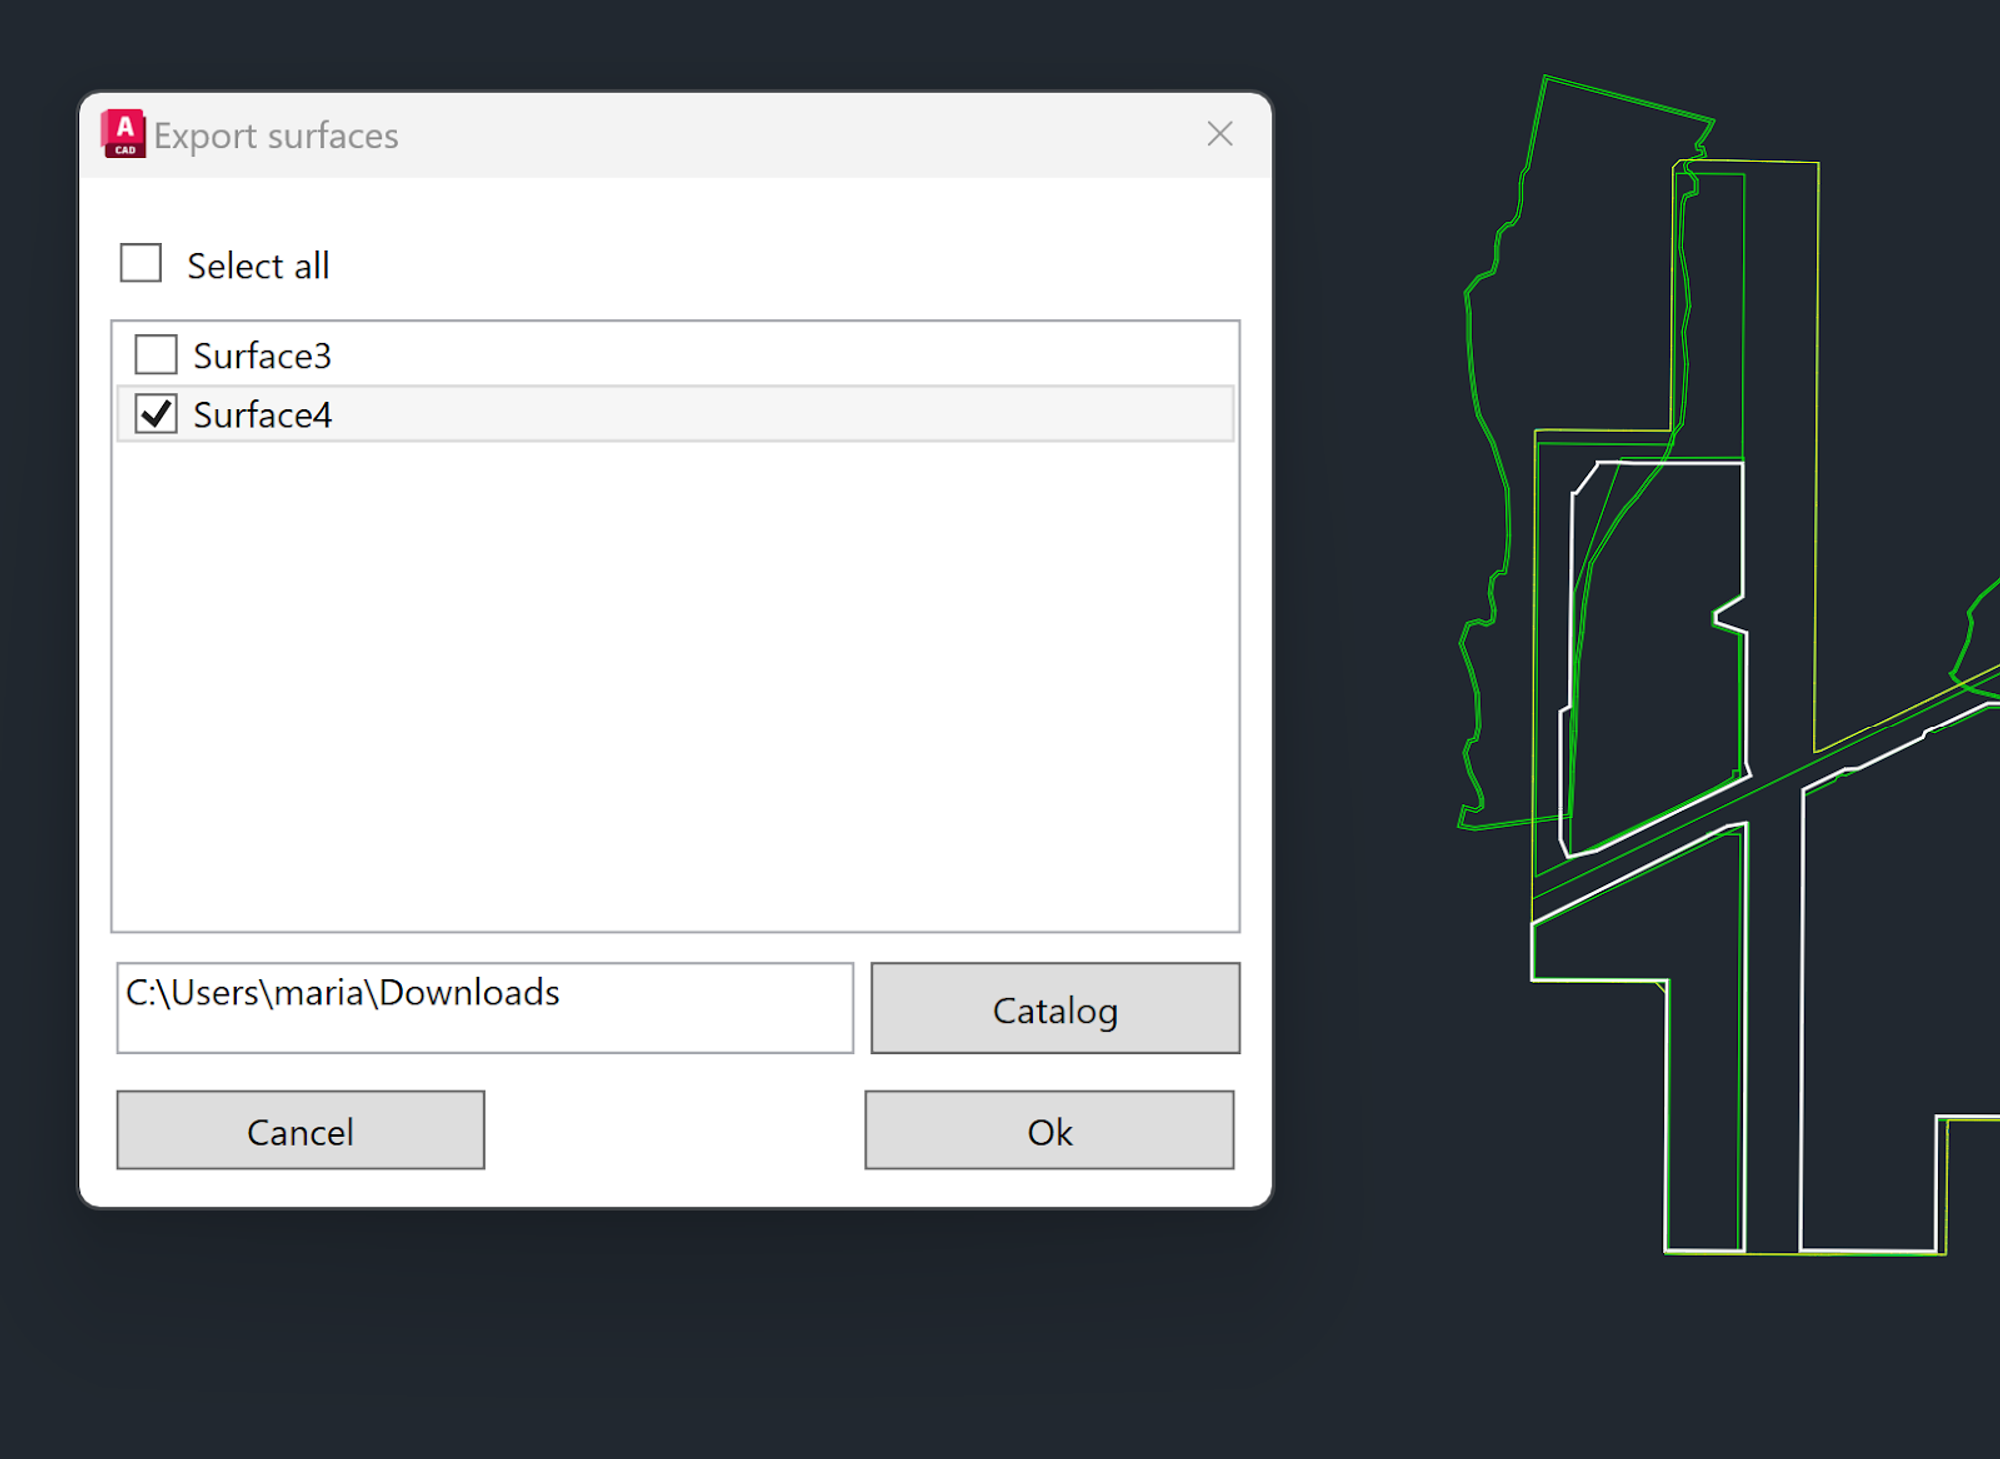
3. Choose the ones you need and press 'Ok'.
Requirements
-
The surface should be created before using the plugin
-
The plugin works with both, GRID and TIN surfaces
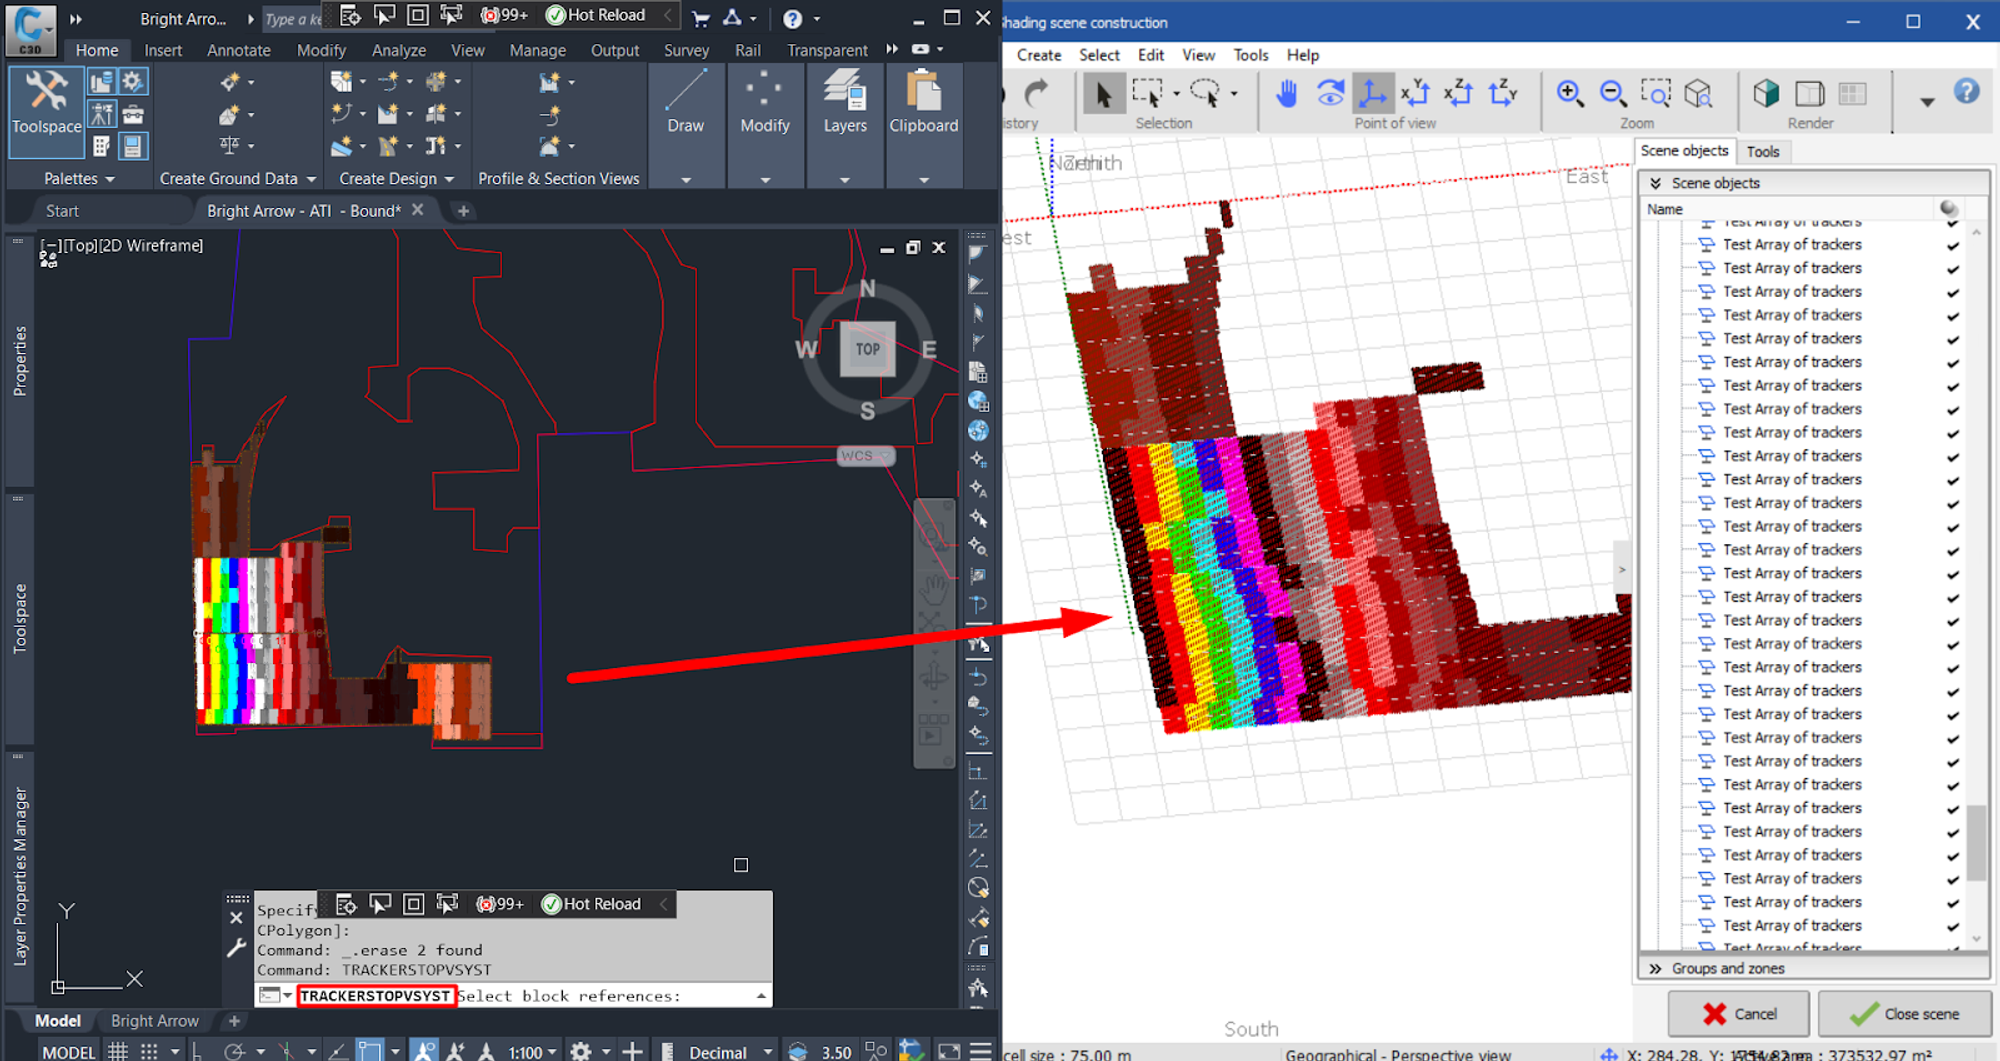
TrackersToPvsyst
-
Run the command ‘TrackersToPvsyst’
-
Select block references
-
Press ‘Enter’
-
Select the ‘Trackers’ or ‘Tables’ option (press ‘Tracker’ or ‘Table’)

5. Choose the desired location on your computer where you wish to save the file
6. After launching the command, choose a part of the model you want to export to the SHD file or press ‘Enter’ when you want everything to be exported (use the FINDARRAYS if necessary)
7. Open SHD file in PVSyst
Requirements:
-
Arrays of trackers should be shown using a one-dimensional associative array
-
The original element can be a block, polyline, or set of lines
-
The original element of the associative array must be built orthogonally so that the vertical axis corresponds to the tracker length and the horizontal to its width
-
Associative arrays must be on visible layers
-
During export, trackers are painted in the color of the layer on which the associative array is located
-
The drawing should be drawn on a 1:1 scale in the current drawing units