.png?width=200&height=98&name=Horizontal%20PVFARM%20Logo%20(Small).png)
Shading Export Options
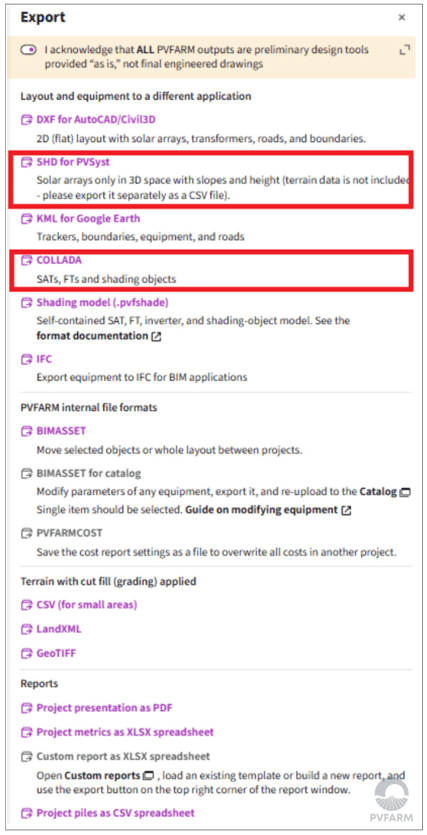
PVFARM offers two formats for exporting project geometry to energy modeling platforms.
-
PVsyst SHD Export (.SHD): The
.SHDformat is designed specifically for shading analysis in PVsyst. It includes the complete solar array layout for: Single-Axis Tracker systems and Fixed-Tilt systems.Terrain is not included in the
.SHDfile and must be exported separately as a CSV file. For terrain-following trackers, enable Divide Solar Arrays by Strings during the export. - COLLADA Export (.DAE): The COLLADA
.DAEformat provides a more complete 3D export for use in PVsyst. - COLLADA Export (.PVC): The
.PVCformat is designed for direct import into PlantPredict or PVSyst.
COLLADA Export can include: solar arrays, shade boxes, trees, walls. This format is useful when the shading analysis needs to include additional site objects beyond the solar array layout.
Main Difference
.SHD— Exports the solar array layout for PVsyst shading analysis. Terrain must be exported separately..DAE and .PVC— Exports the solar array layout together with supported shading objects for a more complete 3D model in PVsyst and Plant predict.
How to Import an SHD File into PVsyst
The SHD export can be used for both Single-Axis Tracker and Fixed-Tilt ground-mounted systems.
- Export the file from PVFARM
In PVFARM, select:Export → SHD for PVsyst - Locate the downloaded file
Find the.SHDfile in your Downloads folder:C:\Users\<UserName>\Downloads - Copy the file to the PVsyst Shadings folder
Copy the downloaded.SHDfile to:C:\Users\UserName>\PVsyst7.0_Data\Shadings - Open the project in PVsyst
Open the PVsyst project where you want to import the PVFARM shading scene. - Open the Near Shadings editor
Navigate to: Near Shadings → Construction/Perspective - Load the shading scene
In the shading editor, select:File → Read Scene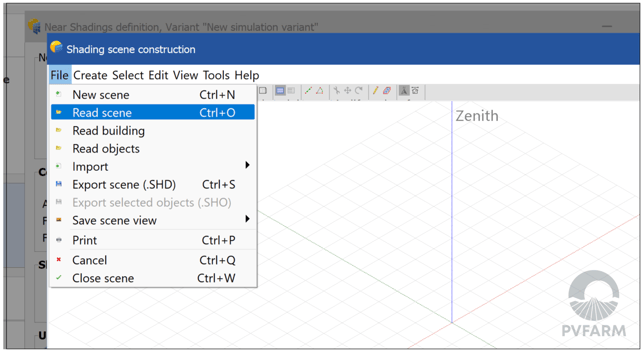
- Select the SHD file
Choose the.SHDproject file exported from PVFARM.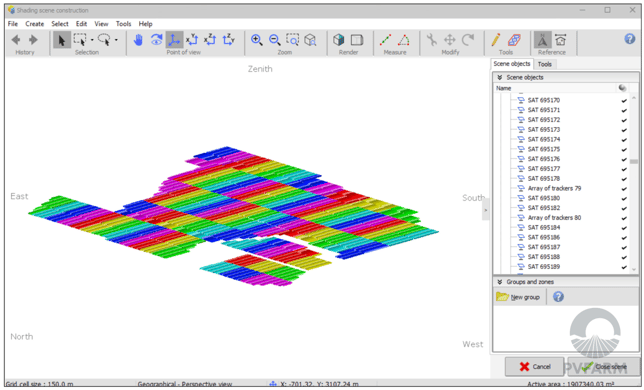
How to Import a COLLADA File into PVsyst
- Export the COLLADA file from PVFARM
In PVFARM, select the COLLADA (.DAE) export option and download the file. - Open your project in PVsyst
Open the PVsyst project where you want to import the solar layout. - Open the Near Shadings window
Navigate to: Near Shadings → Construction/Perspective - Import the 3D scene
In the Near Shadings window, select: File → Import → Import a 3D Scene (3DS, DAE, PVC)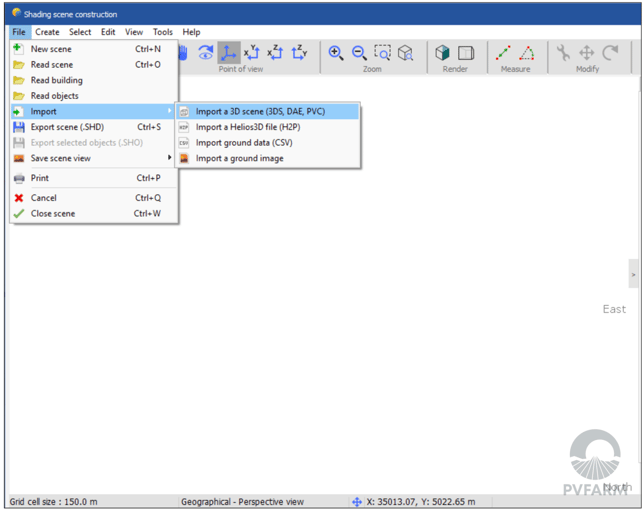
- Select the COLLADA file
Locate and open the.DAEfile exported from PVFARM. - Review the import settings
Review the available settings and confirm that the file units and scale are correct. PVsyst will normally attempt to identify the units contained in the DAE file automatically. - Complete the import
Click OK to add the imported objects to the current Near Shadings scene.