.png?width=200&height=98&name=Horizontal%20PVFARM%20Logo%20(Small).png)
Step-by-Step Guide
-
Complete Your Project:
-
Ensure your project is fully completed and ready for export.
-
-
Navigate to Export Options:
-
Select the "Export" panel from the side bar.
-
Under "Reports," you have two choices: export your project metrics as a spreadsheet or complete project report as PDF.
-
-
Select PDF Report:
-
Click on the option "complete project report as PDF".
-
Confirm by clicking "OK."
-
-
File Generation:
-
The system will generate a PDF file named after your project.
-
The PDF will contain three to four pages, depending on certain project parameters.
-
PDF Report Breakdown
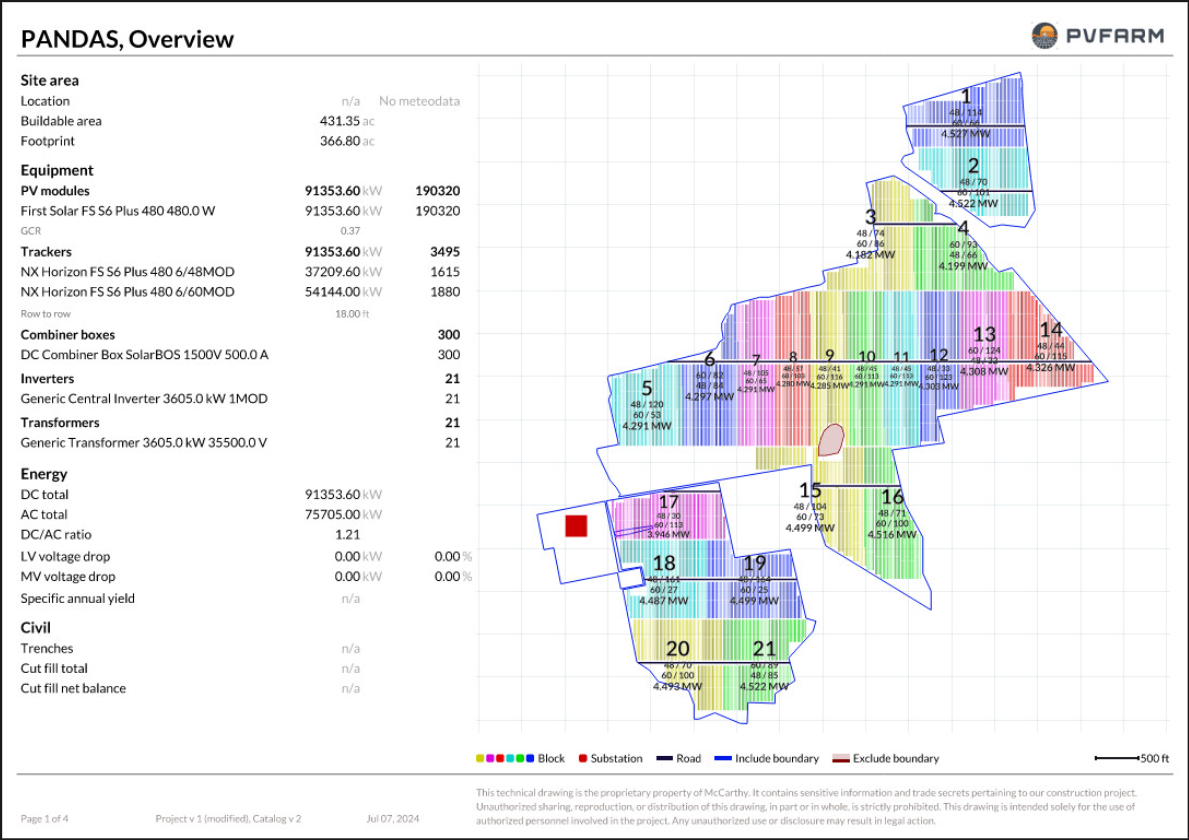
Page 1: Overview
-
Layout Image: Displays your project layout without any underlaid image.
-
Project Metrics: Includes essential information such as site area, equipment details, energy data, and civil information.
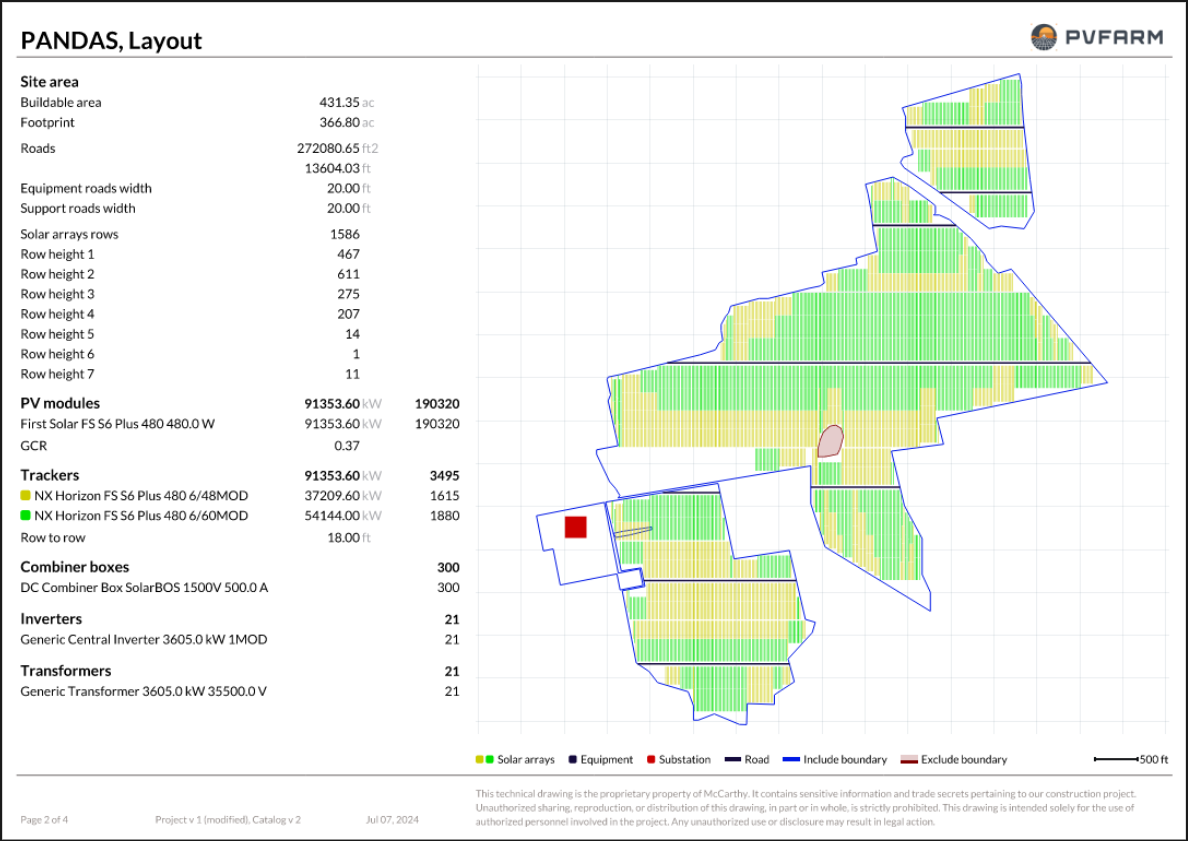
Page 2: Tracker Layout
-
Tracker Details: Shows the types of trackers used in a map of the site with the key giving further details.
-
Additional Information: Includes data on roads, row heights, modules, and equipment.
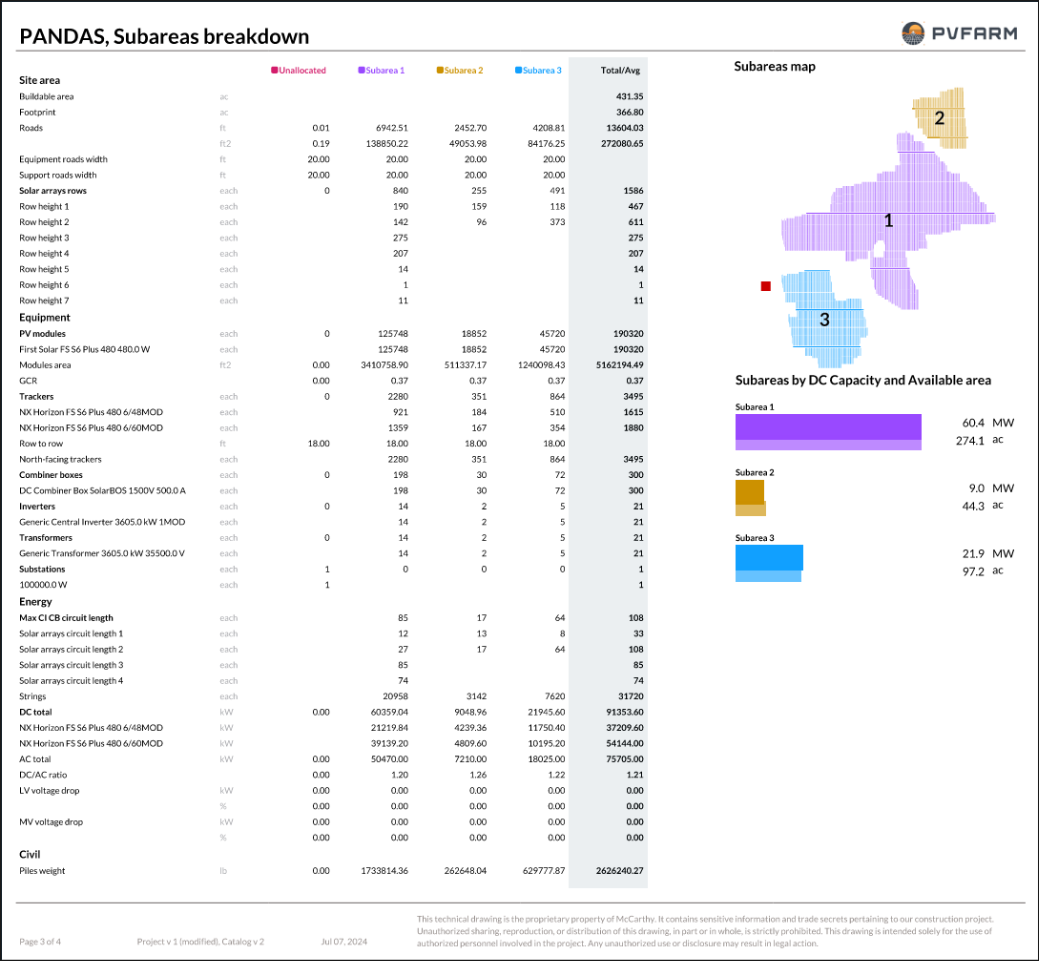
Page 3: Sub-Area Details (Optional)
-
Sub-Area Breakdown: If your project includes sub-areas, this page provides detailed information for each sub-area.
-
Map and Columns: Displays a map of sub-areas and a detailed breakdown of metrics for each sub-area.
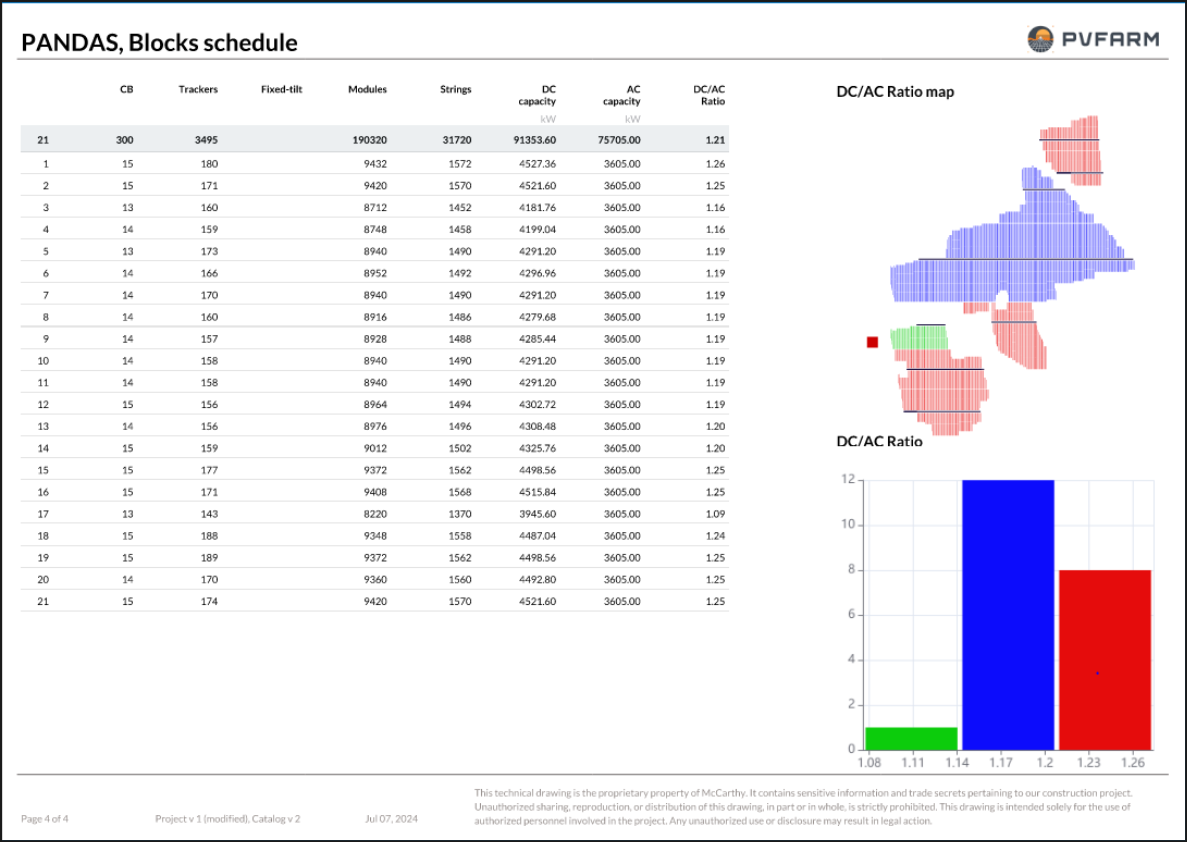
Page 4: Block Schedule
-
DC-AC Ratio Map: Visual representation of the DC-AC ratio.
-
Block Breakdown: Detailed count of combiner boxes, trackers, and other equipment in each block.
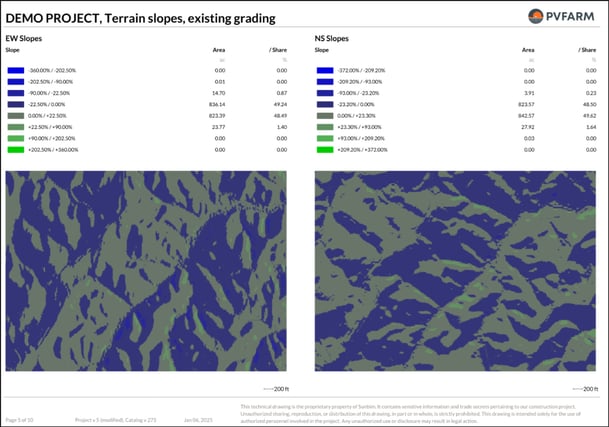
Page 5: Slopes
-
EW and NS Slopes with images
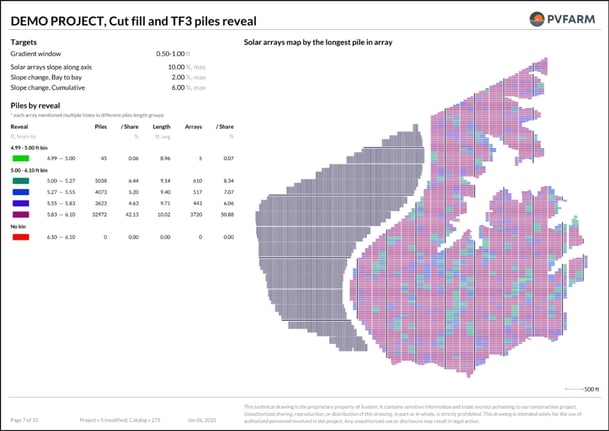
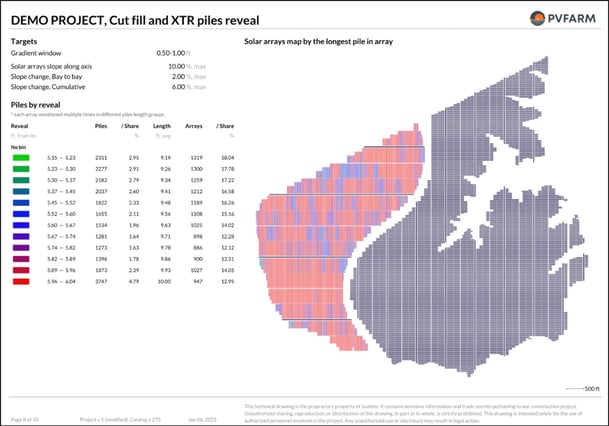
Page 6: Cut and Fill

Page 7: Cut and Fill with Piles Reveal
-
This will give cut/fill and solar array limits along with piles reveal information
-
If there are multiple types of arrays detected in the project it will make a page for each array type
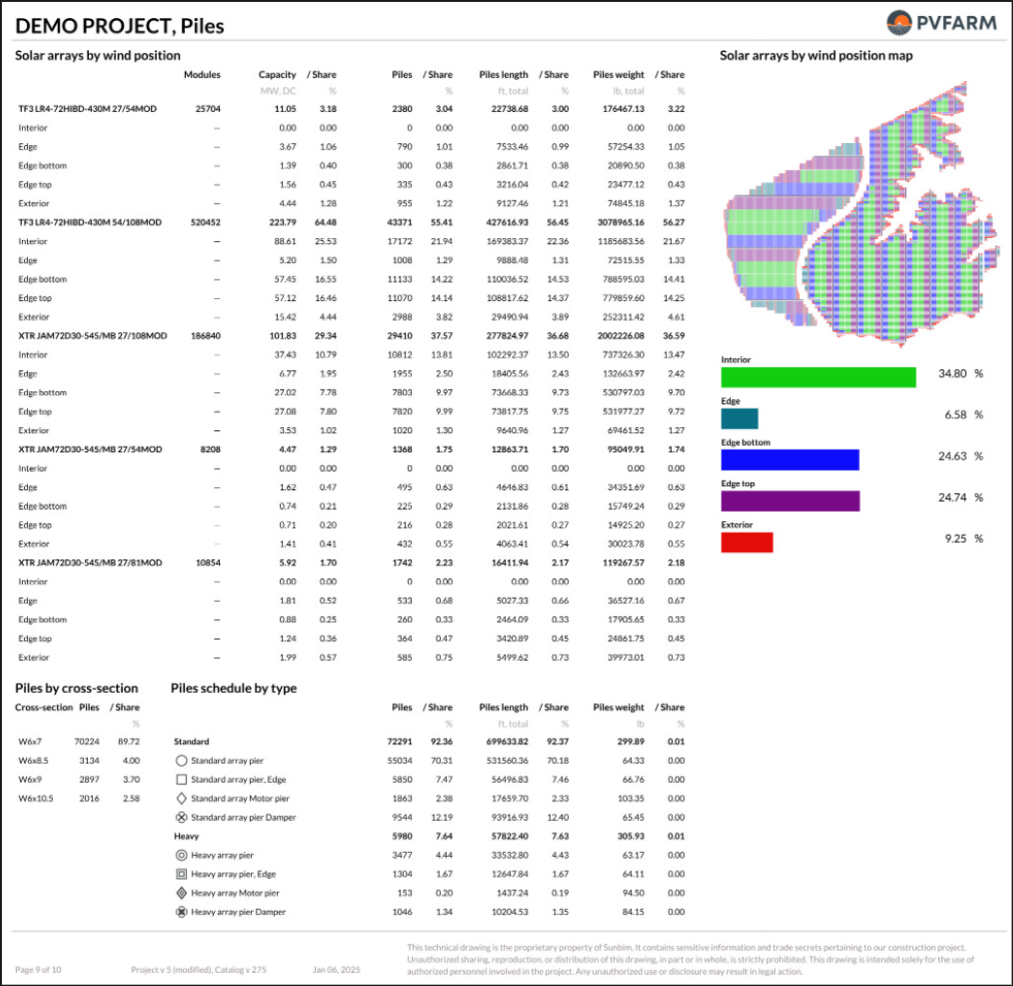
Page 8: Piles
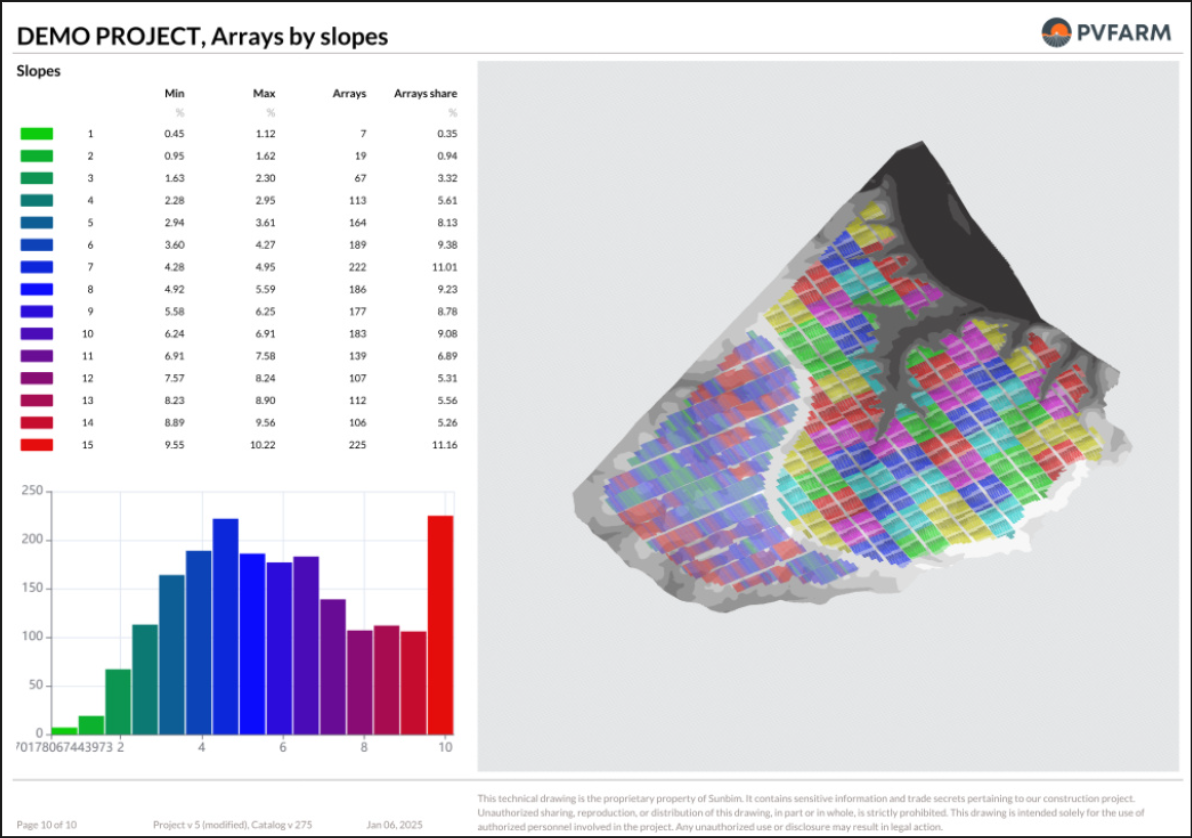
Page 9: Arrays by Slopes
You can now print and incorporate these PDFs into your plan sets!